Removal and Replacement Procedures
Installing a Memory Board
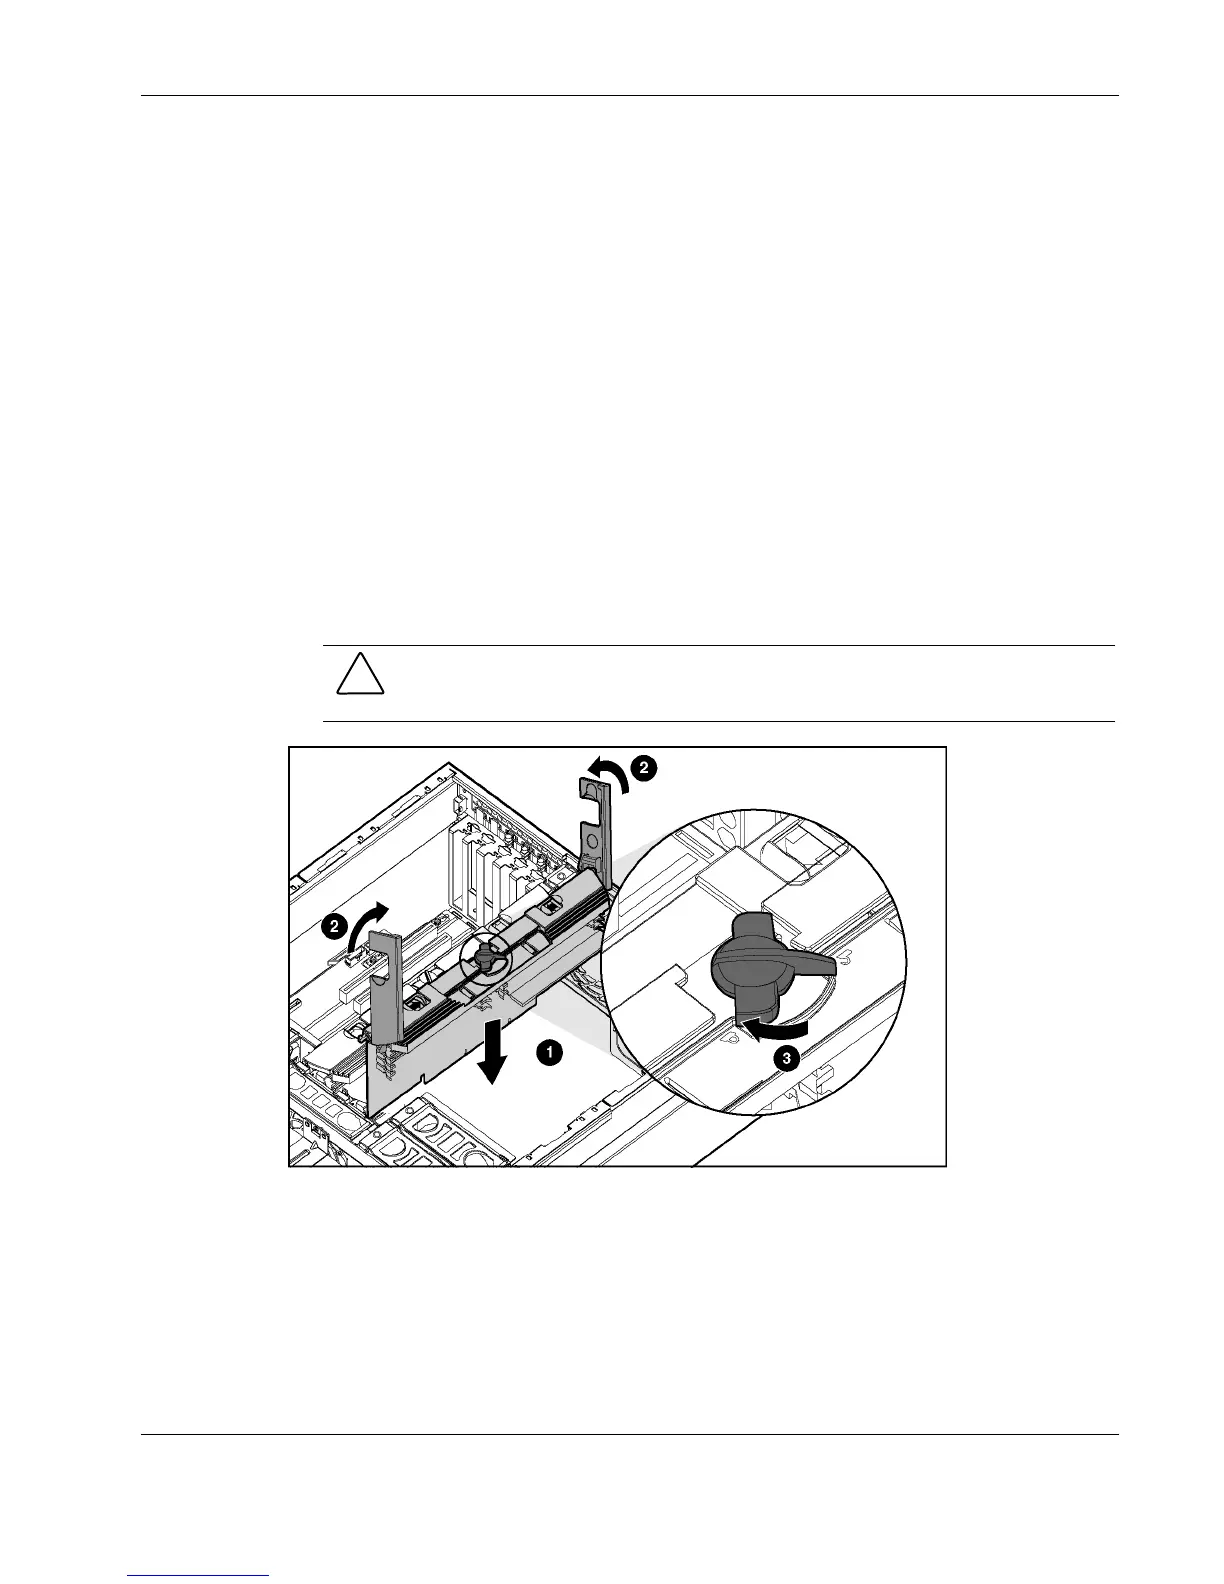
To install a memory board:
1. Align the memory board with the memory slot and memory board guide clips.
2. Slide the memory board into the server (1), and close the ejector levers to seat the
memory board firmly (2).
Hot-plug procedure: Any LEDs that were amber when the board was removed from the
server now illuminate amber again.
IMPORTANT: The LEDs relight amber during this step to enable you to verify again which DIMM
failed. If you have already replaced the failed DIMM, disregard the amber LEDs. The LEDs change
back to green after the locking switch is engaged, and the memory copy is complete.
3. Engage the locking switch (3).
Hot-plug procedure: All LEDs now turn off except the memory status LED, which
flashes green while data is copied from one memory board to the other. This process may
take up to a minute to complete. When the copying process is complete, the other LEDs
will re-illuminate as described in Table 2-11.
CAUTION: Do not remove the memory board while the memory status LED is flashing.
When the memory status LED is flashing, the memory board is transferring data.
Removing the memory board during data transfer may cause system failure.
Figure 2-19: Installing a memory board
4. If the server is not currently configured for hot-plug mirrored memory, power up the
server. Refer to “ Powering Down the Server” in this chapter.
Hot-plug procedure: If the server is configured for hot-plug mirrored memory or Hot-
Add functionality, skip to step 7.
5. Configure the memory. Refer to “Conf iguring the Memory” in this chapter.
HP ProLiant DL580 Generation 2 Server Maintenance and Service Guide 2-27
 Loading...