To use new service parts on product manufac-
tured before the modification date, follow these
instructions:
Fan Replacement (Fan with Ring Seal)
Remove the fan and rear bearing seal. Remove
the old fan assembly from the alternator.
Note: On older units a puller may be required to
remove the old fan from shaft. Using a pry bar or large
screwdriver, remove the rear bearing seal from end
housing. Do not remove bearing.
Installation Of New Fan On Old Assembly
(Figure 13-34).
Remove the ring seal from the new fan, if pre-
sent.Install the new fan onto the shaft and slide
into position. Place fan nut and washer onto the
shaft and tighten to 55 ft.lbs (75 N.m).
Shaft/Core Replacement
Remove old shaft/core assembly. Remove the
shaft/core assembly from alternator (as directed
in this publication). Remove the front seal from
the old end housing.
Install New Shaft/core Assembly
(Figure 13-35)
Remove the ring seal from the new shaft/core
assembly, if present.Install the shaft/core assem-
bly into the alternator (as directed in this manual).
END HOUSING ASSEMBLY (CONTINUED)
3. Apply Loctite to studs, then install nine flanged
locknuts on studs.Torque flanged locknuts to 18
in. lbs. (2.0 N.m) maximum.
4. Install cover plate on front housing with six screws.
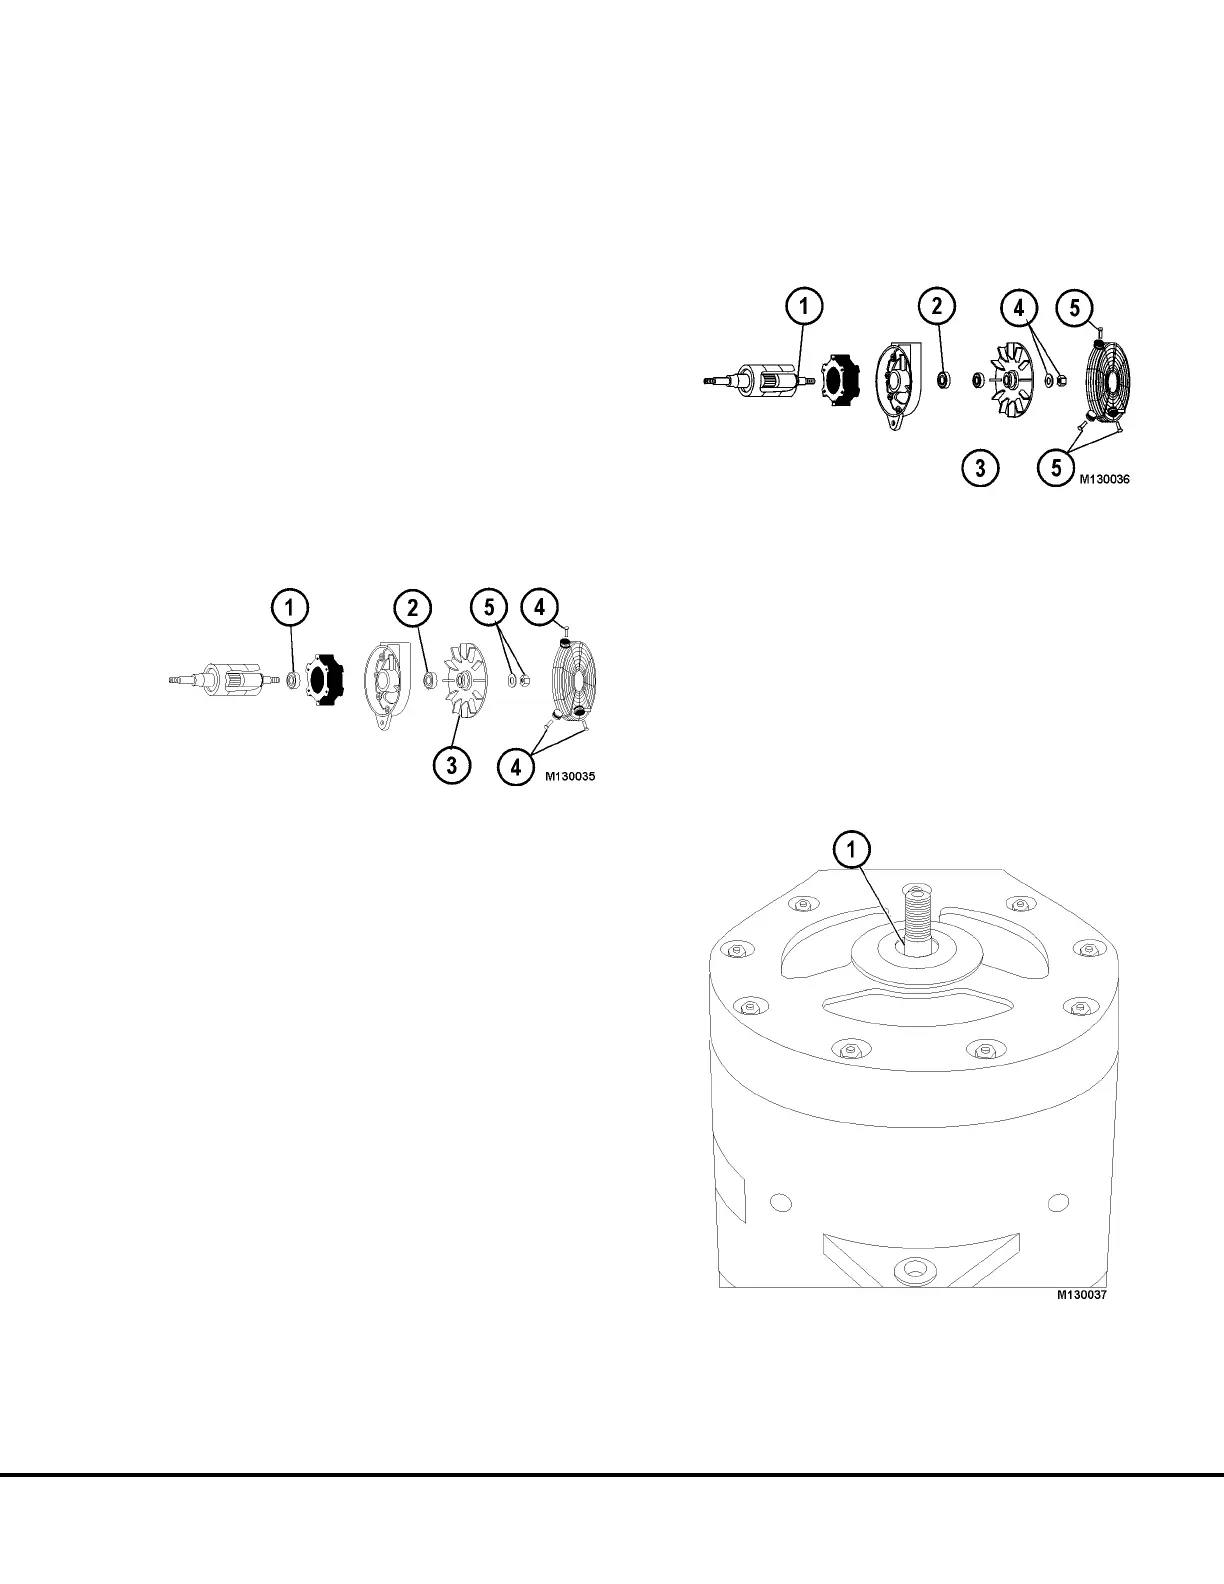
FIGURE 13-34.
1. Bearing Seal 4. Fan Guard Screws
2. Bearing 5. Fan Mounting Hardware
3. Ring Seal Groove
FIGURE 13-35.
1. Ring Seal Groove 4. Fan Mounting Hardware
2. Bearing 5. Fan Guard Screws
3. Bearing Seal
FIGURE 13-36.
1. BF4821 Insertion Tool placed here.
M13003 04/01 Niehoff Alternator Overhaul Manual M13-23
 Loading...


