Pulmonary Artery Wedge Pressure (PAWP) Invasive Blood Pressure (IBP)
11 - 16 V Series Operating Instructions
7. Select the Accept PAWP button to save the PAWP measurement.
The PAWP value and associated timestamp display in the PA digital tile.
8. Optional - select Measure to further adjust the reference line.
9. Select the Done button.
11.7.2 Understanding the PAWP Dialog
• The PAWP dialog supports an expanded PA waveform and up to three (3) other waveforms
(primary ECG lead, PA, and CO
2
/Respiration).
• The waveforms in the PAWP dialog are ordered as follows: ECG lead, ART, PA, and Resp/CO
2
.
• All waveforms in the PAWP dialog scroll at the configured PA sweep speed.
• All waveforms in the PAWP dialog share a common erase bar.
• The ECG waveform is always positioned in the first waveform position in the PAWP dialog.
• When the ART waveform is configured to On in the PAWP Setup dialog, and it is active, the ART
waveform displays in the second waveform position in the PAWP dialog.
• PA is the third waveform in the PAWP dialog.
• Resp/CO
2
is the fourth waveform in the PAWP dialog.
• When currently monitoring CO
2
, the CO
2
waveform is included in the PAWP dialog.
• In the absence of the CO
2
waveform, the Respiration waveform is included in the PAWP dialog.
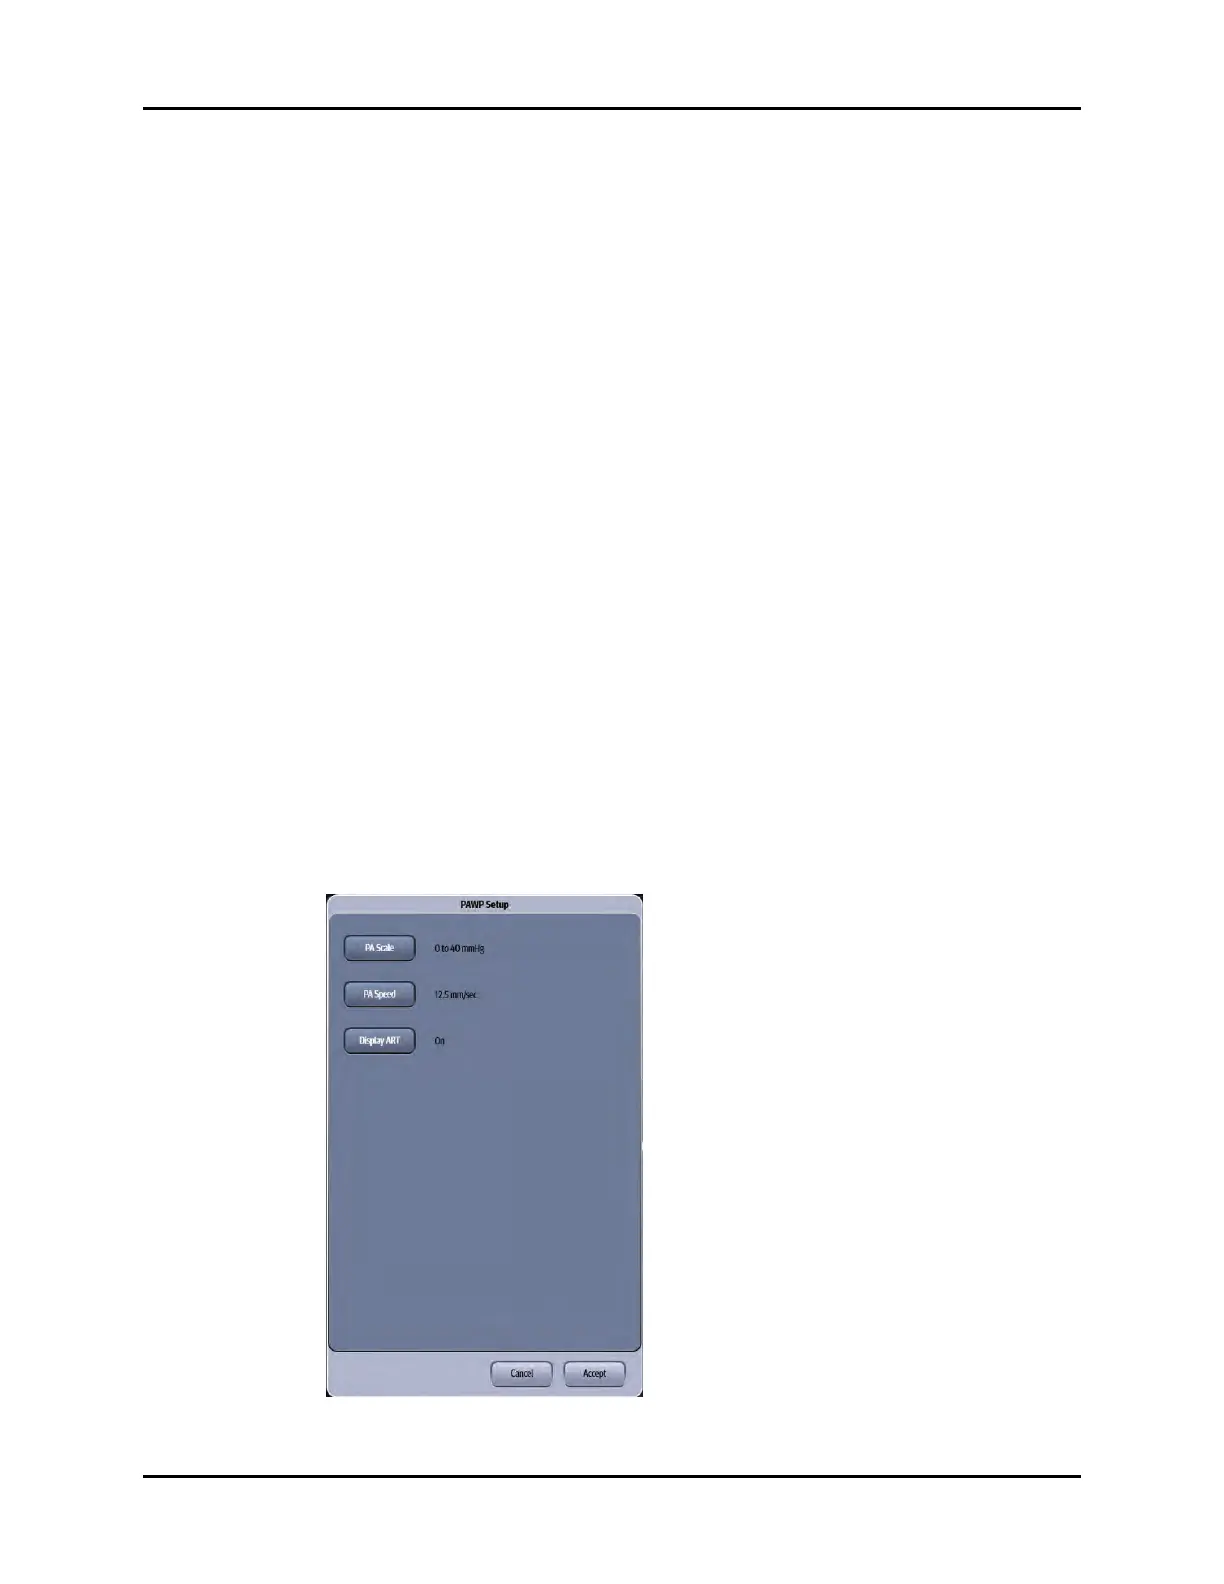
11.7.3 PAWP Setup Dialog
1. Select the PA digital or waveform tile.
2. Select the PAWP button.
3. Select the Setup button.
The PAWP Setup dialog displays (as shown in FIGURE 11-15).
FIGURE 11-15 Example PAWP Setup Dialog
 Loading...