9 Visualization
Maschinenfabrik Reinhausen GmbH 2020250 4453918/14 ENETOS
®
TD
5. Select the Version.
6. If necessary, enable the Assign functions option.
7. Press the Accept button.
8. After adding a sensor or several sensors, restart the device to apply the
changes.
Before restarting the device, you can add even more sensors or change ad-
ditional settings such as the function assignment or configuration of analog
or digital inputs.
Removing a sensor
Proceed as follows to delete a sensor:
1. Go to Settings > Manage sensor.
2. Press the button to delete the sensor.
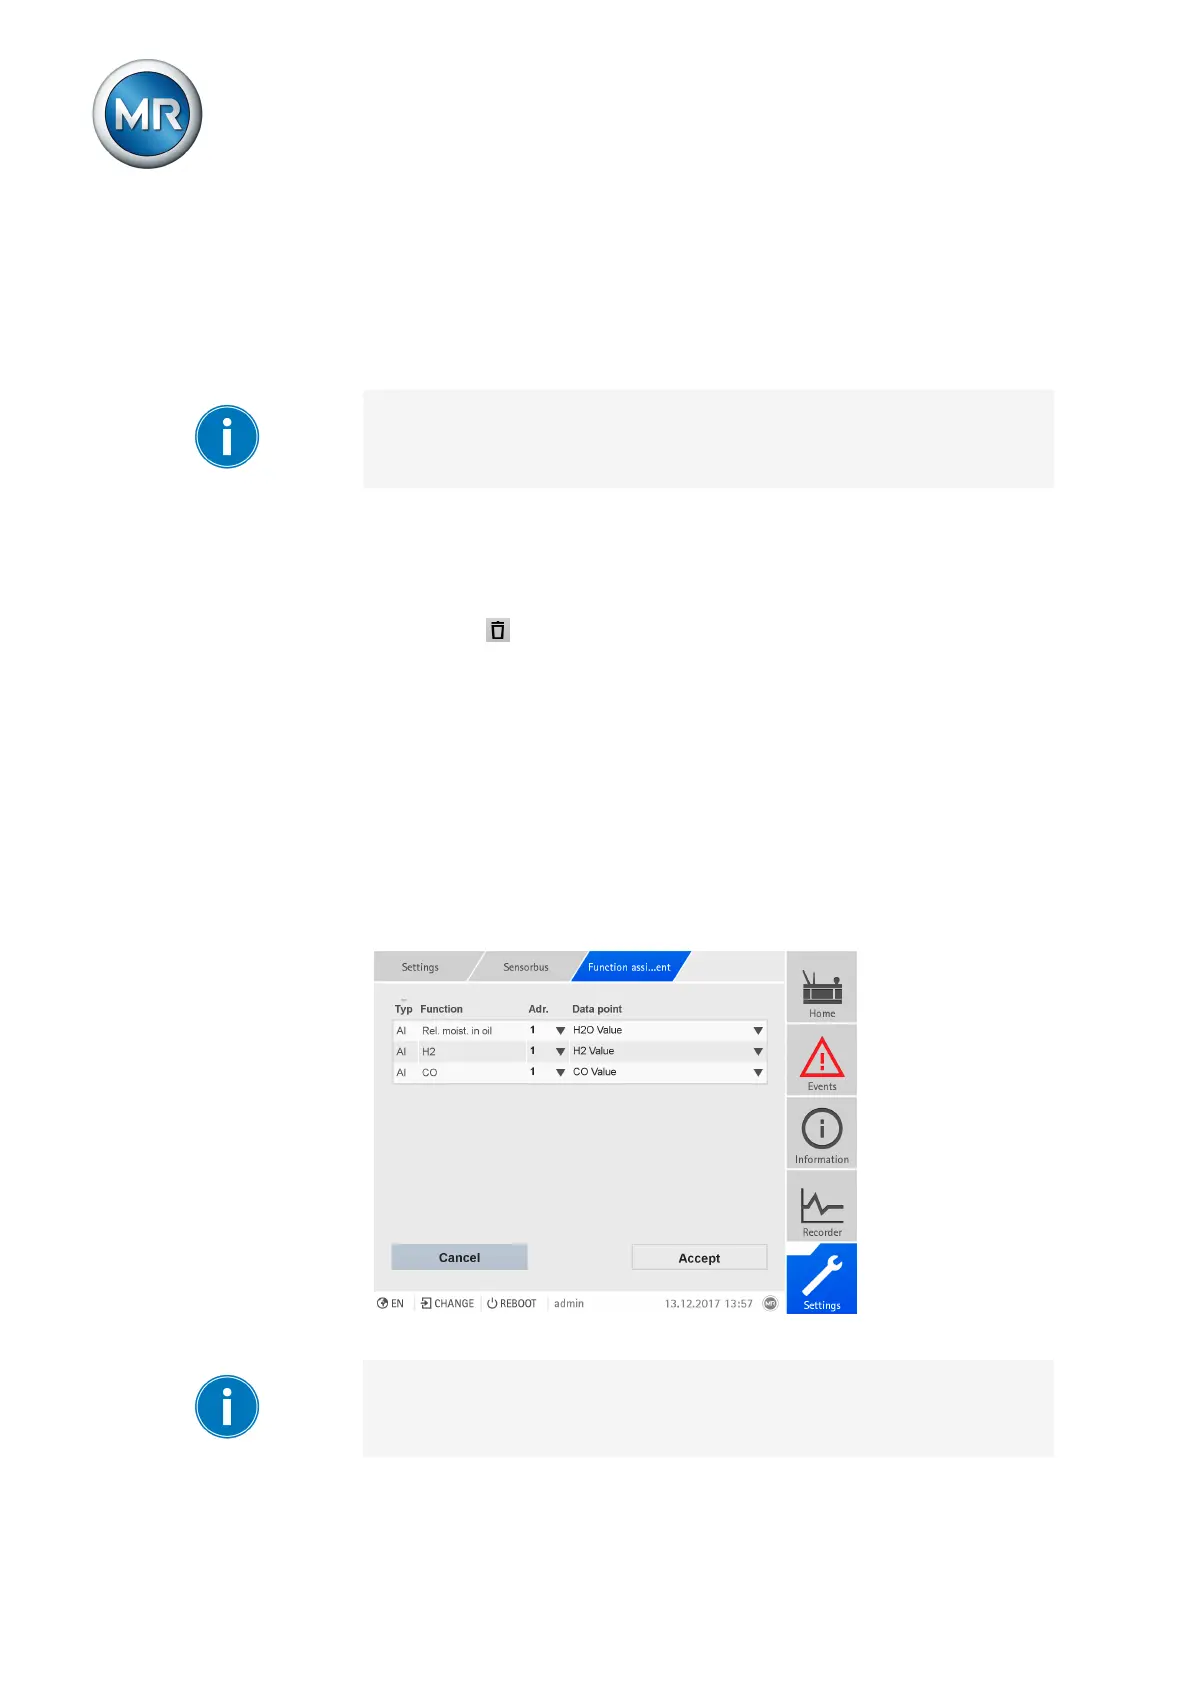
9.28.3 Function assignment
You can link the transmitted signals from the sensor to functions on the de-
vice. This requires configuring the desired device functions of the digital and
analog inputs for Modbus. Observe the following sections for more informa-
tion:
▪ Linking digital inputs and outputs [►Section 9.30, Page 259]
▪ Linking analog inputs and outputs [►Section 9.29, Page 257]
If device functions are configured for Modbus, you can link the functions to
the data points of the sensors.
Figure184: Assigning functions
The operation described below is only possible if you access the visualiza-
tion using a computer. You must also have a Parameterizer or Administrator
user role.

 Loading...