The system considers the first microphone you pair as the primary microphone. By default, a microphone pairs to the
system when you connect it (unless you’ve disabled automatic pairing). You can connect up to three microphones directly
to your system.
Note: If you use a mix of table and ceiling microphones, the primary microphone must be a table microphone. The primary
microphone can be a ceiling microphone if you use only that type of microphone.
Task
1 Connect the primary microphone to an LLN port on the back of your system.
Important: When using Polycom Acoustic Fence technology, remember which microphone is the primary one. If you
disconnect this microphone, Polycom Acoustic Fence no longer works and you must reconnect all microphones
(starting with the primary microphone) for it to work again.
2 Connect the other microphone(s).
Specify a Different Primary Microphone
If you want to change the primary microphone you’re using for Polycom Acoustic Fence technology, you must first
disconnect all the microphones from your G7500 system.
You don’t have specify a primary microphone with the Studio X50 or Studio X30.
Note: If you use a mix of table and ceiling microphones, the primary microphone must be a table microphone. The primary
microphone can be a ceiling microphone if you use only that type of microphone.
Task
1 Disconnect all microphones from the LLN ports on the back of your system.
2 Reconnect the microphone you want to be the primary.
Your primary microphone is set up.
3 Connect the other microphone(s).
Your system is ready to use Polycom Acoustic Fence with a new primary microphone.
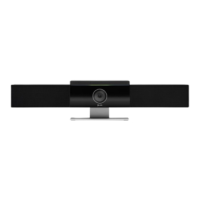
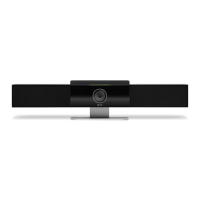
Live Microphone Switching on Studio X70 and Studio X50
Configure your system to automatically toggle the microphone input between the system’s built-in microphones and a
RealPresence Debut expansion microphone.
The system detects which microphone is picking up the strongest audio input from the speaker and automatically changes
to that microphone. For example, if you frequently walk behind your unit you can place the RealPresence Debut expansion
microphone behind your system to catch your voice as you walk around.
Configure Studio X70 or Studio X50 Microphone
You can enable the ability to switch between a built-in microphone that comes with the Studio X70 or Studio X50 and a
RealPresence Debut expansion microphone.
Task
1 In the system web interface, go to Audio/Video > Audio > General Audio Settings.
2 Select the Enable Auto Mic Switching check box (your changes save automatically).
Configure HDMI Audio Input
You can specify the audio input level for your system’s HDMI connections (for example, audio from an HDMI-connected
laptop).
Task
1 In the system web interface, go to Audio/Video > Audio > Audio Input > HDMI.
78
 Loading...