1/05
8b-3
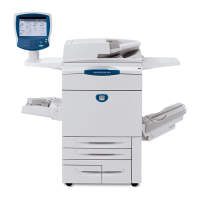
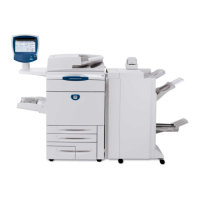
DocuColor 12/DCCS50
ST-1 Convenience Stapler RAP
Convenience Stapler
Reissue
ST-1 Convenience Stapler RAP
The Convenience Stapler is exhibiting one or more of the following problems:
• The Stapler is not operating correctly; poorly clinched staples, no staples.
• The green LED is not illuminated; indicating low staples, jammed staple, or loss of power
to the
Stapler.
• The red LED is illuminated; indicating low staples.
Initial Actions
• Ensure there is power to the Convenience Stapler.
• Ensure that the Stapler Top Cover is closed and th
at Interlock Actuator is not damaged.
Check the position of the Stapler Head.
The Convenience Stapler is stuck in the down (clinched or stapled) position.
YN
Close the Convenience Stapler Top Cover and attempt to staple a stack of paper.
Check the green LED on the Convenience Stapler. The green LED is illuminated.
YN
Check the Stapler Interlock Switch Actuator, located on the Convenience Stapler Top
Cover
. Ens
ure that it is not missing or damaged. The check of the Stapler Inter-
lock Switch Actuator is good.
YN
Replace the Convenience Stapler Top Cover (PL
16
.1).
Check the Convenience Stapler Power Cord. The Power Cord for the Conve-
nience Stapler is connected securely to the Convenience Stapler.
YN
Ensure the Convenience Stapler Power Cord is connected securely.
Check the green LED on the Convenience Stapler. The green LED is illumi-
nated.
YN
Go to the Convenience Stapler Electrical Check.
Check the red LED on the Convenience Stapler. The red LED is illuminated.
YN
Remove and the reinstall the Staple Cartridge. The Convenience Stapler
o
perates
correctly after reinstalling the Staple Cartridge.
YN
Replace the Convenience Stapler Assembly (P
L 16.1
).
Go to Final Actions.
Replace th
e Staple Cartridge. If the problem continues after replacing the Sta-
ple Cartridge, replace the Convenience Stapler Assembly (PL 16.1)
Go
to the Convenience Stapler Electrical Check.
The Convenience Stapler Top Cover closes securely and remains closed during
operat
ion of the Stapler.
YN
Replace the Convenience Stapler Top Cover (P
L 16.1
).
Check the red LED on the Convenience Stapler. The red LED is illuminated.
YN
Go to the S
tapler
Checkout Procedure.
Replace the Staple Cartridge. If the problem continues after replacing the Staple Car-
tridge, replace the Convenience S
tapler Assembly (PL 16.1).
Do the following:
• Close the Convenience Stapler Top Cover to actuate the interlock switch.
• Ensure there is power at the Convenience Stapler.
Check the position of the Stapler Head. The Convenience Stapler remains stuck in the
do
wn (c
linched or stapled) position.
YN
Go to F
inal Actions.
Replace the Conve
nience Stapler Assembly (PL 16.1
).
Convenience Stapler Electrical Check
Check for 110 VAC at the Convenience Stapler. The voltage is 110 VAC.
YN
Remove the Stapler PWB Cover to gain access to Stapler Power Cord to PWB connector.
Meas
ure the volt
age across the connector. The voltage is 110 VAC.
YN
Ensure that the wires are seated securely into the connector on the PWB. Repair as
required.
Do the following:
• Ensure the Stapler Harness is connected to the Convenience Stapler PWB.
• Remove the Staple Cartridge.
• Close the Convenience Stapler Top Cover.
Check the red LED on the Convenience Stapler. The red LED is illuminated.
YN
Replace the Convenience Stapler PWB (P
L 16.1).
If the problem continues, replace
the Convenience Stapler Assembly (PL 16.1).
Replace the Convenience Stapler Assembly (PL 16.1
).
Replace the Convenience Stapler Assembly (PL 16.1
).
A
A
B
B

 Loading...