1/05
8d-79
DocuColor 12/DCCS50
REP 15.2.1
Finisher/Sorter
Reissue
REP 15.2.1 Compiler Tray Solenoid
Parts List on PL 18.15
Removal
WARNING
To avoid personal injury or shock, disconnect the Finisher cable connector. Switch off
the machine power and disconnect the machine Power Cord.
1. Move the Stapler to the rear end of the Stapler track.
2. Switch off the printer power and disconnect the AC Power Cord.
3. Remove the Stapler Cover Assembly (REP 15.3.
3).
4. Remove the wire harness from the harness clamps.
5. Remove the lower screw that secures the wire harness holder to the Compiler Tray Sole-
noid (PL 18.15 it
em 6).
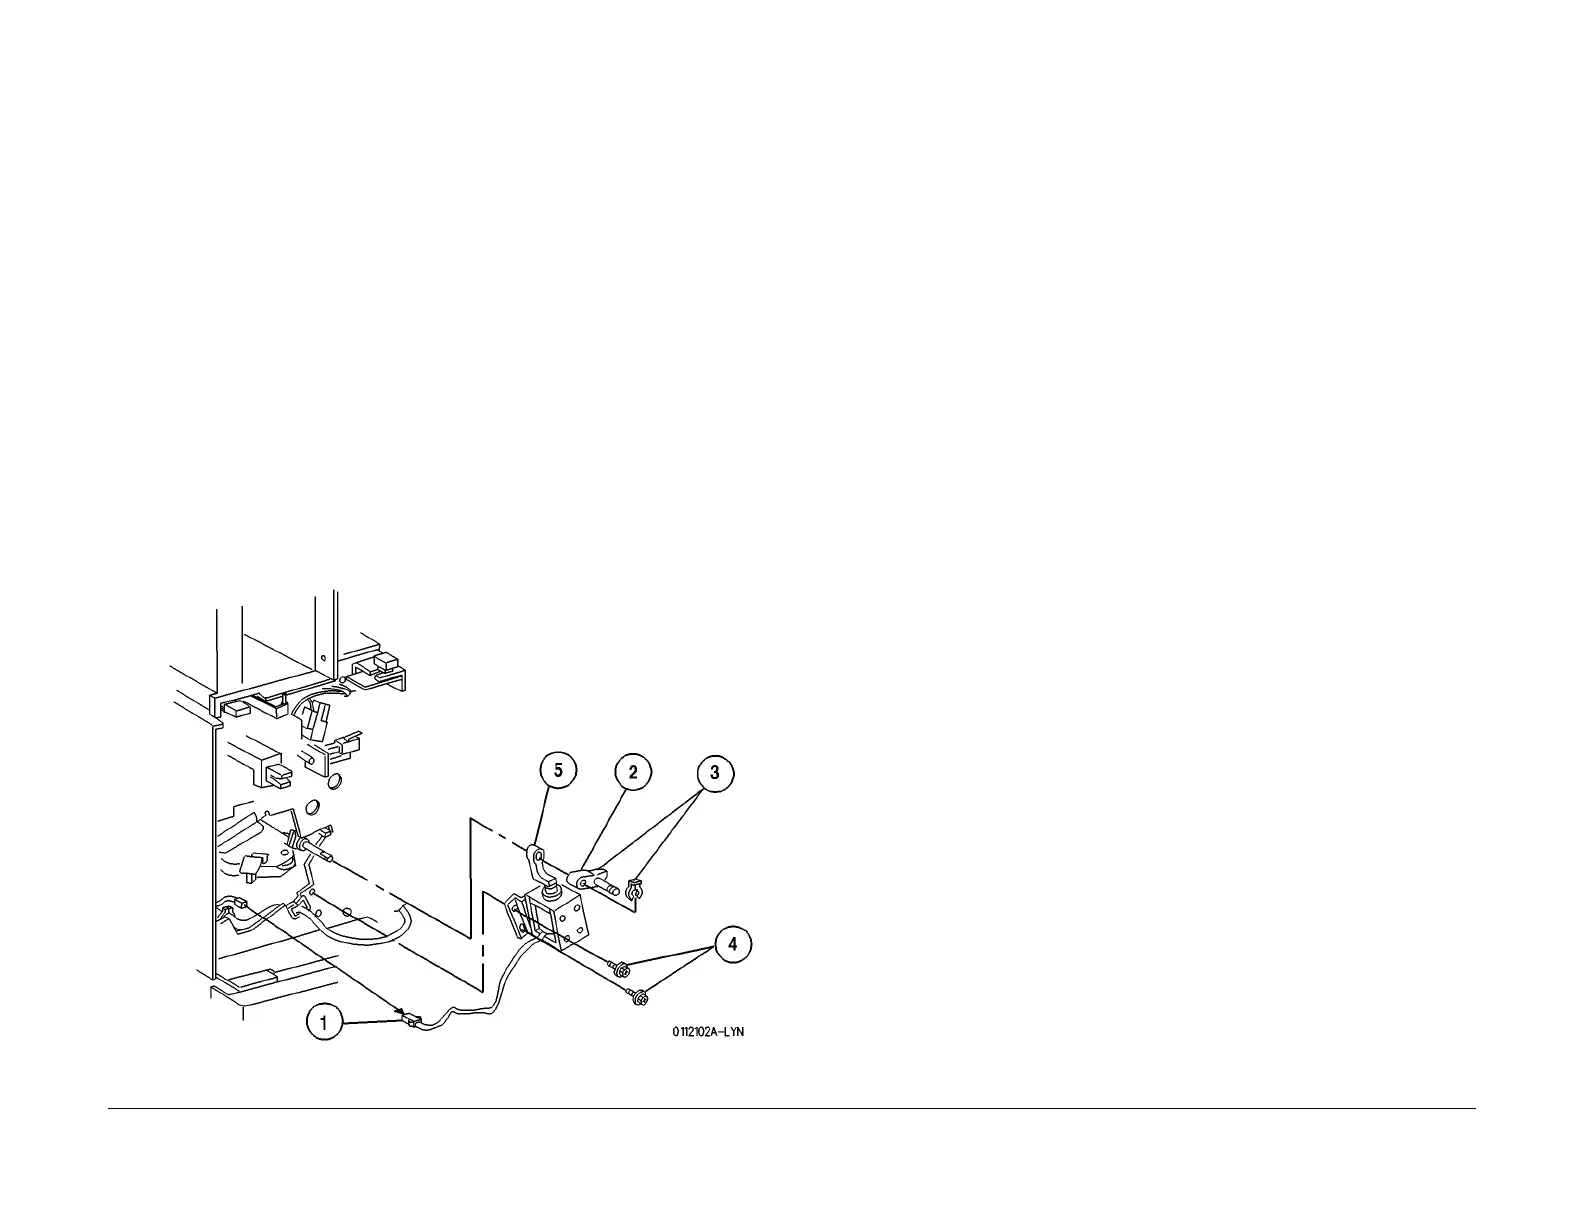
6. Remove the Compiler Tray Solenoid (Figu
re 1).
1. Disconnect the Compiler Tray Solenoid Connector P/J1082.
2. Remov
e the End Wall Spring (PL 18
.15 item 2).
3. Remove the K Clip securing the End Wall Motor Link to the End Wall Motor, and
remove t
he Link.
4. Remove the two screws securing the Compiler Tray Solenoid to the Finisher frame.
Remove the Compiler T
ray Solenoid.
5. Slide the solenoid plunger Link off the End Wall Shaft, and remove the solenoid
plunger and Link.
Fi
gure 1 Remove the Compiler Tray Solenoid
Replacement
1. Reconnect P/J1082.
2. Route the wire harness through the harness clips and lock the clips.
3. Slide the solenoid Link onto the End Wall Shaft.
4. Slide the End Wall Motor Link onto the End Wall Motor Shaft, and use a K Clip to secure
the
Link to the shaft.
5. Install the End Wall Spring.
6. Install the Compiler Tray Solenoid Plunger into the Solenoid and secure the solenoid with
the
screws (2).
7. Install the wire harness bracket to the Compiler Tray Solenoid with the screw (1).
8. Reinstall the Stapler Cover Assembly.

 Loading...


