1/05
4-13
DocuColor 12/DCCS50
REP 1.6.2, REP 1.6.3
Repairs and Adjustments
Reissue
Figure 4 Removing the Fuser Drive
Installation
1. Reinstall the parts in the reverse order of disassembly.
REP 1.6.3 Exit/Fuser Nip Drive Assembly
Parts List on PL 1.6
Removal
1. Turn power off and disconnect the power plug.
2. Remove the following covers:
• IOT Rear Cover (PL
11.3 Item 7)
• Tray Module Rear Cover (PL 11
.3 Item 11)
• Filter Unit Cover (PL
11.2 Item 4)
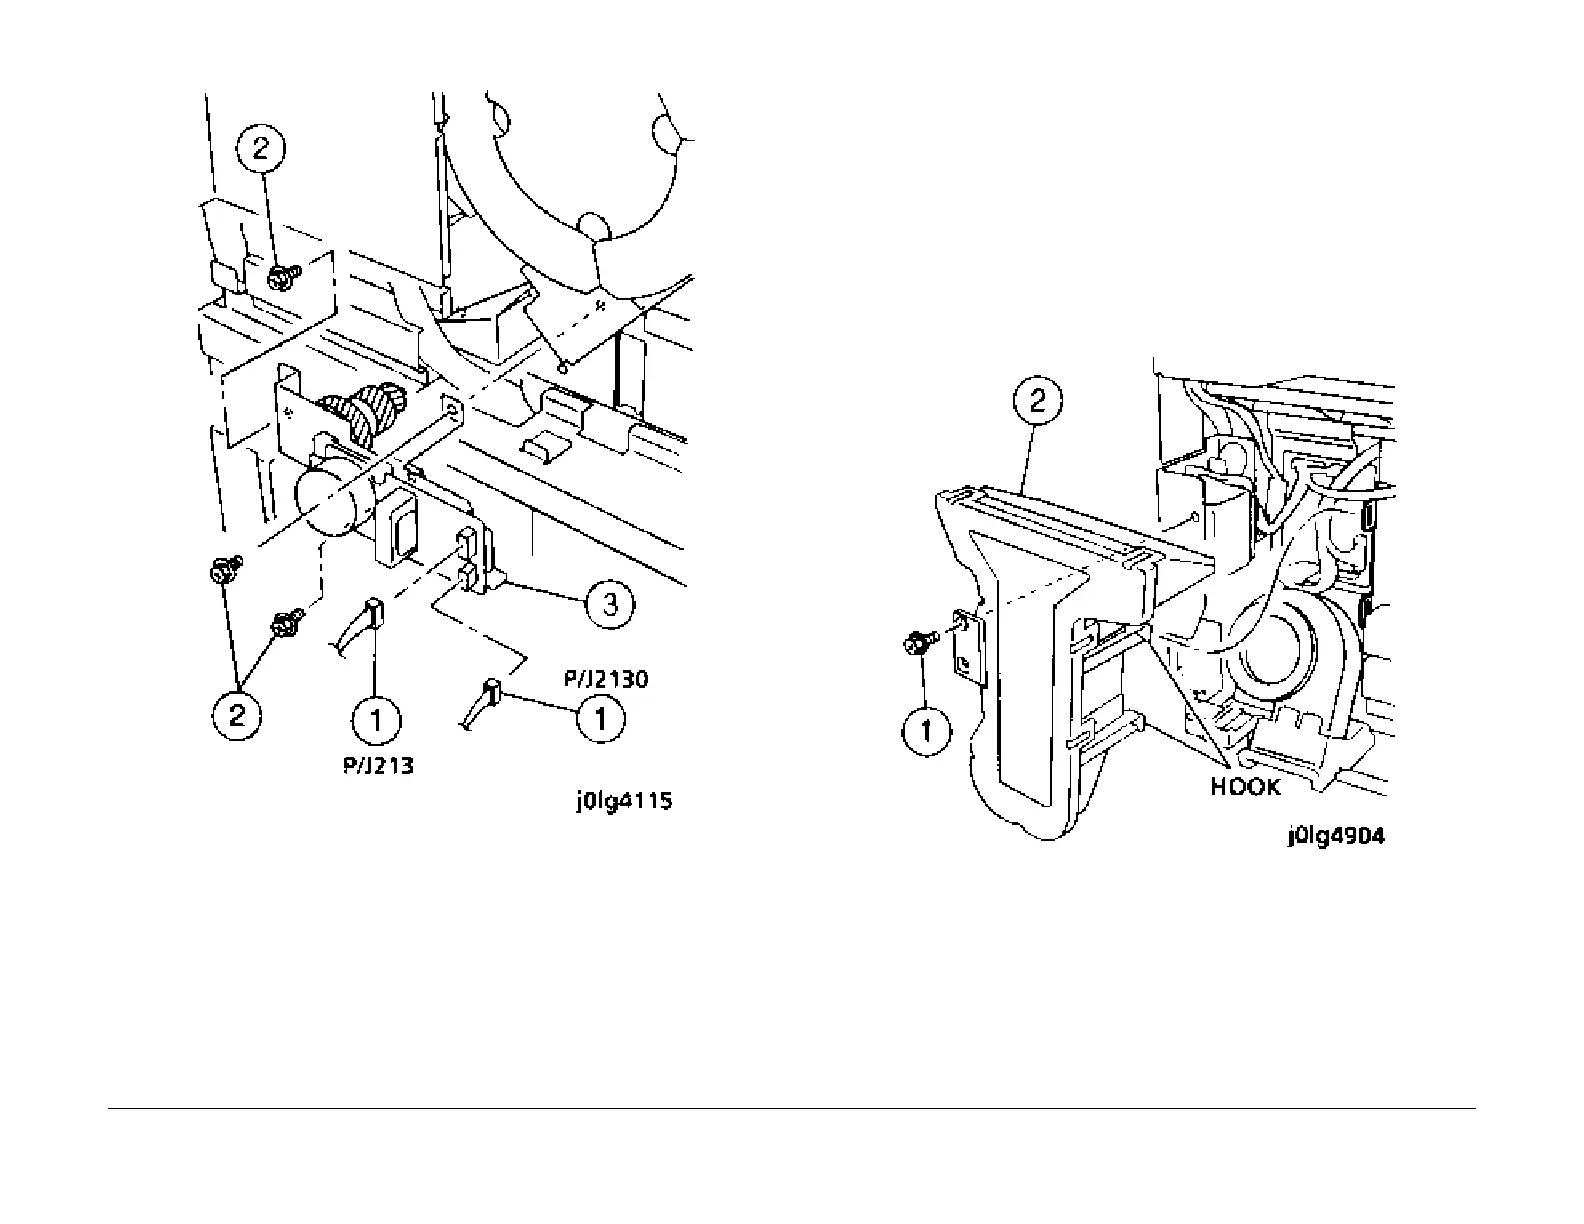
3. Remove the duct (Figure 2
).
1. Remove the screws (2).
2. Release the hook and remove the duct.
Figure 1 Removing the Duct
4. Remove the Filter Case (PL
10.2 Item 3) (Figure 2).
1. Remove the filter.
2. Remove the duct by lifting up and out of the Filter Case.
3. Remove the screws (3).
4. Remove the Filter Case.

 Loading...