1/05
4-187
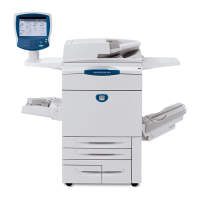
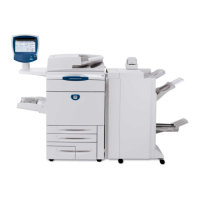
DocuColor 12/DCCS50
REP 19.1
Repairs and Adjustments
Reissue
REP 19.1 Removing the IDFE
Parts List on PL 19.1
Removal (Product Code GL2)
NOTE: There are two configurations of the IDFE for this machine. This REP applies generi-
cally to both. Where differences between the units exist, t
he applicable information is specified
by the product code for the IDFE (GL2 or MFY).
Perform the following to remove the GL2 version of the IDFE:
1. Print a Configuration Report (GP 12
Printing Configuration Reports).
CAUTION
If any of the following steps are not correctly followed, the IDFE will not shut down properly,
and step
s 2-3 of this procedure must be repeated.
2. Switch OFF the Main Switch for the Printer/IDFE.
3. Wait for 30 seconds.
NOTE: Allow 30 seconds to ensure complete shut
down of the Hard Disk Drive.
4. Disconnect all network cables from the IDFE.
5. Disconnect and remove the 2 DDI Cables from the IDFE to the Printer.
6. Disconnect the IDFE wiring harness from the Printer and the IDFE.
7. Loosen the 4 mounting screws that secure the IDFE to the Printer.
8. Remove the IDFE from the Printer.
9. If necessary, remove the Token Ring PWB from the IDFE (P
L 19.1)
10.
If necessary, remove any additional memory from the IDFE (REP 19.3).
NOT
E: The IDFE comes with 128 MB of memory installed. Customers may have addi-
tional memory kit(s) installed in the IDFE. Remove this memory for installation into the
replacement I
DFE.
Removal (Product Code MFY)
Perform the following to remove the MFY version of the IDFE:
1. Print a Configuration Report (GP 12
Printing Configuration Reports).
CAUTION
If any of the following steps are not correctly followed, the IDFE will not shut down properly,
and step
s 2-3 of this procedure must be repeated.
2. Switch OFF the Main Switch for the Printer/IDFE.
3. Wait for 30 seconds.
NOTE: Allow 30 seconds to ensure complete shut
down of the Hard Disk Drive.
4. Disconnect all network cables from the IDFE.
NOTE: The 2 DDI Cables removed in the next step will be used on the replacement IDFE.
5. Disconnect and remove the 2 DDI Cables from the IDFE to the Printer.
6. Disconnect the IDFE wiring harness from the Printer and the IDFE.
7. Loosen the 6 mounting screws that secure the IDFE to the Printer.
8. Remove the IDFE from the Printer.
9. If necessary, remove any additional memory from the IDFE (RE
P 19.3).
NOT
E: The IDFE comes 128 MB of memory installed. Customers may have additional
memory
kit(s) installed in the IDFE. Remove this memory for installation into the replace-
ment IDFE.
Replacement (Product Code GL2)
Perform the following to replace the GL2 version of the IDFE:
1. If necessary, reinstall the Token Ring PWB into the IDFE (REP 19.2).
2.
If necessary, reinstall the customer’s additional memory kit(s) into the IDFE (REP 19.3
).
3. If necessary, remove the IDFE Cover from the existing IDFE and install the Cover on the
replacement I
DFE.
4. Install the IDFE on the Printer.
5. Tighten the 4 mounting screws that secure the IDFE to the Printer.
6. Install the IDFE wiring harness between the IDFE and the Printer.
CAUTION
Do not cross the 2 DDI Cables.
7. Connect the 2 DDI Cables between the IDFE and the Printer.
8. Connect all network cables to the IDFE.
9. Switch on the Main Power to the Printer.
10. Ask the customer to use the Configuration Report to verify that the printer connectivity
set
tings
are correct.
Replacement (Product Code MFY)
Perform the following to replace the MFY version of the IDFE:
1. If necessary, install the customer’s additional memory kit(s) into the IDFE (REP 19.3).
2.
If necessary, remove the IDFE Cover from the existing IDFE and install the Cover on the
replacement I
DFE.
3. Install the IDFE on the Printer.
4. Tighten the 6 mounting screws that secure the IDFE to the Printer.
5. Install the IDFE wiring harness between the IDFE and the Printer.
CAUTION
Do not cross the 2 DDI Cables.
6. Connect the 2 DDI Cables between the IDFE and the Printer.
7. Connect all network cables to the IDFE.
8. Switch on the power to the Printer.
9. Ask the customer to use the Configuration Report to verify that the printer connectivity
set
tings
are correct.

 Loading...