Maintenance
WorkCentre 7425/7428/7435
User Guide
168
Replacing the Fuser Assembly
The printer will display a message on the touch screen when the fuser assembly needs to be replaced.
Caution: Do not perform this procedure when the printer is copying or printing.
1. Power the printer OFF using the power switch located on the front, ride side, below control panel.
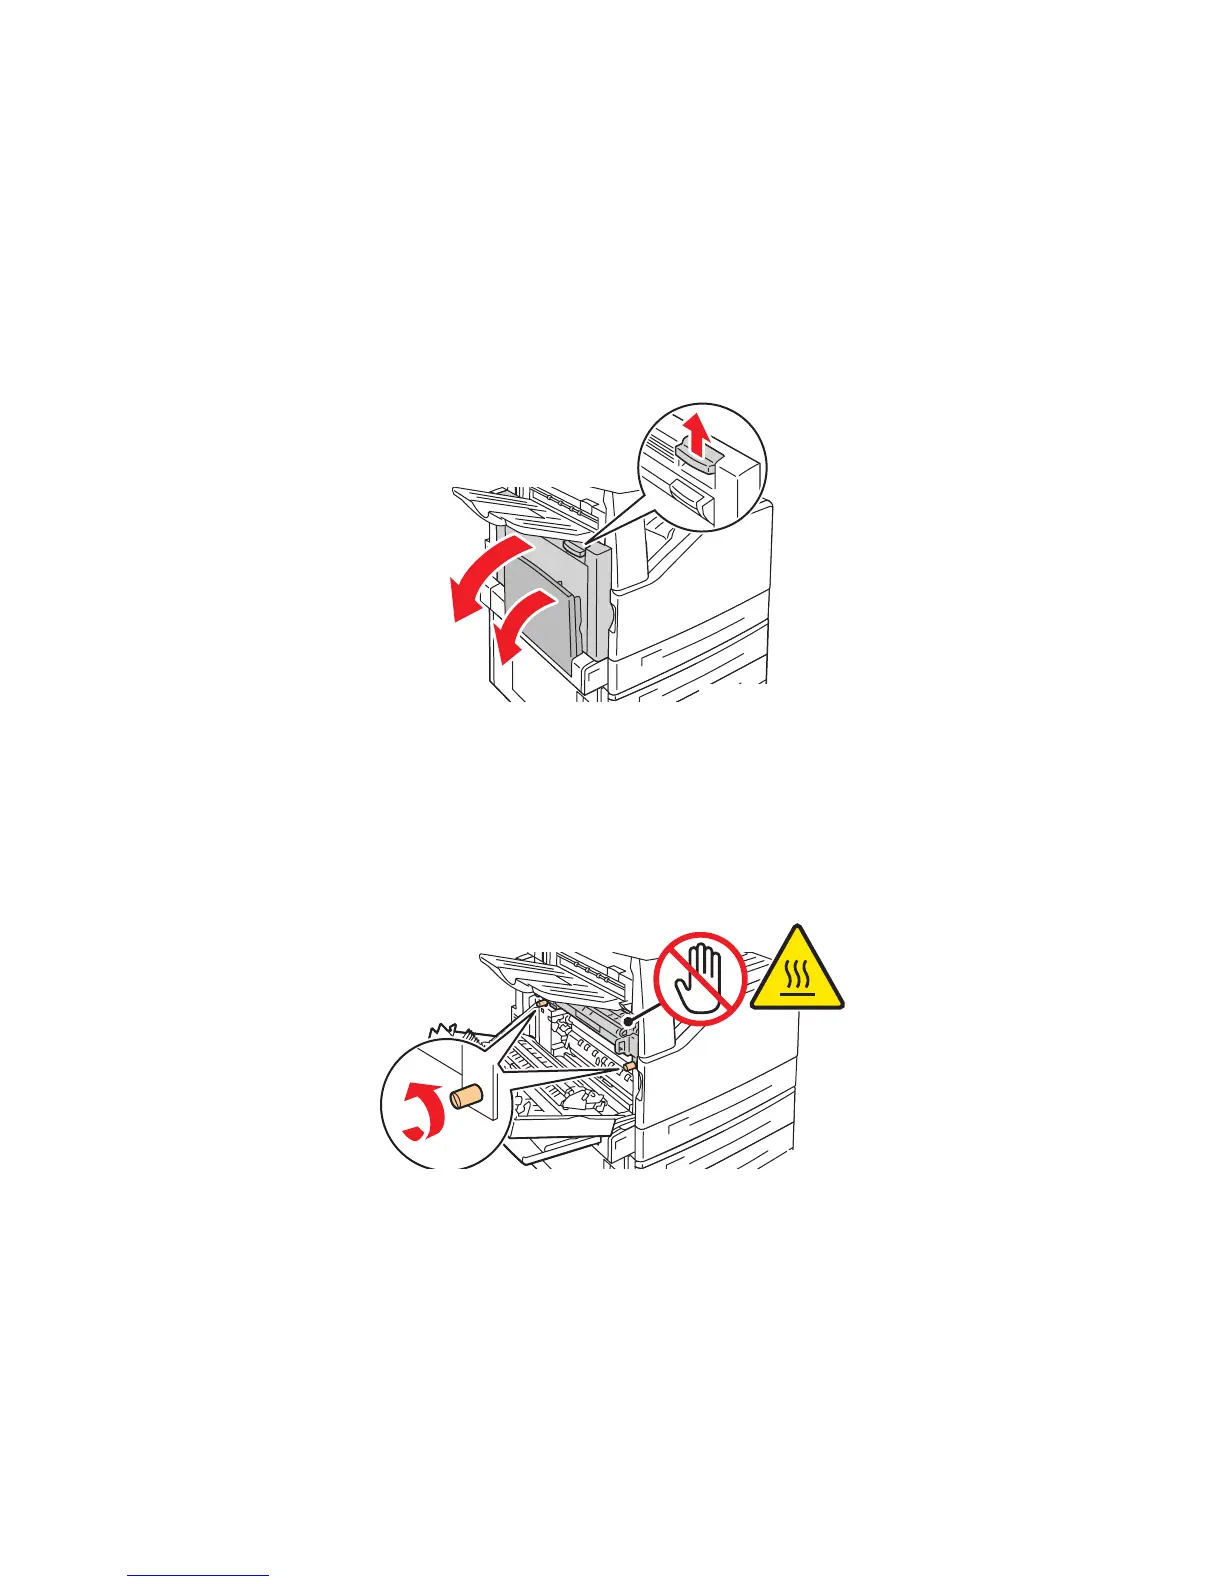
2. Open Tray 5 (Bypass) (1). While lifting up the release lever, open the top left cover (2).
Warning: The fuser assembly is hot during normal operation. To avoid potential personal injury,
wait 40 minutes for the fuser assembly to cool before proceeding.
3. Turn the two orange screws on either side of the fuser assembly counterclockwise until they are
completely loosened.
Note: The screws do not detach from the printer.
2
1
wc74xx-01
wc74xx-172
 Loading...


