PERIODIC MAINTENANCE
3-5
2. Remove:
• Fuel tank
Refer to “FUEL TANK” on page 7-1.
3. Remove:
• Air filter case
Refer to “AIR FILTER CASE” on page 7-
5.
4. Disconnect:
• Ignition coil
5. Remove:
• Spark plug
ECA13320
Before removing the spark plugs, blow
away any dirt accumulated in the spark
plug wells with compressed air to prevent it
from falling into the cylinders.
6. Check:
• Spark plug type
Incorrect → Change.
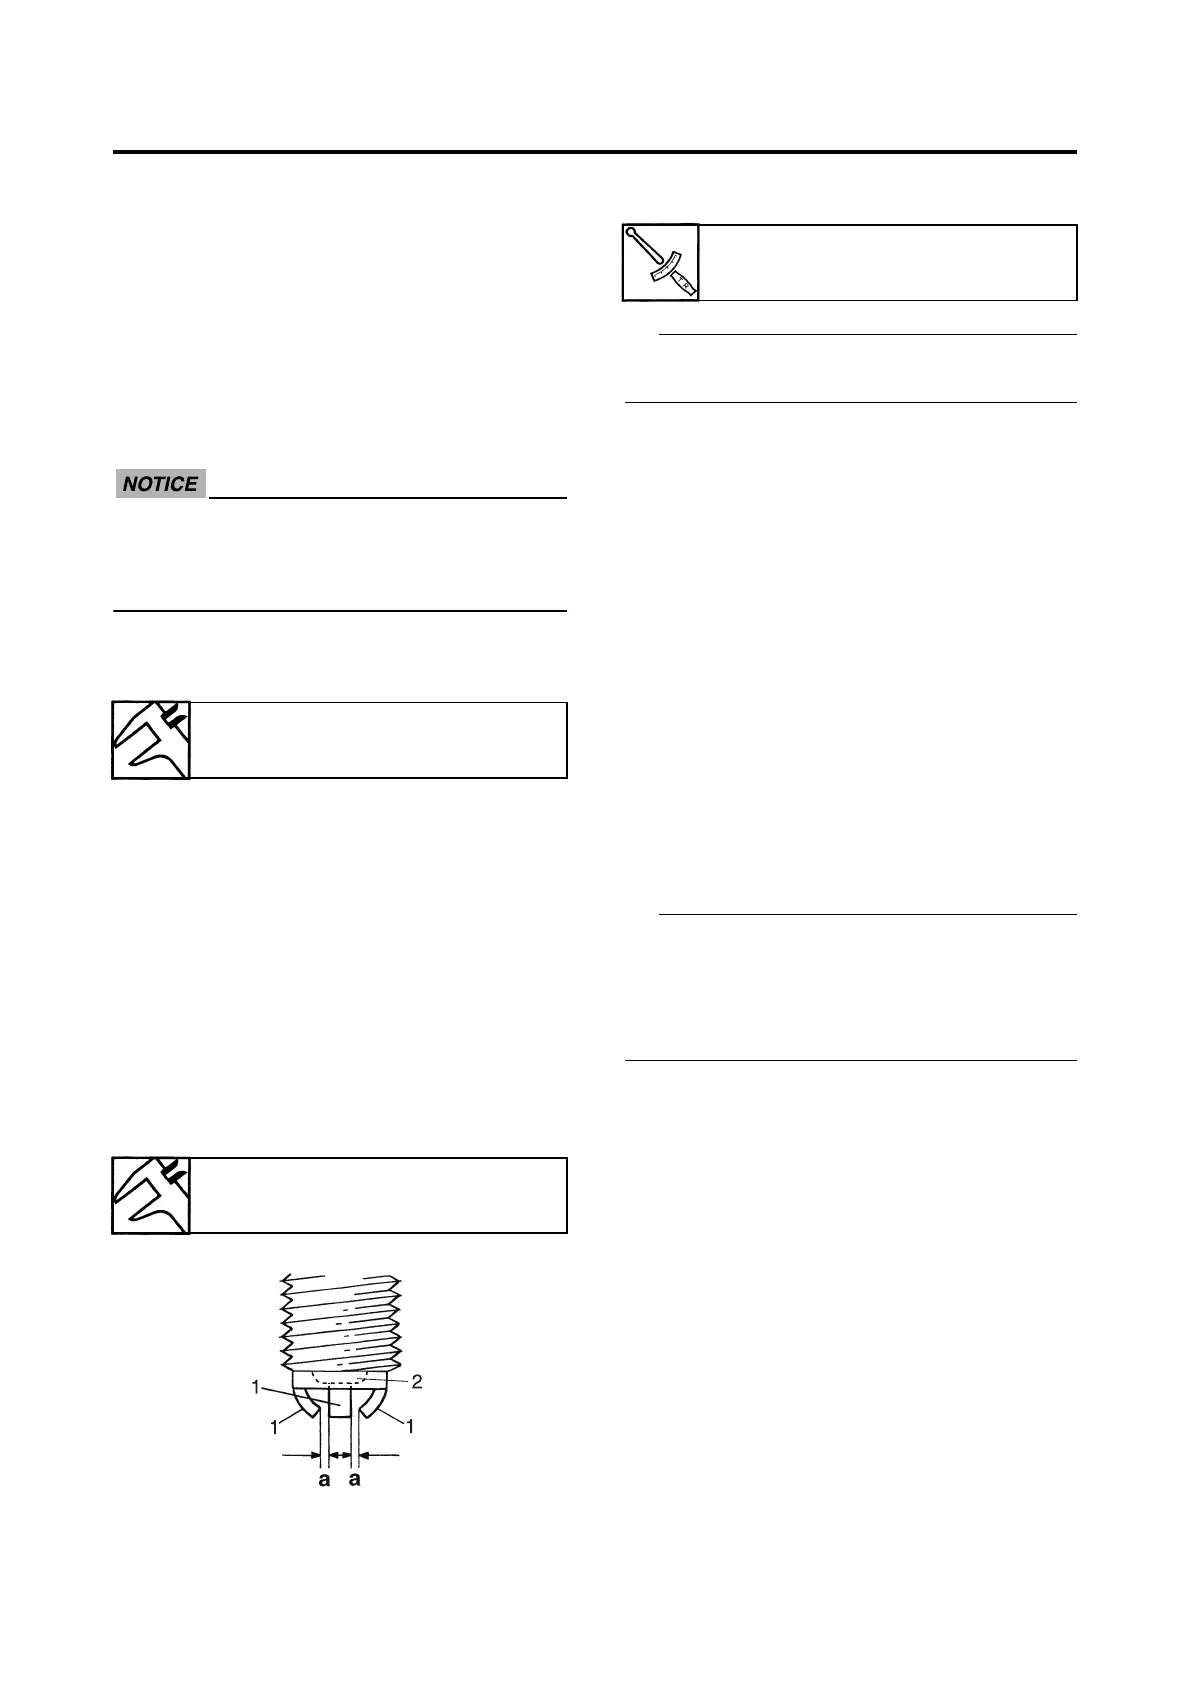
7. Check:
• Electrode “1”
Damage/wear → Replace the spark plug.
• Insulator “2”
Abnormal color → Replace the spark
plug.
Normal color is medium-to-light tan.
8. Clean:
• Spark plug
(with a spark plug cleaner or wire brush)
9. Measure:
• Spark plug gap “a”
(with a wire thickness gauge)
Out of specification → Regap.
10. Install:
• Spark plug
Before installing the spark plug, clean the
spark plug and gasket surface.
11. Install:
• Ignition coil
12. Install:
• Air filter case
Refer to “AIR FILTER CASE” on page 7-
5.
13. Install:
• Fuel tank
Refer to “FUEL TANK” on page 7-1.
14. Install:
• Lower cowlings
• Side cowlings
Refer to “GENERAL CHASSIS” on page
4-1.
EAS20490
ADJUSTING THE VALVE CLEARANCE
The following procedure applies to all of the
valves.
• Valve clearance adjustment should be made
on a cold engine, at room temperature.
• When the valve clearance is to be measured
or adjusted, the piston must be at top dead
center (TDC) on the compression stroke.
1. Remove:
• Rider seat
Refer to “GENERAL CHASSIS” on page
4-1.
• Fuel tank
Refer to “FUEL TANK” on page 7-1.
• Air filter case
Refer to “AIR FILTER CASE” on page 7-
5.
• Lower cowlings
• Side cowlings
Refer to “GENERAL CHASSIS” on page
4-1.
• Throttle body assembly
Refer to “THROTTLE BODIES” on page
7-12.
Manufacturer/model
NGK/LMAR9E-J
Spark plug gap
0.6–0.7 mm (0.024–0.028 in)
Spark plug
13 Nm (1.3 m·kgf, 9.4 ft·lbf)

 Loading...