CHAIN DRIVE
4-84
EAS23410
REMOVING THE DRIVE CHAIN
1. Stand the vehicle on a level surface.
EWA13120
Securely support the vehicle so that there
is no danger of it falling over.
Place the vehicle on a suitable stand so that
the rear wheel is elevated.
2. Remove:
• Drive chain
Cut the drive chain with the drive chain cut &
rivet tool.
EAS14B1012
CHECKING THE DRIVE CHAIN
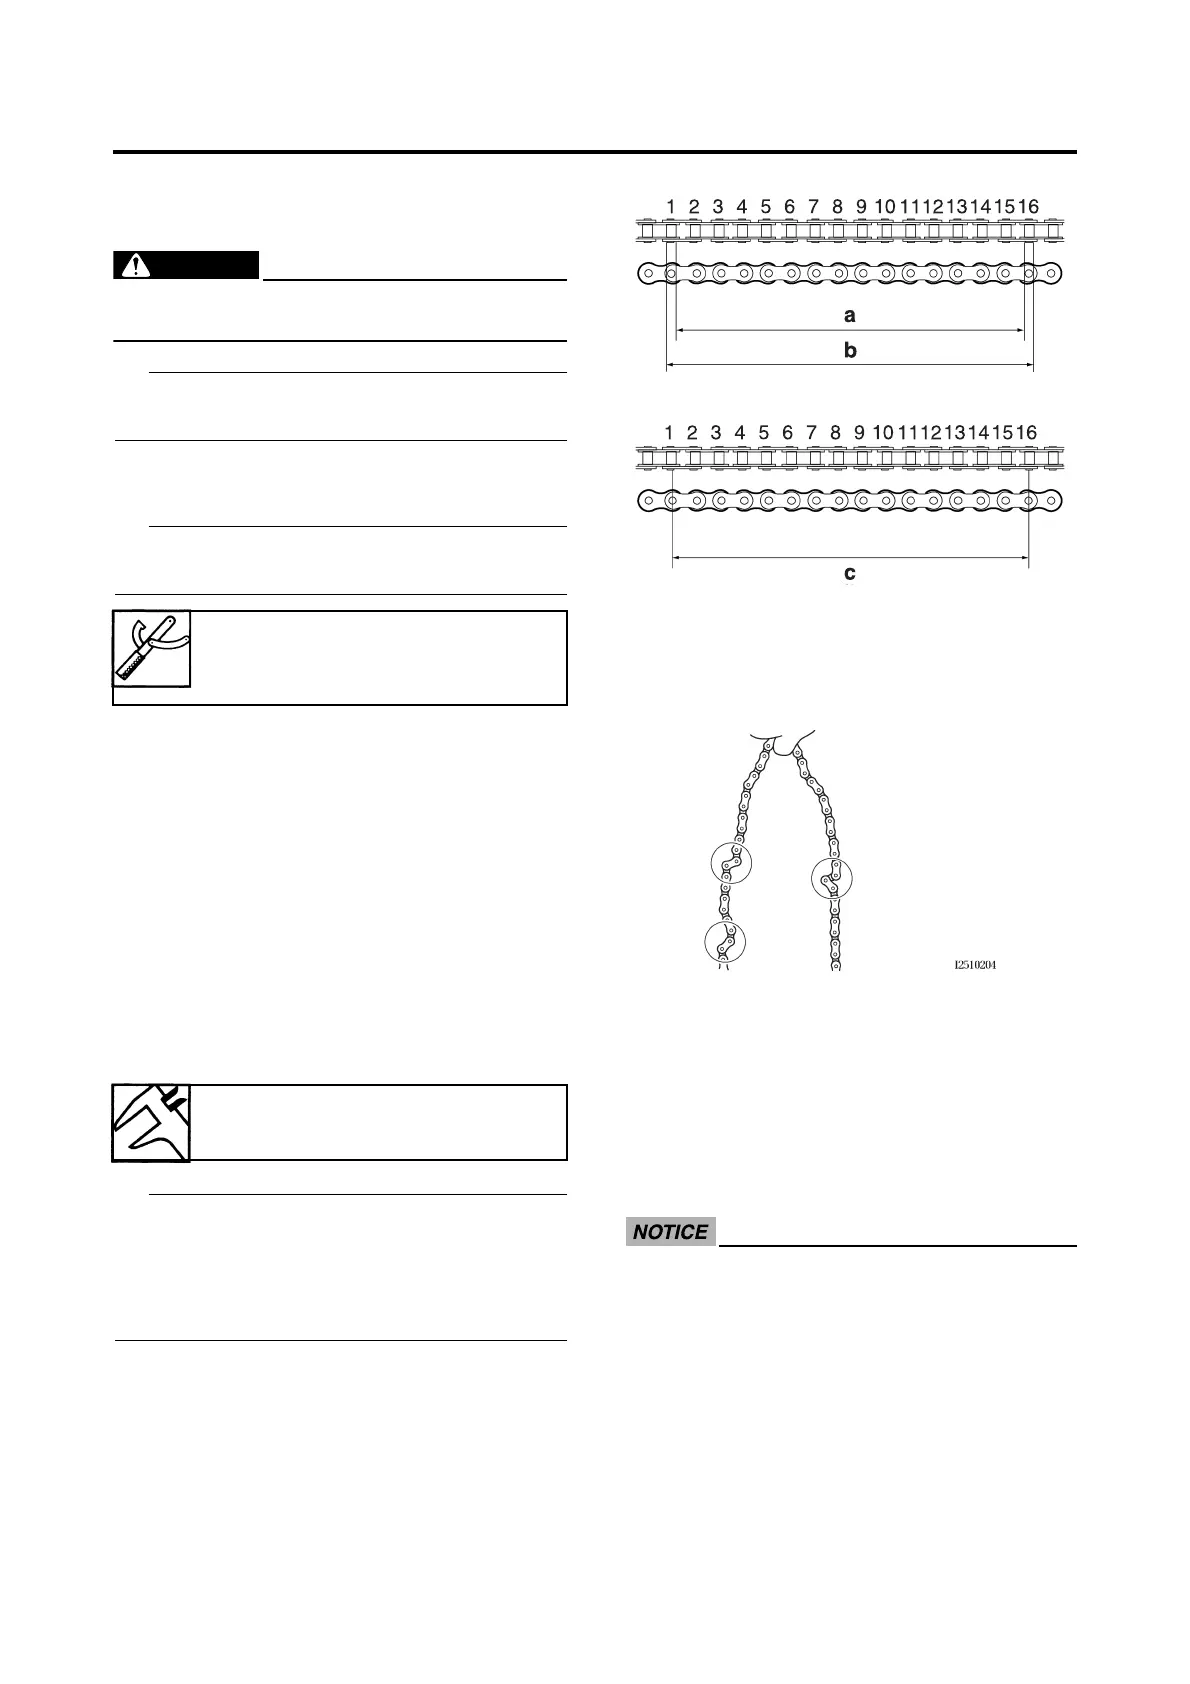
1. Measure:
• Measure the dimension between 15-links
on the inner side “a” and outer side “b” of
the roller and calculate the dimension
between pin centers.
• Dimension “c” between pin centers =
(Inner dimension “a” + Outer dimension
“b”)/2
• 15-link section “c” of the drive chain
Out of specification → Replace the drive
chain, drive sprocket and rear wheel
sprocket as a set.
• While measuring the 15-link section, push
down on the drive chain to increase its ten-
sion.
• Perform this measurement at two or three dif-
ferent places.
2. Check:
• Drive chain
Stiffness → Clean and lubricate or
replace.
3. Clean:
• Drive chain
▼▼▼▼▼▼▼▼▼▼▼▼▼▼▼▼▼▼▼▼▼▼▼▼▼▼▼▼▼▼
a. Wipe the drive chain with a clean cloth.
b. Put the drive chain in kerosene and remove
any remaining dirt.
c. Remove the drive chain from the kerosene
and completely dry it.
ECA14B1010
• This vehicle has a drive chain with small
rubber O-rings “1” between the drive
chain side plates. Never use high-pres-
sure water or air, steam, gasoline, certain
solvents (e.g., benzine), or a coarse brush
to clean the drive chain. High-pressure
methods could force dirt or water into the
drive chain’s internals, and solvents will
deteriorate the O-rings. A coarse brush
can also damage the O-rings. Therefore,
Drive chain cut & rivet tool
90890-01550
YM-01550
15-link length limit
239.3 mm (9.42 in)

 Loading...