CAMSHAFTS
5-20
EAS23950
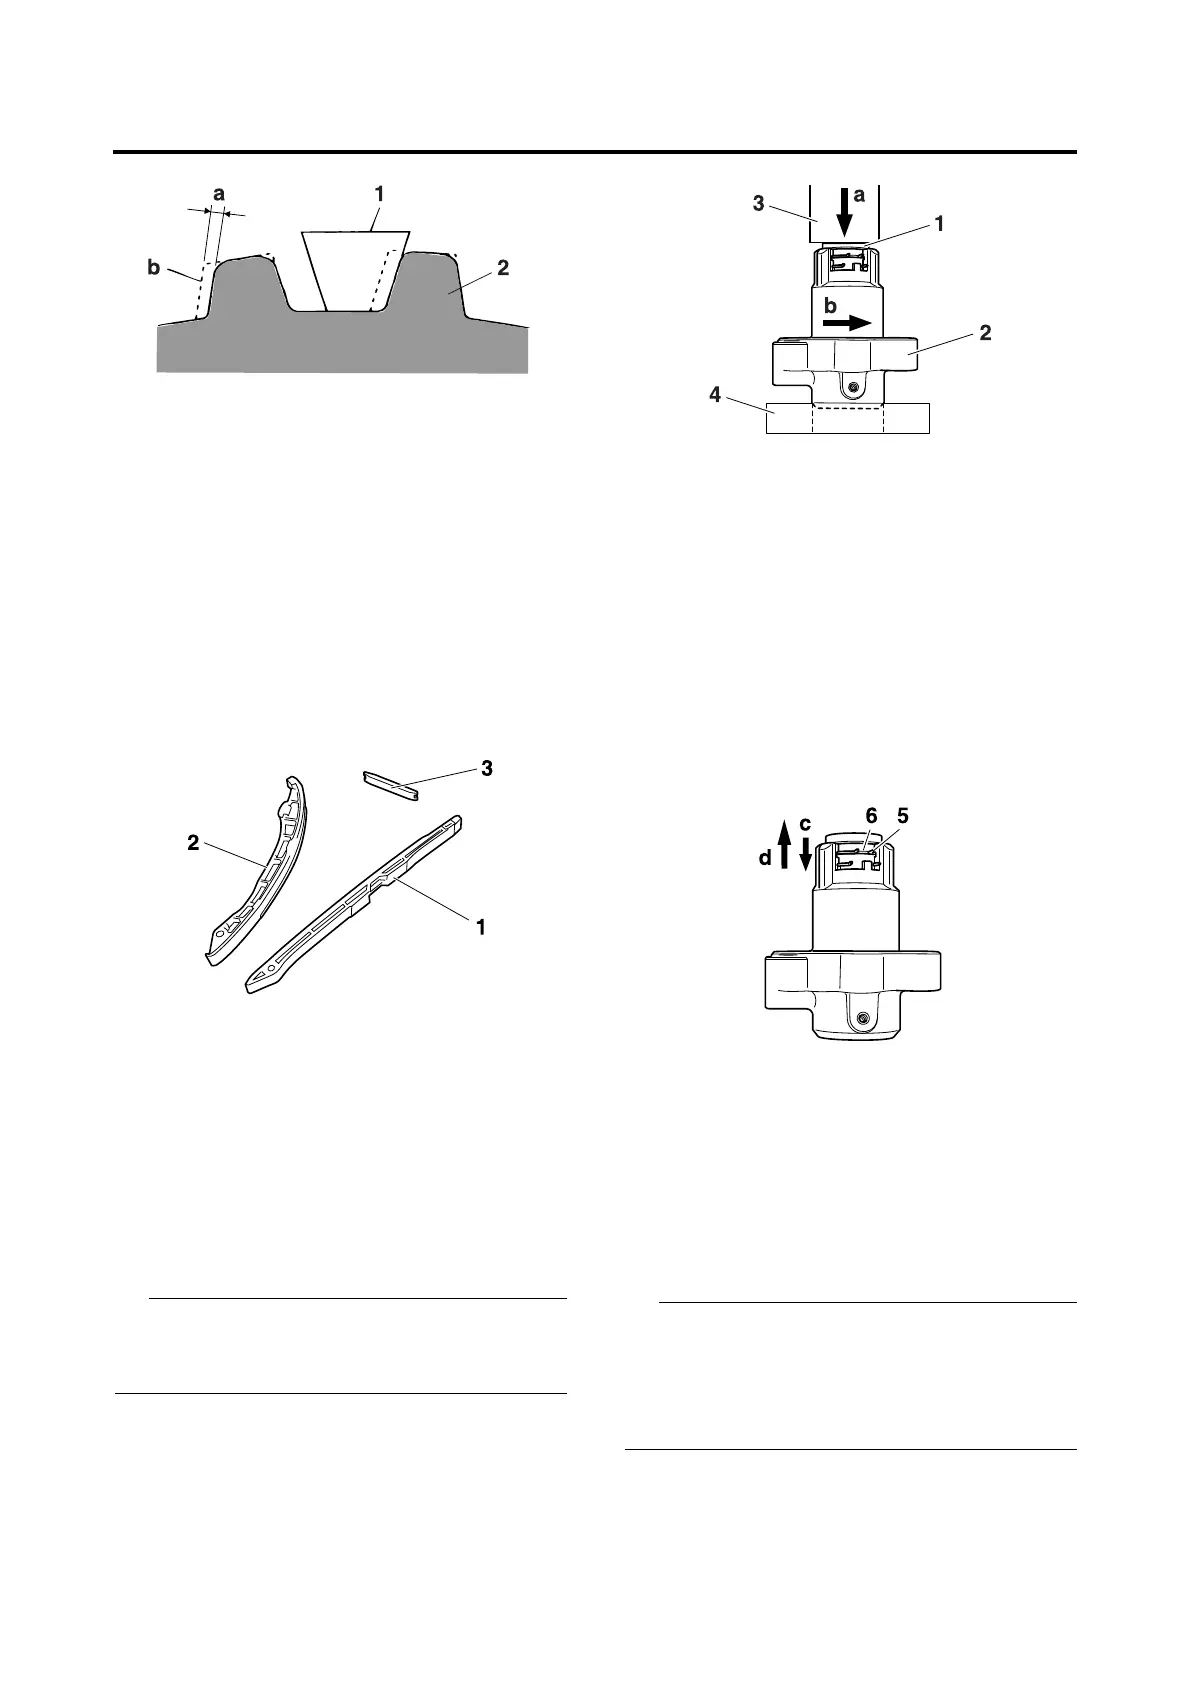
CHECKING THE TIMING CHAIN GUIDES
1. Check:
• Timing chain guide (exhaust side) “1”
• Timing chain guide (intake side) “2”
• Timing chain guide (top side) “3”
Damage/wear → Replace the defective
part(s).
EAS23960
CHECKING THE TIMING CHAIN TEN-
SIONER
1. Check:
• Timing chain tensioner
Cracks/damage → Replace.
▼▼▼▼▼▼▼▼▼▼▼▼▼▼▼▼▼▼▼▼▼▼▼▼▼▼▼▼▼▼
a. Using a hand press, push and insert timing
chain tensioner rod “1” into the timing chain
tensioner housing.
Push the timing chain tensioner rod in direction
“a”, and turn the timing chain tensioner body
“2” in direction “b” until it stops.
b. Keep pressing the timing chain tensioner
rod, mount clip “5” into groove “6”, and lock
the timing chain tensioner rod.
c. Push the timing chain tensioner rod in
direction “c”.
d. Make sure that the timing chain tensioner
rod can smoothly move out from the timing
chain tensioner housing in direction “d”. If
not smooth, replace the timing chain ten-
sioner assembly.
▲▲▲▲▲▲▲▲▲▲▲▲▲▲▲▲▲▲▲▲▲▲▲▲▲▲▲▲▲▲
EAS24000
INSTALLING THE CAMSHAFTS
1. Install:
• Straight key “1”
• Collar “2”
• Crankshaft sprocket “3”
• Timing chain
• Align the straight key to the crankshaft
groove “a”, collar and crankshaft sprocket
groove “b” to the straight key and then install.
• To prevent the timing chain from falling into
the crankcase, fasten it with a wire “4”.
a. 1/4 tooth
b. Correct
1. Timing chain
2. Camshaft sprocket or crankshaft sprocket
3. Hand press
4. Bearing

 Loading...