PERIODIC MAINTENANCE
3-16
EAS21160
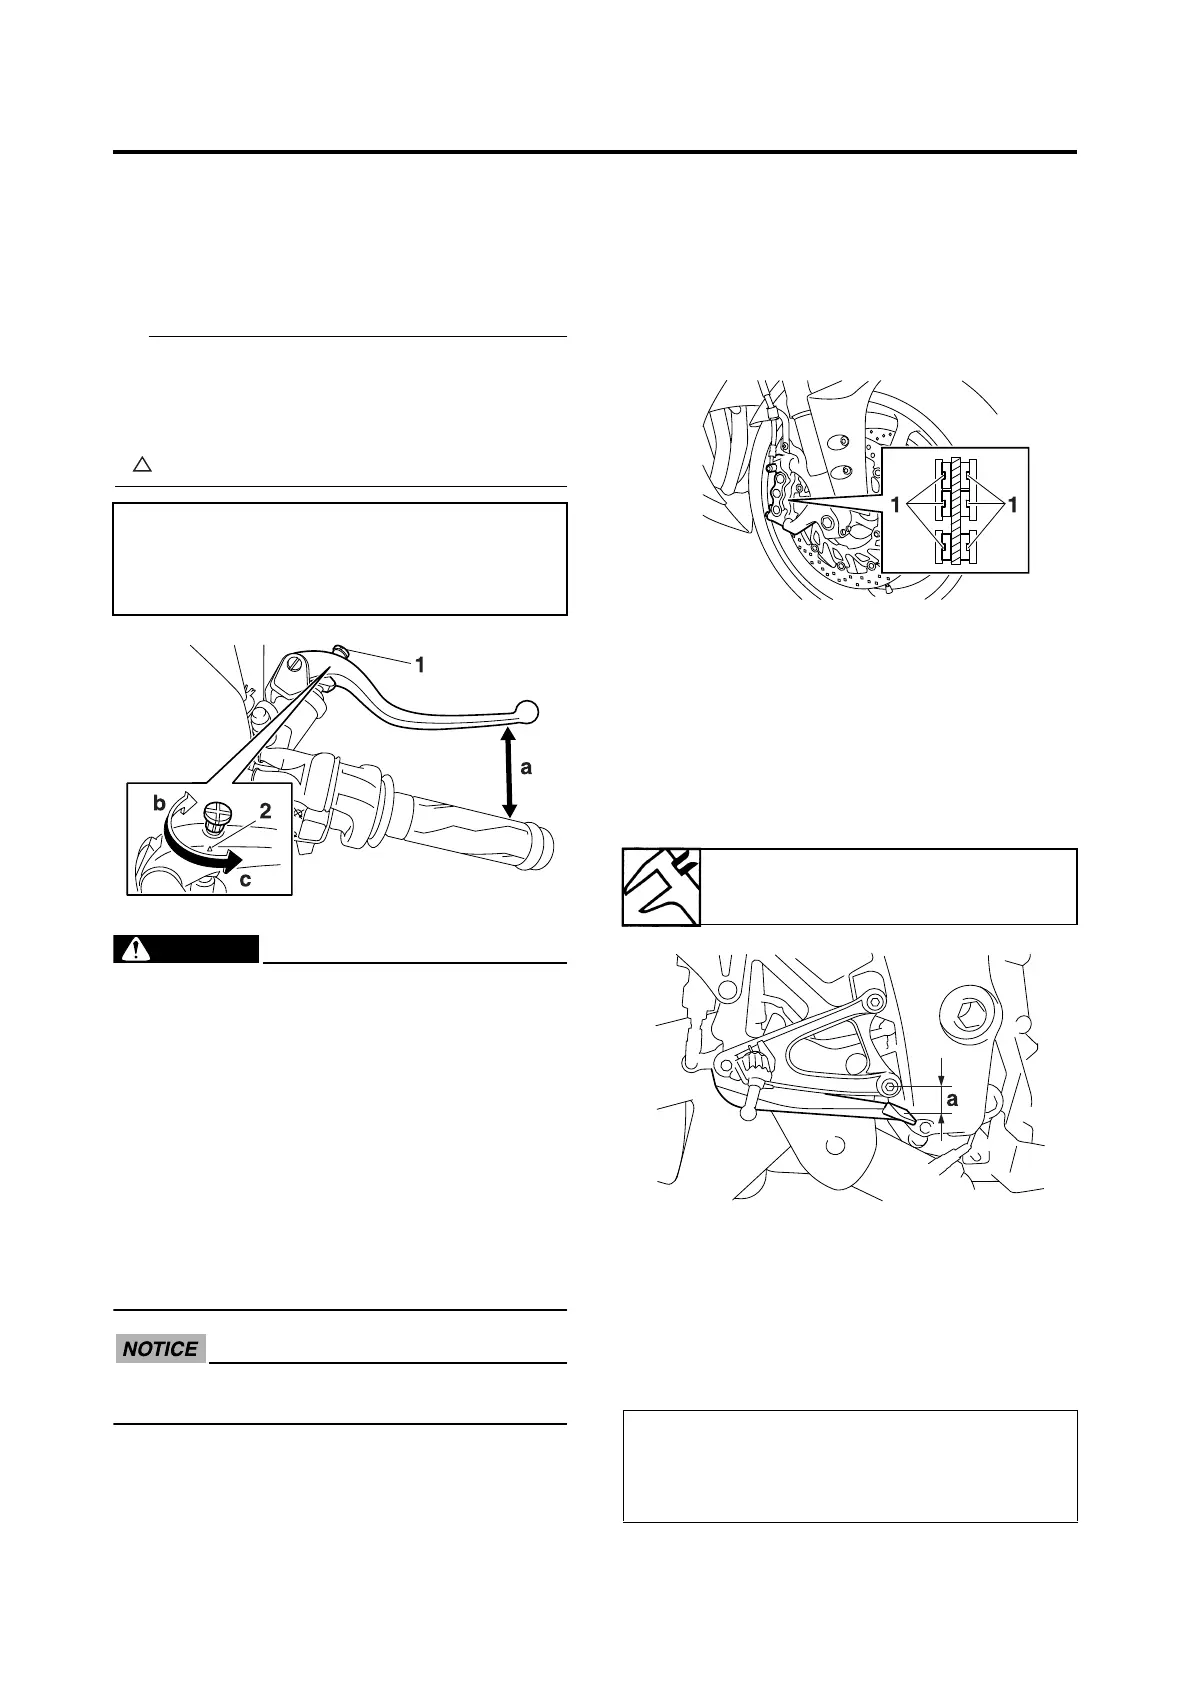
ADJUSTING THE FRONT DISC BRAKE
1. Adjust:
• Brake lever position
(distance “a” from the throttle grip to the
brake lever)
• While pushing the brake lever forward, turn
the adjusting dial “1” until the brake lever is in
the desired position.
• Adjust the groove of the adjusting dial to the
mark “2” at preferable position.
EWA13060
• After adjusting the brake lever position,
make sure the pin on the brake lever
holder is firmly inserted in the hole in the
adjusting dial.
• A soft or spongy feeling in the brake lever
can indicate the presence of air in the
brake system. Before the vehicle is oper-
ated, the air must be removed by bleeding
the brake system. Air in the brake system
will considerably reduce in loss of control
and possibly an accident. Therefore,
check and if necessary, bleed the brake
system.
ECA13490
After adjusting the brake lever position,
make sure there is no brake drag.
EAS21250
CHECKING THE FRONT BRAKE PADS
The following procedure applies to all of the
brake pads.
1. Operate the brake.
2. Check:
• Front brake pad
Wear indicators “1” almost touch the
brake disc → Replace the brake pads as
a set.
Refer to “FRONT BRAKE” on page 4-30.
EAS21190
ADJUSTING THE REAR DISC BRAKE
1. Check:
• Brake pedal position
(distance “a” from the center of the foot-
rest bracket bolt to the center of the brake
pedal)
Out of specification → Adjust.
2. Adjust:
• Brake pedal position
▼▼▼▼▼▼▼▼▼▼▼▼▼▼▼▼▼▼▼▼▼▼▼▼▼▼▼▼▼▼
a. Loosen the locknut “1”.
b. Turn the adjusting bolt “2” in direction “a” or
“b” until the specified brake pedal position
is obtained.
Direction “b”
Brake lever distance “a” is increased.
Direction “c”
Brake lever distance “a” is decreased.
Brake pedal position
12–18 mm (0.47–0.71 in)
Direction “a”
Brake pedal is raised.
Direction “b”
Brake pedal is lowered.

 Loading...