• ‘Subnet’: Enter the new subnet mask (in dotted-decimal notation) that you want to
assign the device.
• ‘Gateway’: Enter the IP address of the Default Gateway (if required).
5. Click Apply to save the new client.
6. Physically reset the device by powering it down and then up again. This enables the
device to receive its new networking parameters through the BootP process.
2.3 CLI
The procedure below describes how to assign an OAMP IP address, using CLI.
Note: Assigning an IP address using CLI is not applicable to MP-112 as this model
does not provide RS-232 serial interface.
To assign an OAMP IP address using CLI:
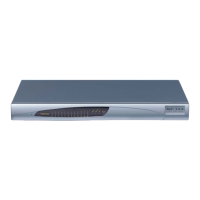
1. Connect the RS-232 port of the device to the serial communication port on your
computer. For more information, refer to the Hardware Installation Manual.
Figure 2-6: MP-11x Serial Connection with PC for CLI Communication
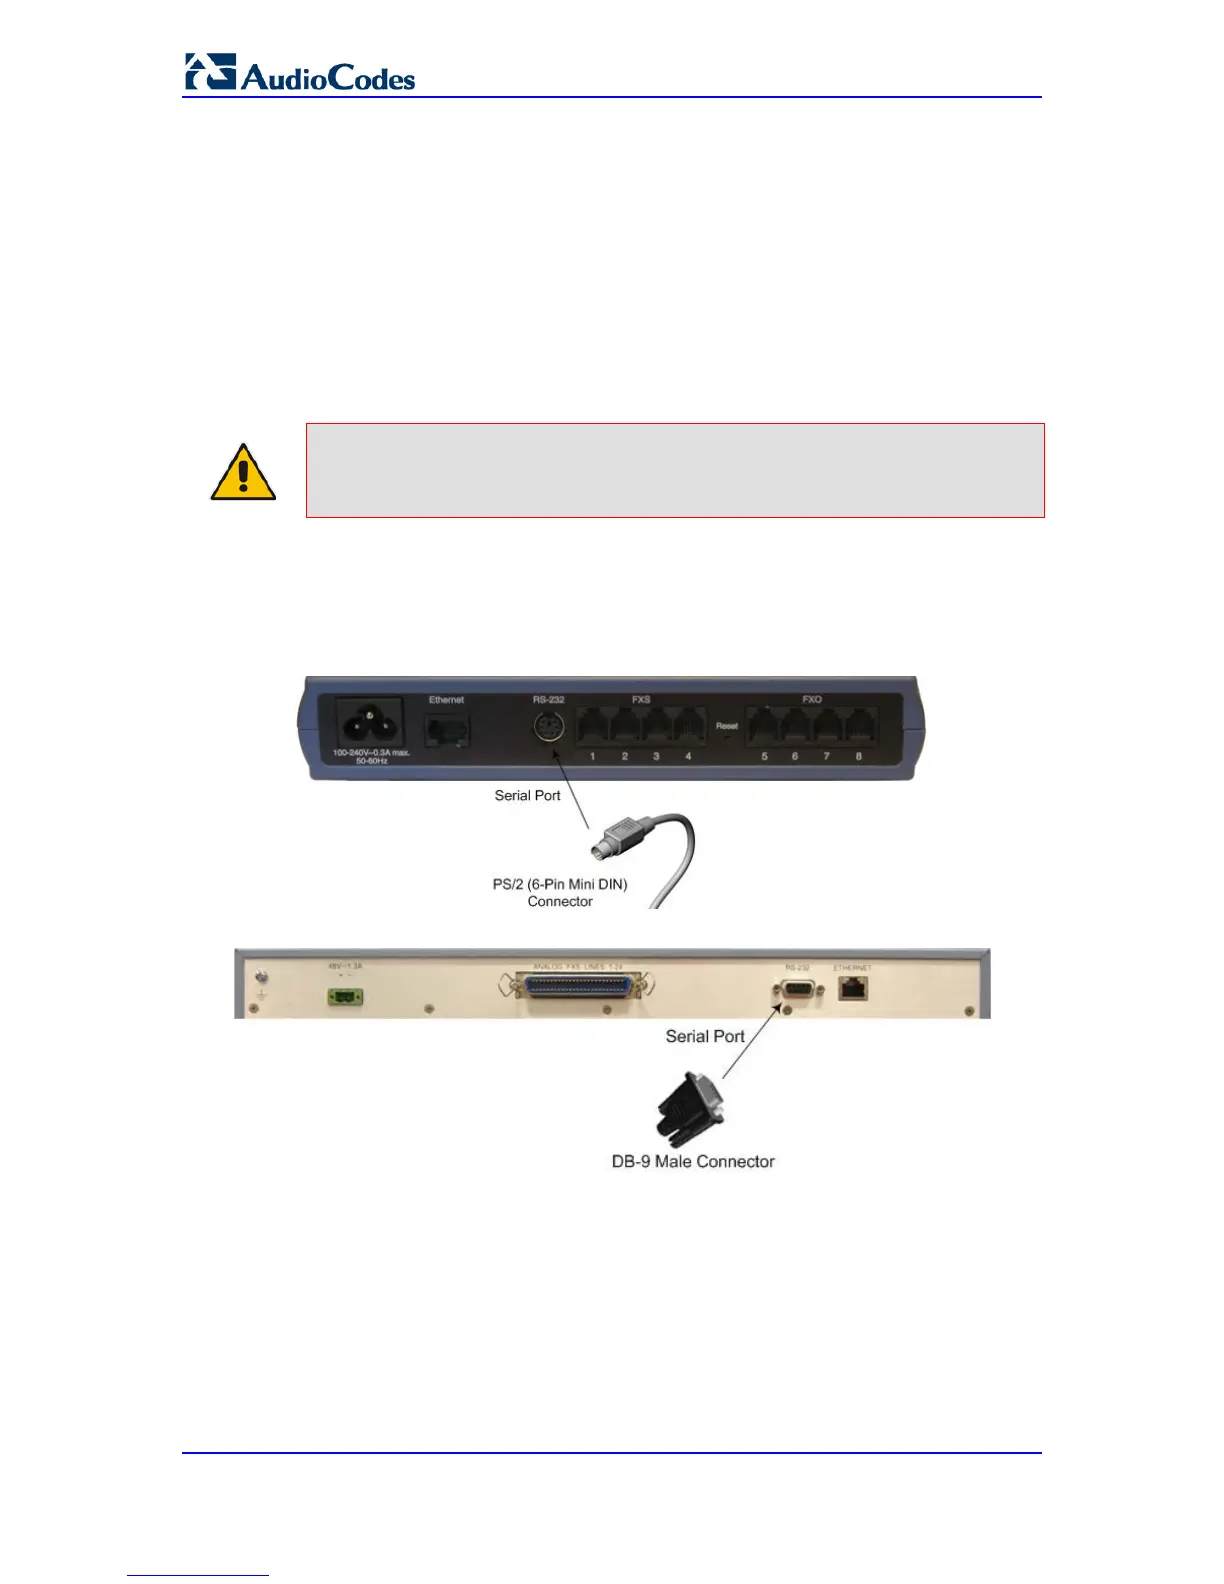
Figure 2-7: MP-124 Serial Connection with PC for CLI Communication
2. Establish serial communication with the device using a terminal emulator program
(such as HyperTerminal) with the following communication port settings:
• Baud Rate: 115,200 bps for MP-124 and 9,600 bps for MP-11x
• Data Bits: 8
• Parity: None
• Stop Bits: 1
• Flow Control: None

 Loading...