18
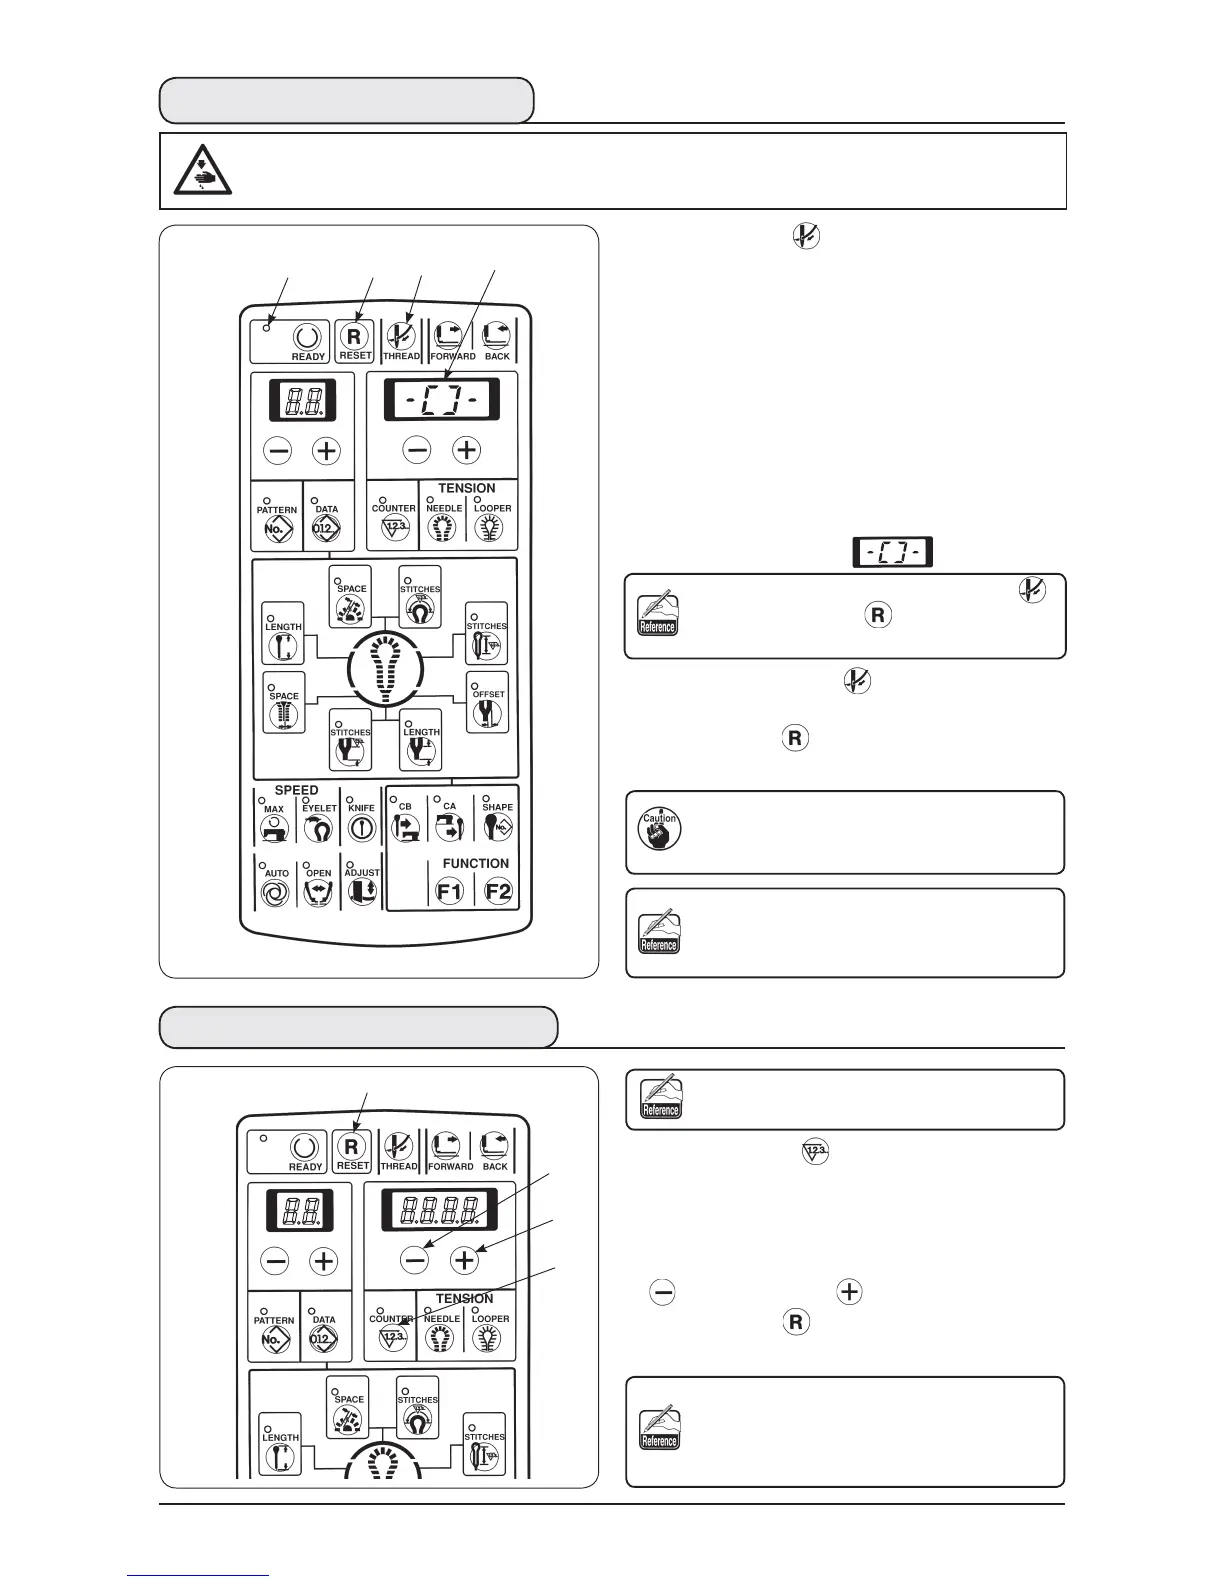
(5) Performing threading
1)
Press [THREAD ] key
when sewing LED
lights up and the sewing machine stops at the setting
position.
The needle bar rotates by 180˚ and threading
can be performed from the front side.
The presser comes down.
Change the cloth set position (memory switch
No.11=1), and the presser (feed base) moves to
the rear (origin position) when the front set is used.
The cloth cutting drive motor is turned to OFF,
and the cloth cutting dial can be turned by hand.
Display is shown as
.
In this state, keys other than [THREAD ]
key
and [RESET ] key
cannot be
accepted.
2) Press again [THREAD ] key
and the needle
bar only returns to its home position.
3) Press [RESET ] key
and
to
return to
their home positions.
The presser and the feed base operate.
Be careful that hands or fingers are not
being caught in them.
It is recommended to perform installing/removing
the presser unit after operating the aforementioned
step 1) and turning OFF the power.
(6) How to use the counter
The counter has been set to UP counter in
the state of delivery.
1)
Press [COUNTER ] key
to display the counter
value.
2) Every time the sewing machine completes one
cycle stitching, the value increases by 1 count.
3)
The counter value can be changed with [RIGHT
] key
or [RIGHT ] key
.
4) Press [RESET ] key
to return the counter
value to “0”.
The counter can be used as DOWN counter
as well.
(Refer to the item “10. Various functions : (6)
Change-over of the counter” P.43.)
WARNING :
Turn OFF the power after operation of steps 1) and 2), and replace needle, thread, cloth cutting
knife or knife holder.
 Loading...