39
ENGLISH
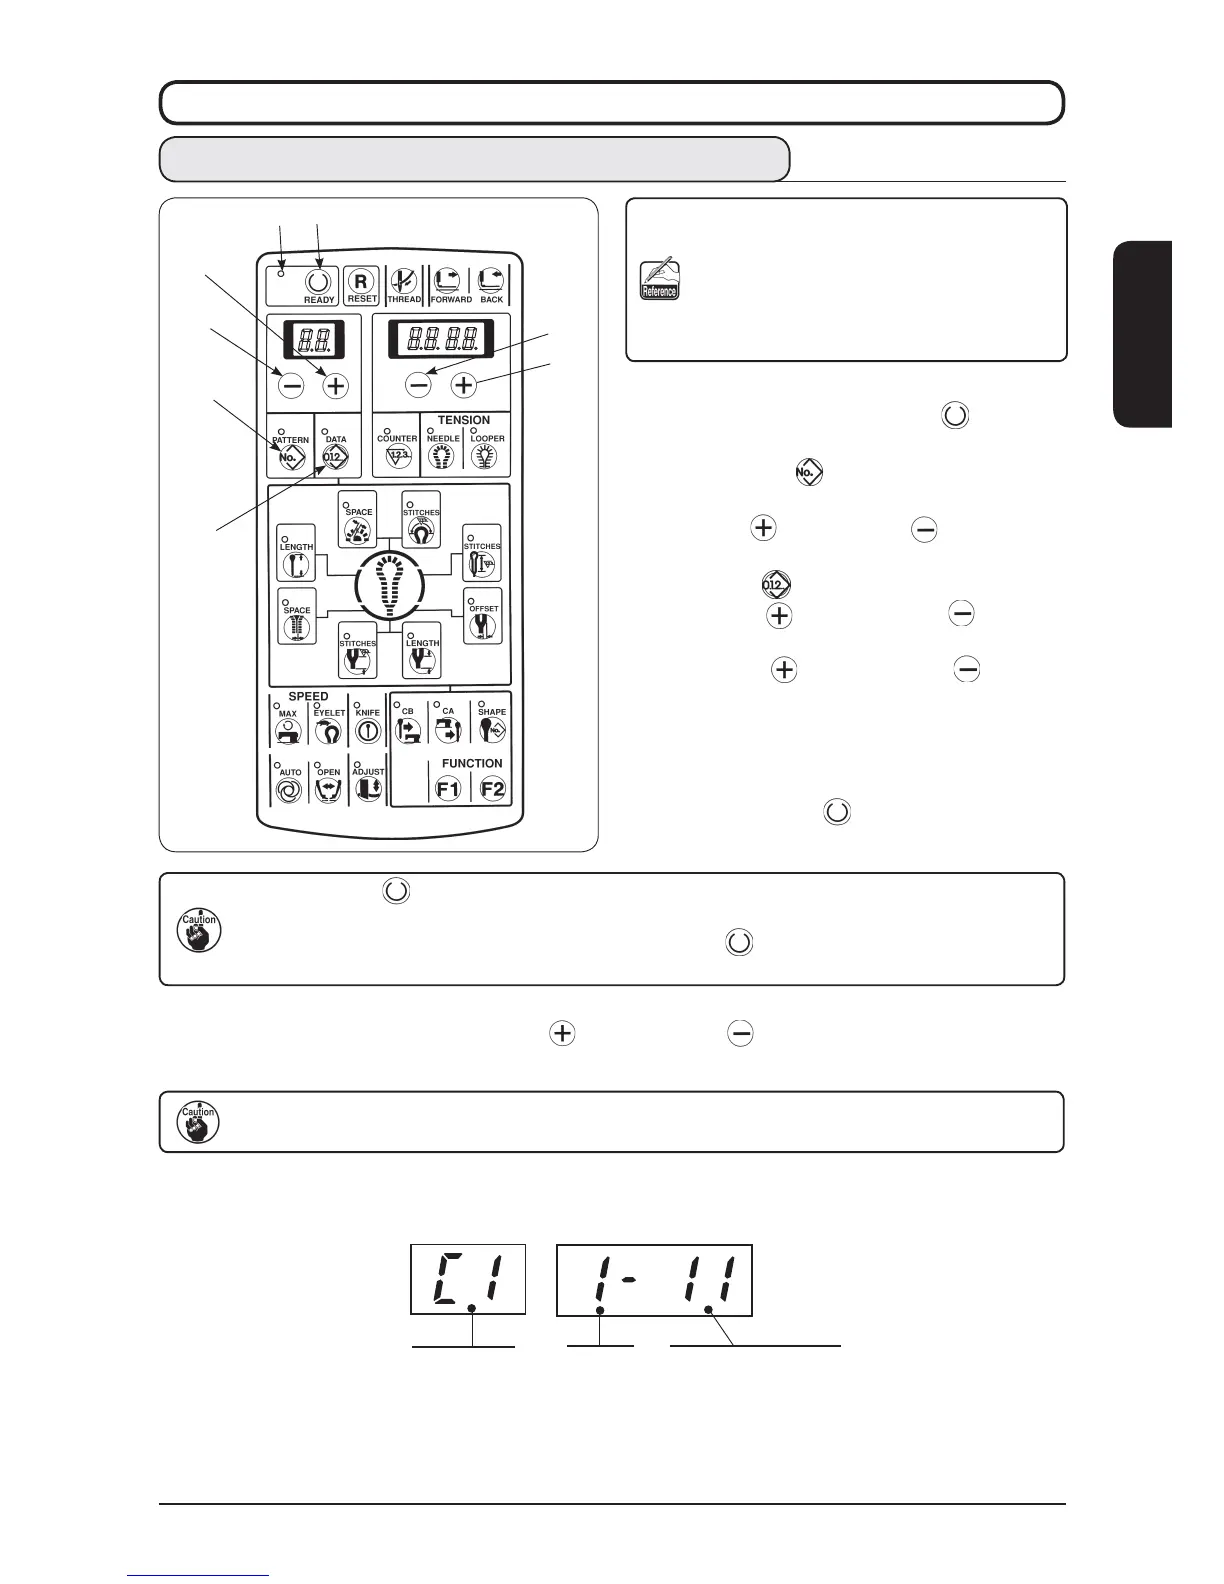
Example of display
Step 1 and pattern No. 11 of cycle sewing 1 (C1)
Cycle sewing
Step
Individual pattern No.
Program No. : C1 to C3 1 to 9 1 to 99
A,b,C,d,E,F
10. HOW TO USE THE VARIOUS FUNCTIONS
For the cycle sewing, three programs, C1
to C3, can be registered and maximum 15
different kinds of patterns (1 to 15 steps)
in the respective programs can be sewn in
order. (Set the data with individual patterns
in advance before resgistration.)
1) Make sure that sewing LED
has gone out.
When it lights up, press [READY ] key
to
make it go out.
2)
Press [PATTERN ] key
to display the pattern
No.
3)
Press [LEFT ] key
or [LEFT ] key
to select
the program No. desired to register. (C1 to C3)
4) Press [DATA ] key
.
5) Press [LEFT ] key
or [LEFT ] key
to
display the step of cycle sewing.
6) Press [RIGHT ] key
or [RIGHT ] key
to
set the individual pattern No.
7) Repeat the steps 5) to 6) and when the setting is
completed, display the next step and make the
display of individual pattern No. [ ][ ] (no light-up).
Then press [READY ] key
to light up sewing
LED
and the program is stored in memory.
• When [READY ] key
is pressed with the display of pattern No. [ ] [ ] (no light-up), the pattern
after the step will be deleted.
•
When changing the cycle sewing without pressing [READY ] key
or turning OFF the power, the
data is not stored in memory.
When you desire to return the pattern to the previous one or to skip to the next one at the time of stop of the
sewing machine during sewing, press [LEFT ] key
or [LEFT ] key
. (It is effective only when the
presser goes up.) Display of the pattern No. changes.
When the data is changed with each pattern, the contents registered in C1 to C3 also change.
So, be careful.
(1) Performing procedure of the cycle sewing
 Loading...