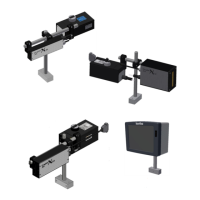
6.5 Mounting the control unit
1. Find a secure location, which is easily accessible for operators, to mount the control unit.
2. Locate the control unit on a position near the coding unit bracket and install the cable so that the
coding unit can rotate and move back and forth within the dimensions of the bracket.
3. Check whether all of the cables mentioned below are long enough to be connected to the connectors
on the bottom of the control unit. If not, correct it by relocating either the coding unit or the control
unit and/or extend the cable(s) if possible (the cable between the coding unit and control unit should
not be extended).
4. Mount the control unit on the determined location. Refer to Appendix B, for the dimensions of the
mounting holes.
5. Connect the interface cable to the host machine. Use the electrical diagram, Appendix D X3 Circuit
diagram (input) and X3 Circuit diagram (output), to determine which interface option suits best
with the host machine.
CAUTION:
Make sure the interface cable is no longer than 30m and is shielded. Using a cable longer than 30m
can cause EMC interference.
6. Connect the interface cable to the interface port (X03).
7. Connect the print request cable (X04 – e.g. photocell).
8. Connect the encoder cable (X01 - optional).
9. Connect the control/data cable, between the control unit and the coding unit (X02/X06 - fixed
length).
10. Connect the LAN cable (LAN - optional).
11. Connect the BCD cable (X07 – optional).
12. Connect the RS232 cable (X05 – optional).
13. Connect the Product detect cable (X08 – optional)
14. Connect the mains supply (X09).