7
9924880 Rev 2- 1/10/2014 - 2013 / 2014 RANGER XP 900 - 2014 RANGER XP 900 / CREW 900 Service Manual
© Copyright Polaris Sales Inc.
7.3
FRONT BEARING CARRIER
BEARING CARRIER INSPECTION /
REMOVAL
1. Elevate front of vehicle and safely support machine
under the frame area.
CAUTION
Serious injury may result if machine tips or falls. Be
sure machine is secure before beginning this service
procedure. Wear eye protection when removing
bearings and seals.
2. Check bearings for side play by grasping the top and
bottom of the tire firmly and checking for movement.
The tire should rotate smoothly without binding or
rough spots.
NOTE
Side to side play could also indicate tie rod end wear
and top to bottom play could also indicate upper or
lower ball joint wear. Be sure to closely inspect these
components if play is found.
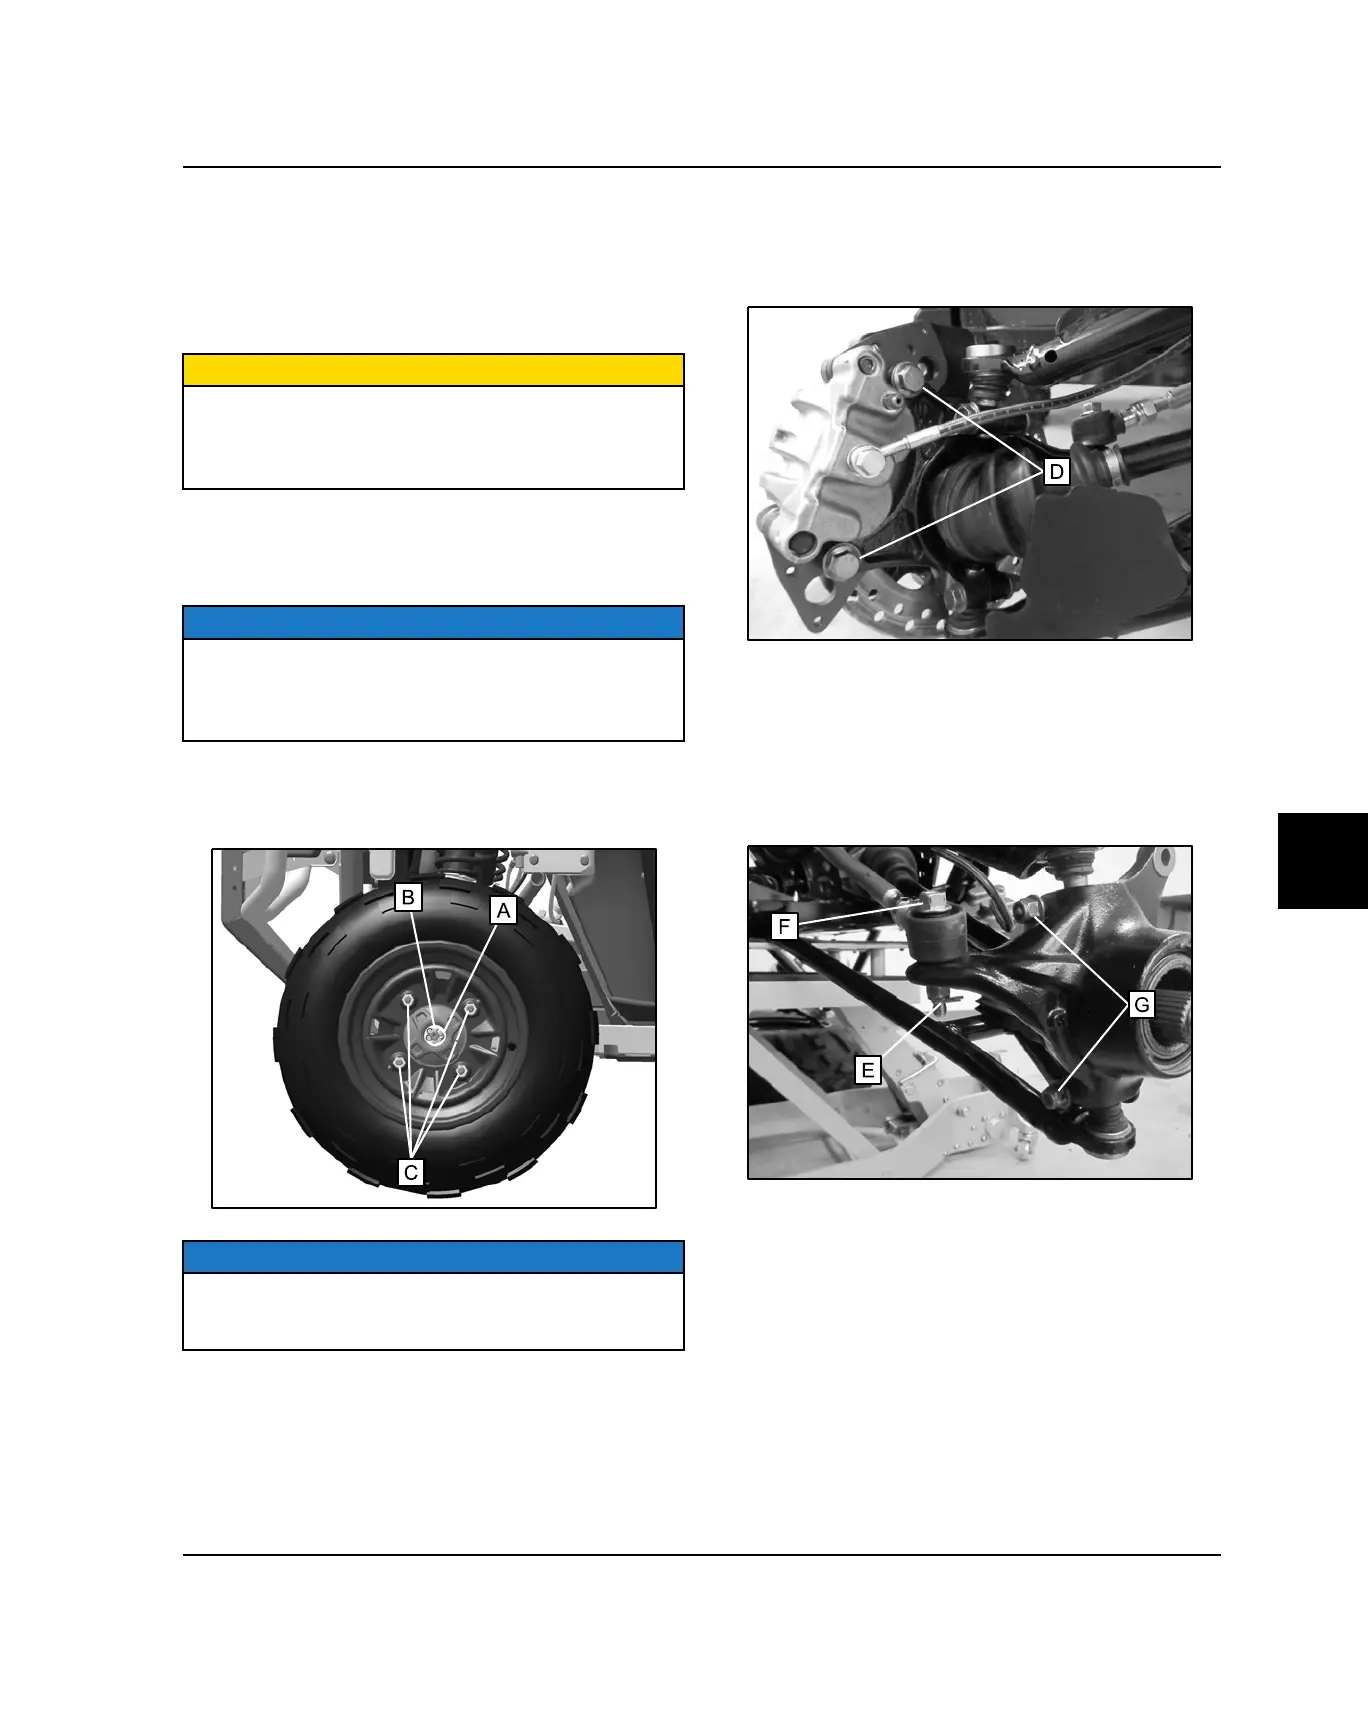
3. Remove the center cap and/or rubber dust cap.
Remove the cotter pin (A) and loosen the front wheel
hub castle nut (B).
NOTE
Lower the vehicle so the front wheels are on the ground
to prevent the wheel from spinning while attempting to
loosen the castle nut.
4. Lift the vehicle up again safely and remove the (4)
wheel nuts (C). Remove the front wheel from the
vehicle.
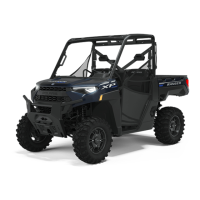
5. Remove the (2) brake caliper mounting bolts (D).
CAUTION: Do not hang caliper by the brake line.
Use wire to hang caliper to prevent damage to brake
line.
6. Remove the castle nut and (2) cone washers from
the front wheel hub assembly.
7. Remove the wheel hub and brake disc assembly.
8. Remove cotter pin (E). Using a 15mm socket,
remove the fastener (F) retaining the tie rod end to
the bearing carrier.
9. Remove the upper and lower ball joint pinch bolts
(G).
10. Using a soft faced hammer, lightly tap the bearing
carrier while removing the upper and lower ball joints
ends from the bearing carrier.
11. Pull the bearing carrier out to remove it from the
driveshaft.
12. Rotate bearing by hand and check for rough spots.
The bearing should rotate quietly and smoothly with
no detectable up and down movement and minimal
movement sideways between the inner and outer
races. Visually inspect for moisture, dirt or corrosion.
FINAL DRIVE
 Loading...