25—Automix
320 www.RolandUS.com Roland VS-2400CD Owner’s Manual
6. Press STOP when you’re done—Automix recording is automatically turned off.
7. Change the status of the Automix tracks you’ve just recorded to Read mode by:
• holding down AUTOMIX and pressing the AUTOMIX STATUS buttons for
your automated input, track, Aux bus or FX return channels until they’re lit
solidly.
• holding down SHIFT, pressing AUTOMIX, and setting each automated track to
Read mode.
8. Press ZERO or move the now line to the location at which you started mixing.
9. Press PLAY to hear your automation—if you made changes to the positions of your
faders during the writing of Automix data, you’ll see them move during playback.
10. To re-do your automation—or to record new Automix data—repeat Steps 2-9.
Realtime Punching of Automix Data
You can re-record sections of your automated mix by punching in new Automix data on
any Automix tracks that are set to Write mode.
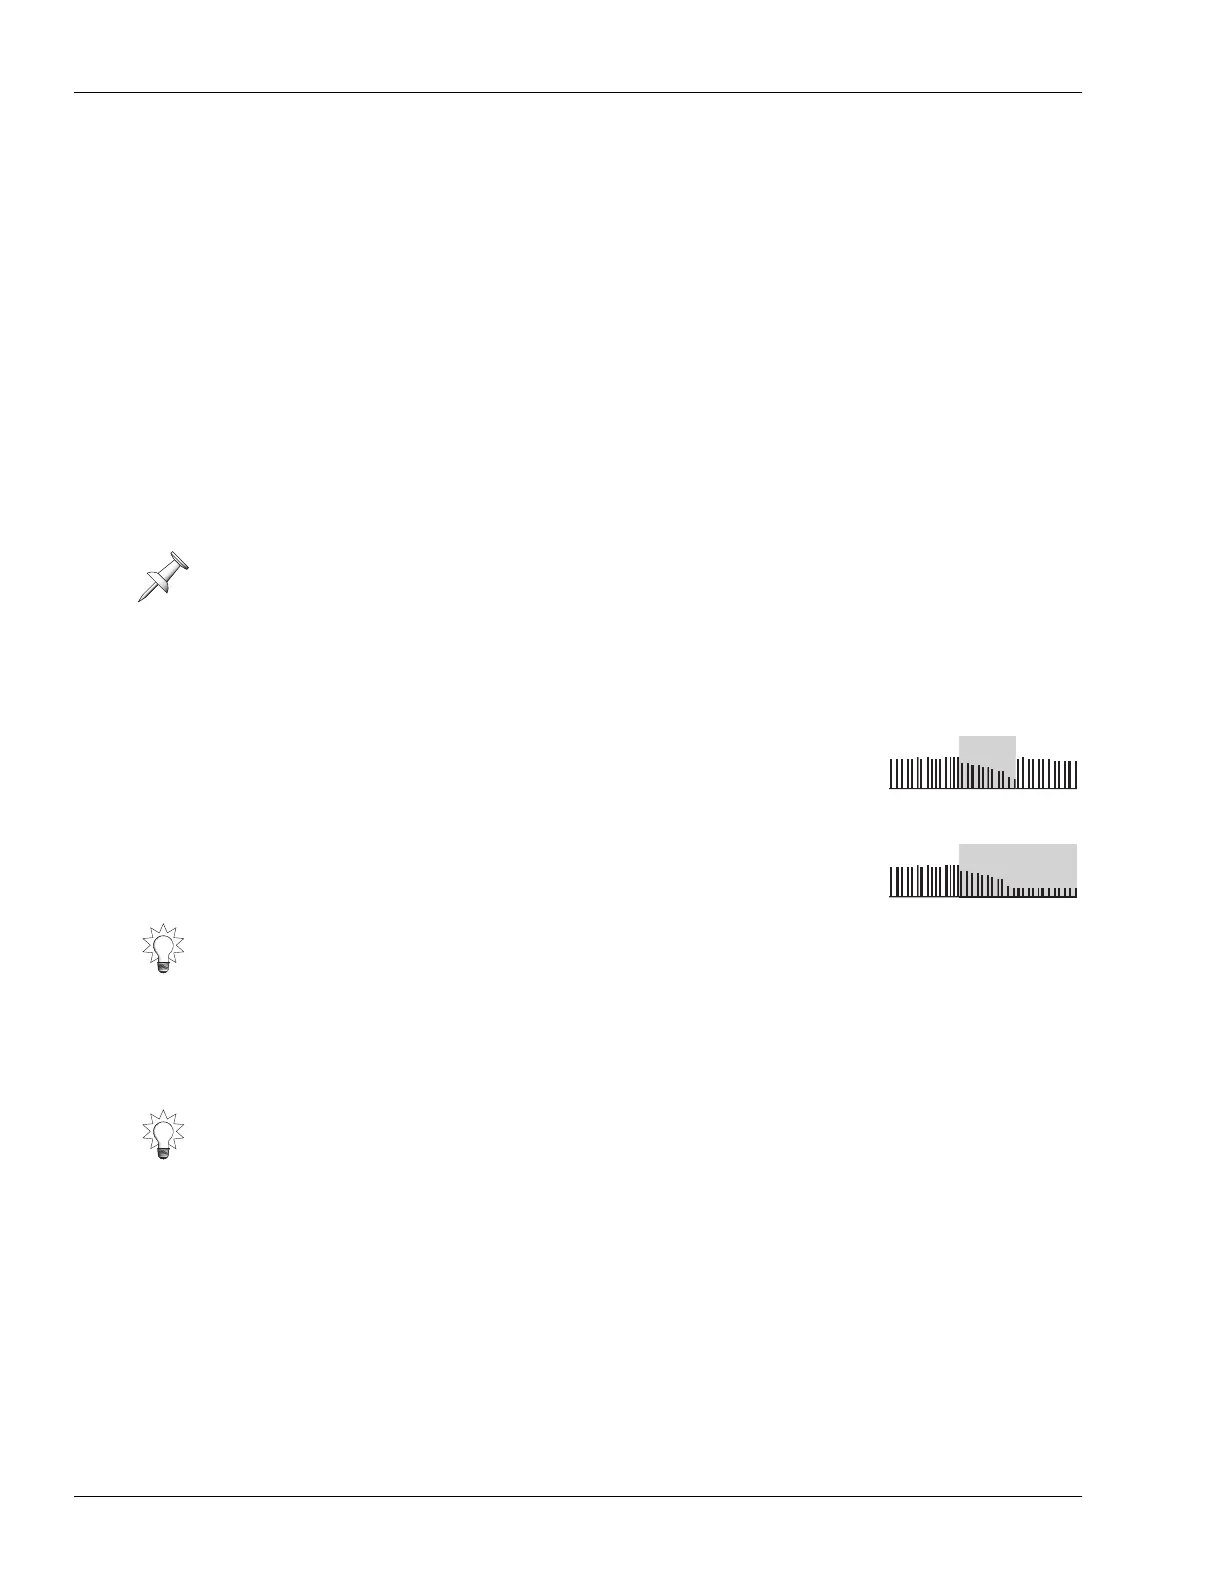
Merging New and Old Automix Data
When you insert new Automix data by punching in on an
Automix track, the AFTER PUNCH OUT parameter on the
AUTOMIX screen lets you determine what happens to
parameter values after you punch out. When you set it to:
•
Return
—parameters return to their previously recorded
values after the punch-out.
•
Keep
—parameter values at the end of the punch-out
remain in effect for the rest of the project, or until you
perform another punch-in later in the project.
When you set AFTER PUNCH OUT to Return, the RETURN TIME parameter helps
smooth the transition between the punch’s final parameter values and those already
recorded after the punch ends. You can set RETURN TIME to a value between 0ms and
1000ms—lower settings make transitions more abrupt.
Automix offers two different ways to punch—you can use either method. The idea is to
choose the method that requires the fewest button-presses for what you’re doing:
•
AUTOMIX STATUS Button Punching
—Turn on Automix recording and toggle the
desired Automix track(s) in and out of Write mode as the project plays.
•
AUTOMIX Button Punching
—Set the desired Automix tracks to Write mode, and
toggle Automix recording on and off as the project plays.
If you want to redo a section of automation at the very beginning of the project, use the
recording procedure described on Page 319 and press STOP where you want the newly
recorded automation to end.
Set AFTER PUNCH OUT to Return when you want to insert some Automix changes
without affecting the rest of your automation data. Set it to Keep when you want the
punch-in to change parameter values for the remainder of the project.
If you decide at a later time that a punch-out transition is too noticeable, you can use
the GRADATION Automix editing operation to smooth it out.
Punch
Punch
Punch with Return
Punch with Keep
VS2400OMUS.book 320 ページ 2006年2月28日 火曜日 午前11時12分

 Loading...