Roland VS-2400CD Owner’s Manual www.RolandUS.com 89
7—Project and Drive Operations
This chapter describes the various project- and hard drive-related activities you can
perform from the VS-2400CD’s PROJECT menu screens. Most everything that has to do
with an entire project can be found on this menu.
Navigating the PROJECT Menu Screens
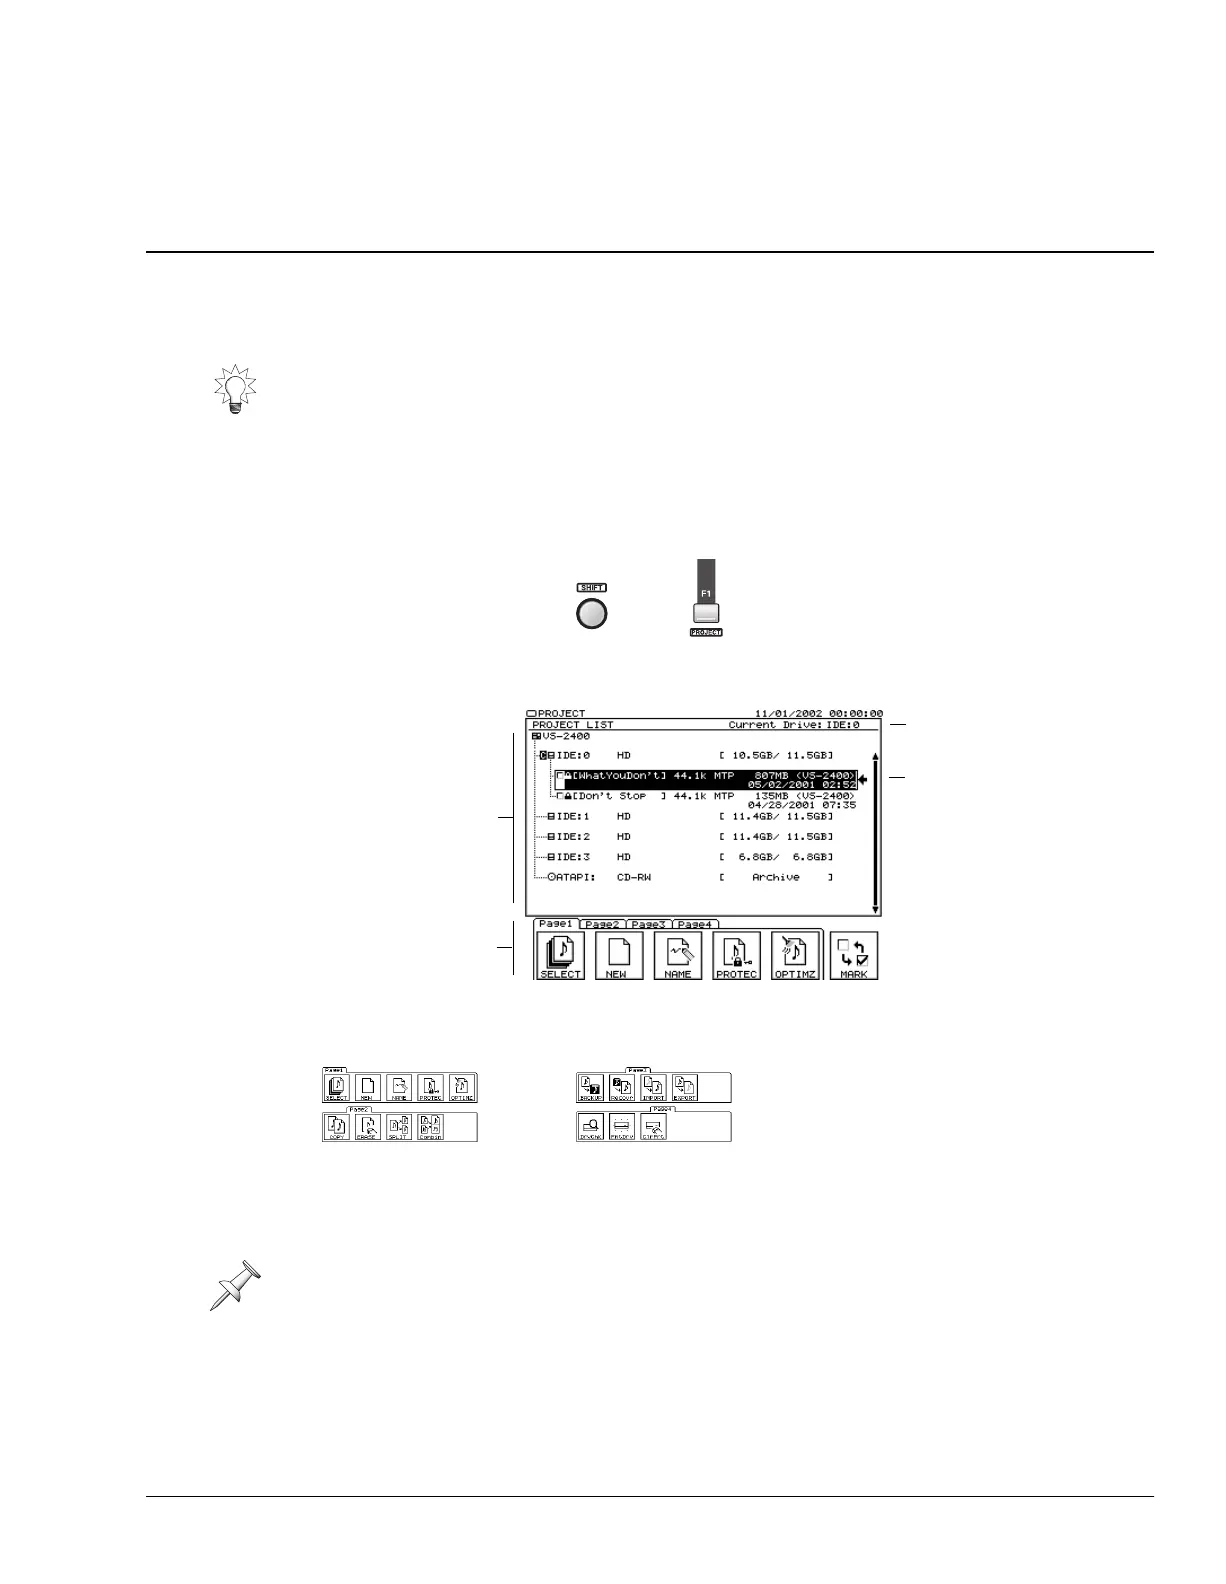
1. Hold down SHIFT and press F1 (PROJECT).
2. The VS-2400CD scans your hard drive and CD-RW drive. When it’s done, the first
PROJECT menu screen appears.
To perform a project- or hard drive-related operation, press the operation’s F button,
shown on a tabbed layer at the bottom of the screen.
Working with the PROJECT LIST
You can scroll through the items in the project list by pressing
or
.
The project list shows all your available drives. Your internal drives are labeled as
“IDE:(partition number).” As shipped from the factory, these partitions are IDE:0,
IDE:1, IDE:2 and IDE:3. Your CD-R/RW drive is shown as “ATAPI.”
You can quickly save the latest changes you’ve made to the currently loaded project by
holding down SHIFT and pressing ZERO•STORE. We recommend you do this often.
As noted in “How a VS-2400CD Hard Drive Organizes Data” on Page 83, each hard
drive partition is called a “drive.”
+
The project list
occupies the top of
every PROJECT
menu screen.
Tabbed layers
of F Buttons
Currently
selected drive
The project that’s
currently loaded in
the VS-2400CD’s
memory is shown in
white type on a
black background in
the project list.
If you’re looking for an operation
whose F button is currently
hidden, press PAGE repeatedly
until its F button appears.
VS2400OMUS.book 89 ページ 2006年2月28日 火曜日 午前11時12分

 Loading...