Scan
3-18 Xerox 4112/4127 Copier/Printer
User Guide
3. Select the applicable option:
• Original Orientation... (See Chapter 2, Original Orientation
on page 2-31)
• Original Size... (See Chapter 2, Original Size
on page 2-25)
• Edge Erase... (See Edge Erase
on page 3-18)
• Book Scanning... (See Book Scanning
on page 3-19)
• Reduce/Enlarge... (See Reduce/Enlarge
on page 3-20)
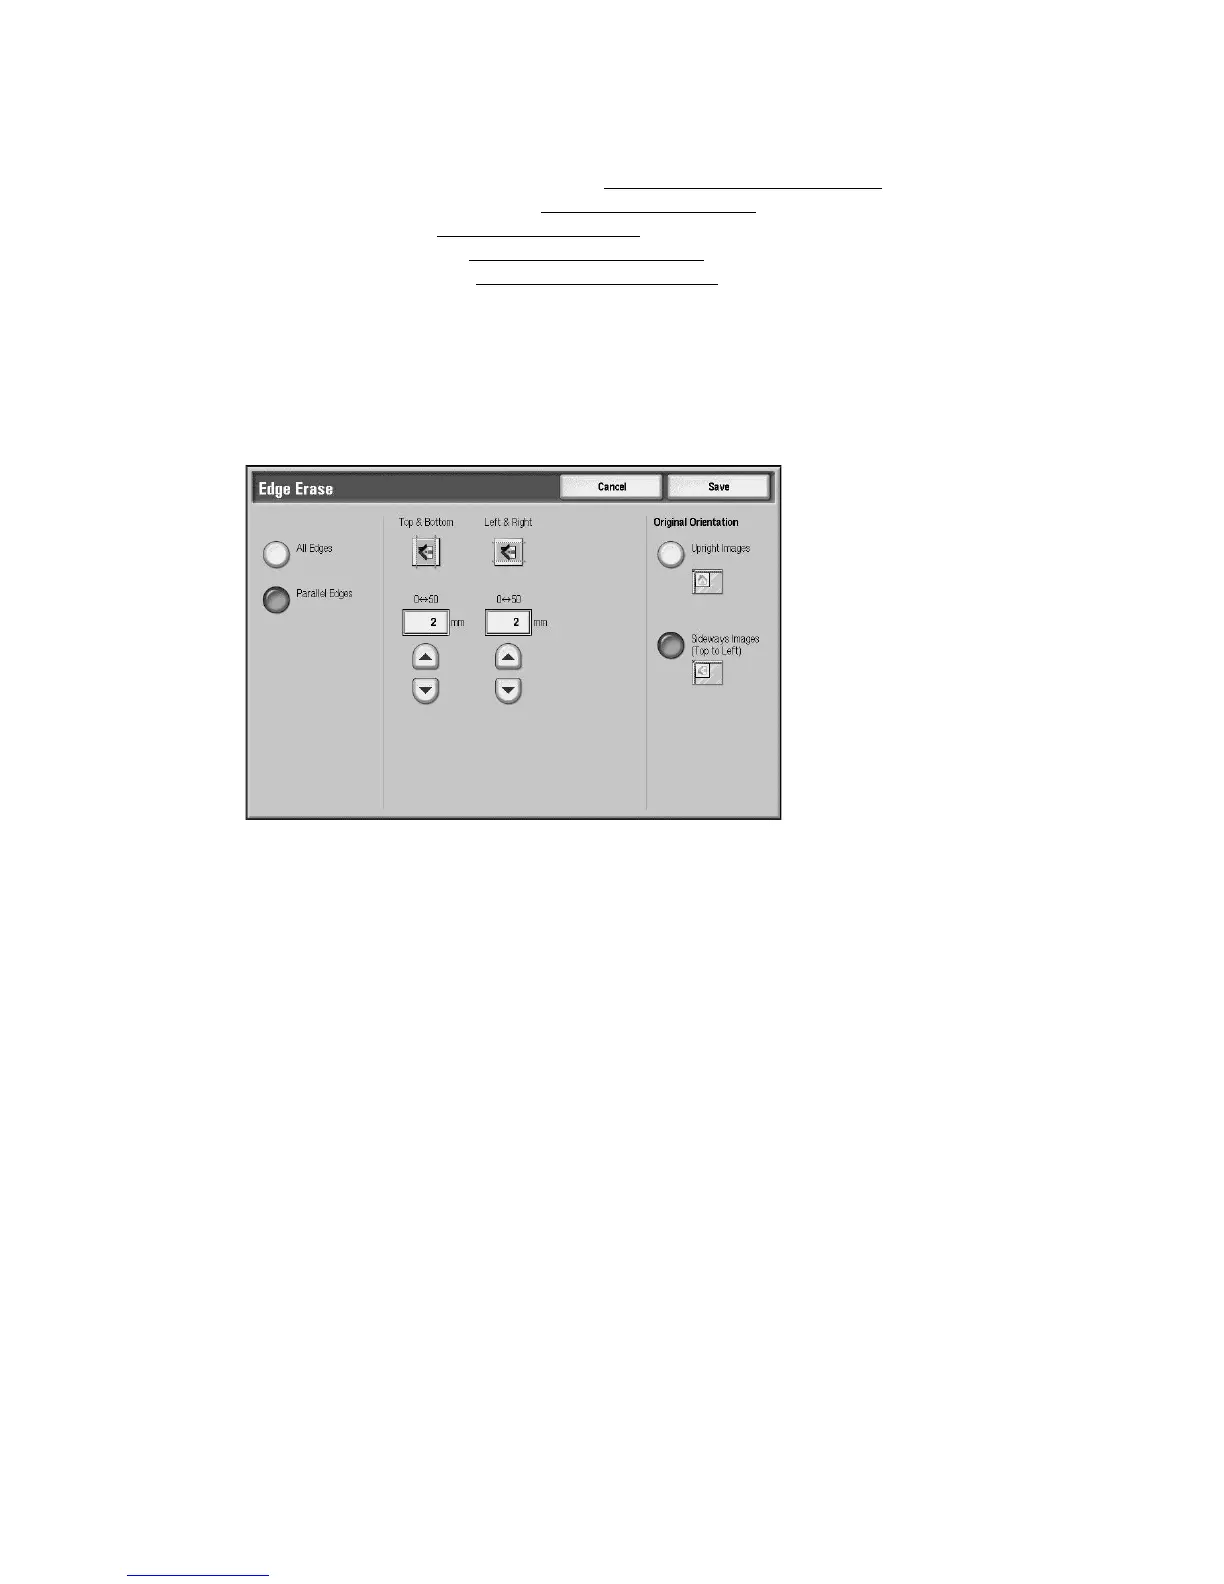
Edge Erase
When scanning with the document-feeder in the open position or from a book, you can remove
the black shadows along the edges using the Edge Erase feature.
1. From the Layout Adjustments tab, select Edge Erase...
2. Select All Edges or Parallel Edges:
• All Edges: Erases the same amount of length from all four edges of your document. The
edge erase amount is specified by the System Administrator. If you do not want to
erase any edges, select [Parallel Edges] and specify 0 for both the top and bottom and
left and right edges.
• Parallel Edges: Allows you to specify the lengths to be erased from the top and bottom
and left and right edges of your document. Up to 50 mm (2 inches) can be specified to
each field.
3. For parallel edges, you can use the up or down buttons to set the values.
4. Select the applicable Original Orientation:
• Upright Images - Selects the vertical orientation, where the top of the document is
orientated towards the back of the machine.
• Sideways Images - Selects the horizontal orientation, where the top of the document is
orientated towards the left of the machine.
5. Select Save.
 Loading...