Scan
Xerox 4112/4127 Copier/Printer 3-31
User Guide
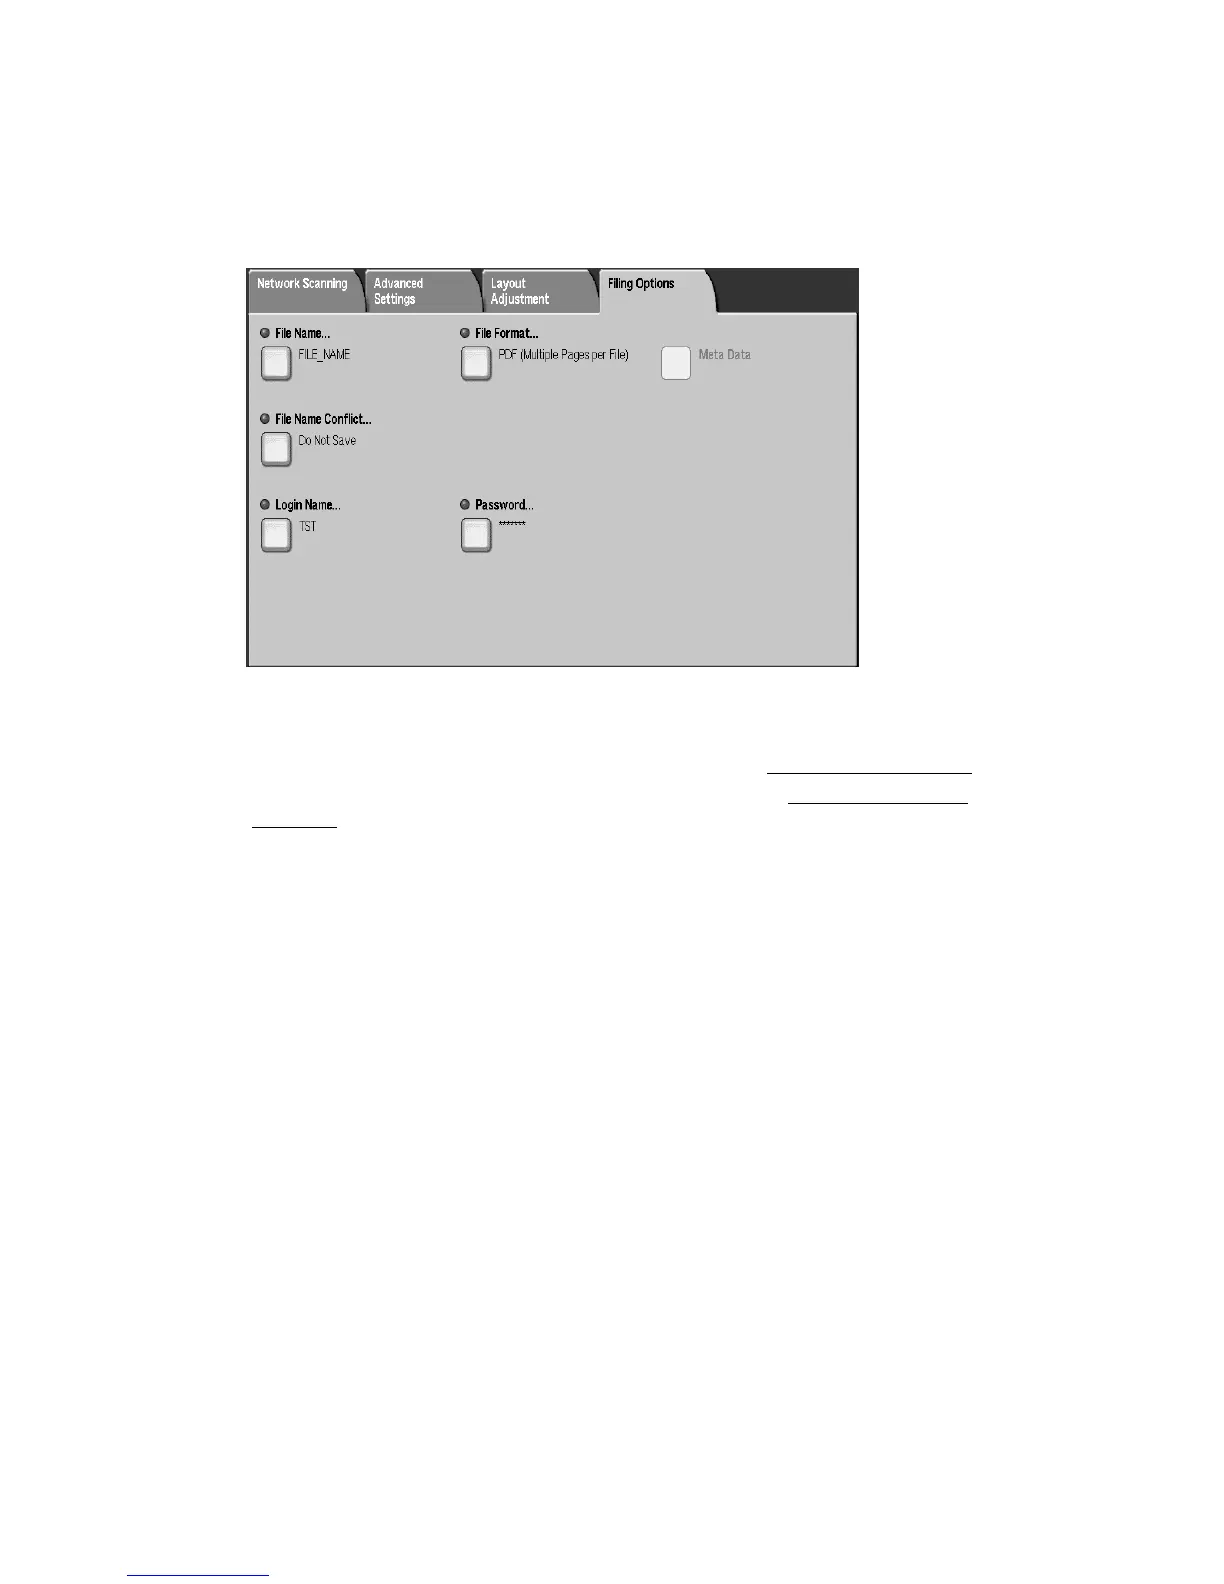
Filing Options tab
You can use the Filing Options tab to set and save the various filing options.
1. Select the Filing Options tab.
2. Select File Name... to set the name of the scanned file using the displayed keyboard.
3. Select Save.
4. Select File Format... to set the various formats available. (See File Format
on page 3-31)
5. Select File Name Conflict... to resolve a File Name conflict. (See File Name Conflict
on
page 3-33)
6. Enter Login Name password.
File Format
You can select the applicable file scanning format by using the File Format option.
Note
The number of format features available varies between formats. If a feature is not available
for the specified format, it is either not displayed or displayed as ‘greyed-out’ and not selectable.
1. From the Filing Options tab, select File Format...
2. Select the applicable file format:
• TIFF/JPEG Auto Select: Automatically saves scanned data as TIFF or JPEG files. Full
color and grayscale scanned images are stored in JPEG format, and monochrome
scanned images are saved in TIFF format.
• PDF Images Multiple Pages per File: Saves multiple pages into a single file in PDF
format.
• PDF/A: Saves scanned data in the PDF/A format; PDF/A format is used primarily for
archiving and long-term preservation.
•Optimize PDF for fast web: If you select one of the PDF file format options, the
Optimize PDF for Fast Web View option is available for selection.
Notes
•The Optimize PDF for Fast Web View feature allows the user to open and view the
first page of a multi-page PDF document within a web browser, while the remainder of
the document continues to load in the background. This may increase the overall file
 Loading...