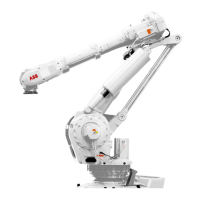
5 Calibration information
5.5. Updating revolution counters
4153HAC023082-001 Revision: E
© Copyright 2004-2008 ABB. All rights reserved.
5.5. Updating revolution counters
General
This section details how to perform a rough calibration of each robot axis, i.e. updating the
revolution counter value for each axis, using the pendant.
Step 1 - Manually running the robot to the calibration position
This procedure details the first step when updating the revolution counter; manually running
the robot to the calibration position.
Correct calibration position of axis 4 and 6
When running the robot to calibration position, it is extremely important to make sure that
axes 4 and 6 of the below mentioned robots are positioned correctly. The axes can be
calibrated at the wrong turn, resulting in wrong calibrated robot.
Make sure the axes are positioned according to the correct calibration values, not only
according to the calibration marks. The correct values are found on a label, located either on
the lower arm or underneath the flange plate on the base.
At delivery the robot is in the correct position, do NOT rotate axis 4 or 6 at power up before
the revolution counters are updated.
If one of the below mentioned axes are rotated one or more turns from its calibration position
before updating the revolution counter, the correct calibration position will be lost due to
uneven gear ratio. This affects the following robots:
If the calibration marks seem to be wrong (even if the motor calibration data is correct), try
to rotate the axis one turn, update the revolution counter and check the calibration marks
again (try both directions, if needed).
Action Note
1. Select axis-by-axis motion mode.
2. Jog the robot to place the calibration marks
within the tolerance zone.
IRB 140, 1400, 2400, 4400, 6600ID/
6650ID: Axes 5 and 6 must be positioned
together!
Shown in section Calibration scales and
correct axis position on page 412.
3. When all axes are positioned, store the
revolution counter settings.
Detailed in section:
Step 2 - Storing the revolution counter
setting with the TPU on page 416
(RobotWare 4.0).
Step 2 - Storing the revolution counter
setting with the FlexPendant on page 417
(RobotWare 5.0).
Robot variant Axis 4 Axis 6
IRB6600-175/2.55 Yes No
IRB6600/6650 / others Yes Yes
IRB6600ID/6650ID Yes No
Continues on next page

 Loading...