Battery
Charging process display
3 Valid for: hybrid vehicles
Fig. 190
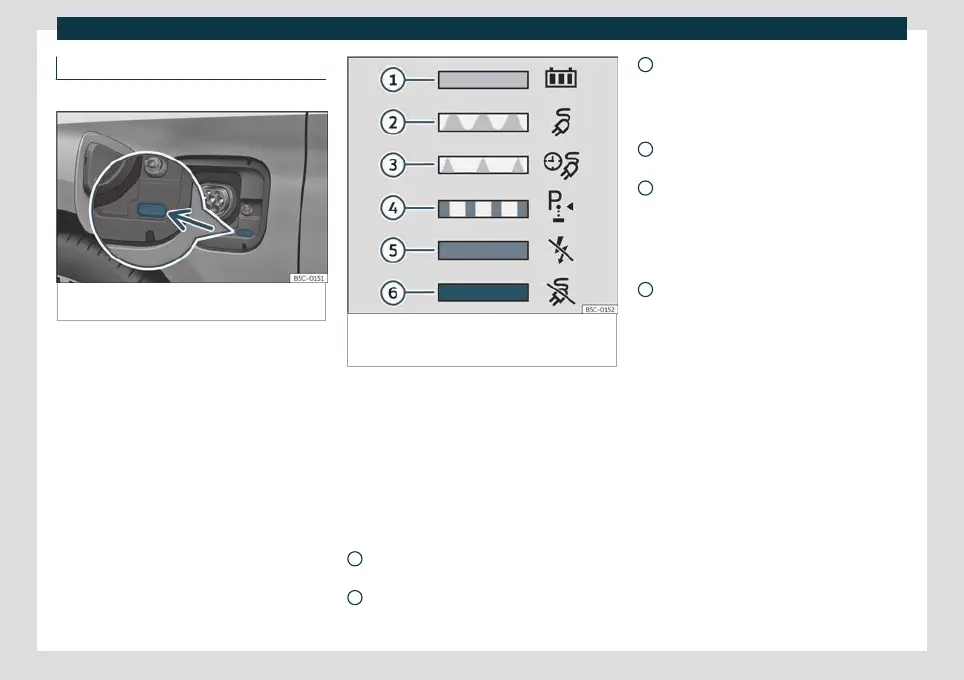
Behind the cover of the battery charging
socket: charging process display
Fig. 191
On the inside of the cover of the battery
charging socket: sticker with information on the
charging process display.
An LED light on the charging socket
›
›
›
Fig. 190 (arrow) shows the status of the
charging process.
A sticker on the battery charging cover pro-
vides information on the meaning of the
LEDs
›››
Fig. 191 .
charging process displays:
Green LED
›››
Fig. 191 :
Always on: Charge completed success-
fully.
Turn signals: The high-voltage battery is
charging.
1
2
Short flashes: Programmed charging is
activ
e. The char
ging process has not yet
started.
Yellow LED
›››
Fig. 191 :
Turn signals: The parking lock P has not
been enabled.
Always on: No electrical network has
been detected. Arrange an inspection of
the power supply and network. Seek pro-
fessional assistance.
Red LED
›››
Fig. 191 :
Turn signals: Error in the charging sys-
tem. The charging process cannot start
or has paused.
Always on: The charging connector has
not been locked. Unplug the charging
connector and plug it back in to the
charging socket, making sure it is proper-
ly inserted. If the problem persists, check
the compatibility of the cable or ask a
professional for help.
Charging socket lighting
In the dark, the charging socket's side light-
ing (white LED) can facilitate orientation in
the vehicle:
Ignition
●
The vehicle has been unlocked.
●
OR: The charging connector has been un-
plugged from the charging socket.
3
4
5
6
306

 Loading...