Serial port Configure RealPort mode using the Digi Navigator
Digi Connect EZ Mini User Guide
154
1. Make sure Digi Navigator is installed and the Connect EZ is powered and connected to your
local network or computer with an Ethernet cable.
2. Launch the Digi Navigator.
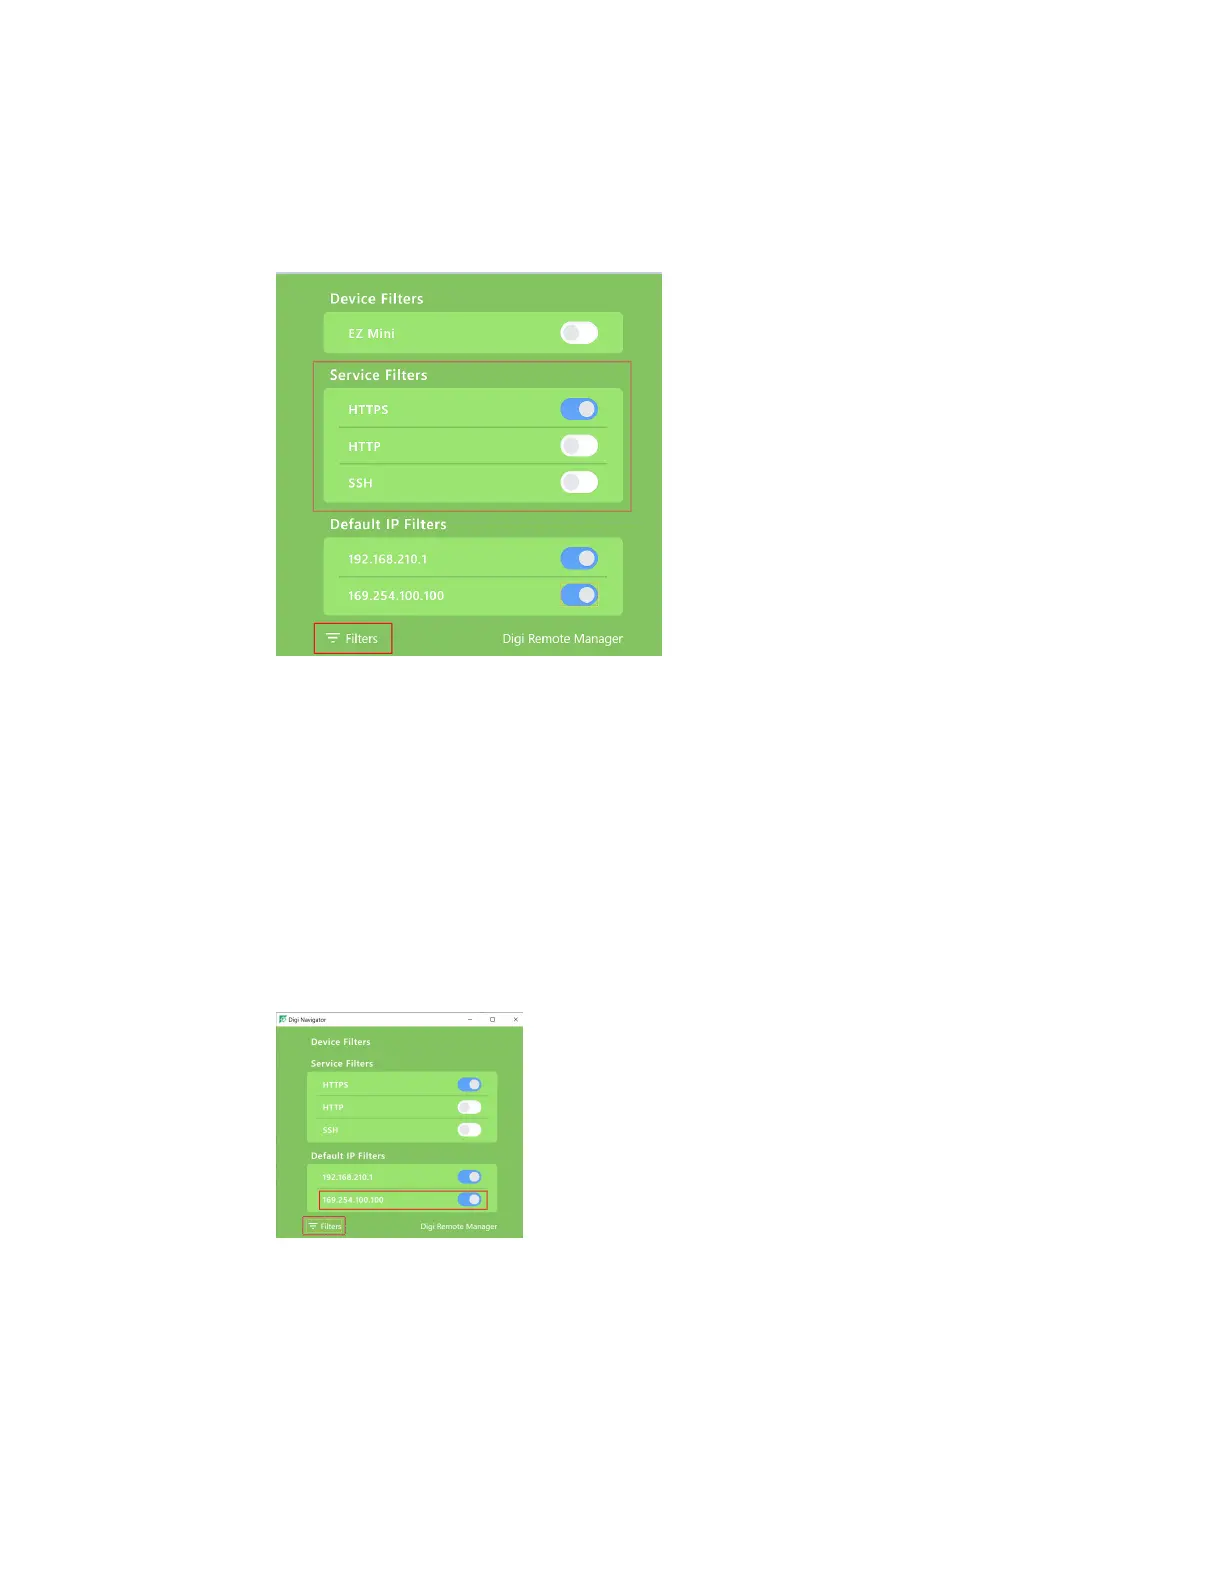
3. Click Filters from the green toolbar to expand the toolbar and display the filter options.
4. In the Services Filters section, click the enable button to enable the services that you want to
use to find an IPaddress.
5. Click Filters at the bottom of the expanded toolbar to minimize the toolbar and hide the filters.
Use the autodiscovery protocol to discover a device
If a Digi device is directly connected to a computer or connected to a network with no DHCP server,
you can assign an IPaddress to the Digi device so that the device is automatically discovered.
1. Make sure Digi Navigator is installed and the Connect EZ is powered and connected to your
local network or computer with an Ethernet cable.
2. Launch the Digi Navigator.
3. Click Filters from the green toolbar to expand the toolbar and display the filter options.
4. In the Default IP Filters section, click the enable button for the 169.254.100.100 option.
5. Click Filters at the bottom of the expanded toolbar to minimize the toolbar and hide the filters.
6. Log into the device and set a unique IP address for the device that is appropriate for the
network on which it will be deployed. See Define a static IPaddress.
 Loading...