Appendix A
154 M-Max Series Adjustable Frequency Drive MN04020003E—October 2013 www.eaton.com
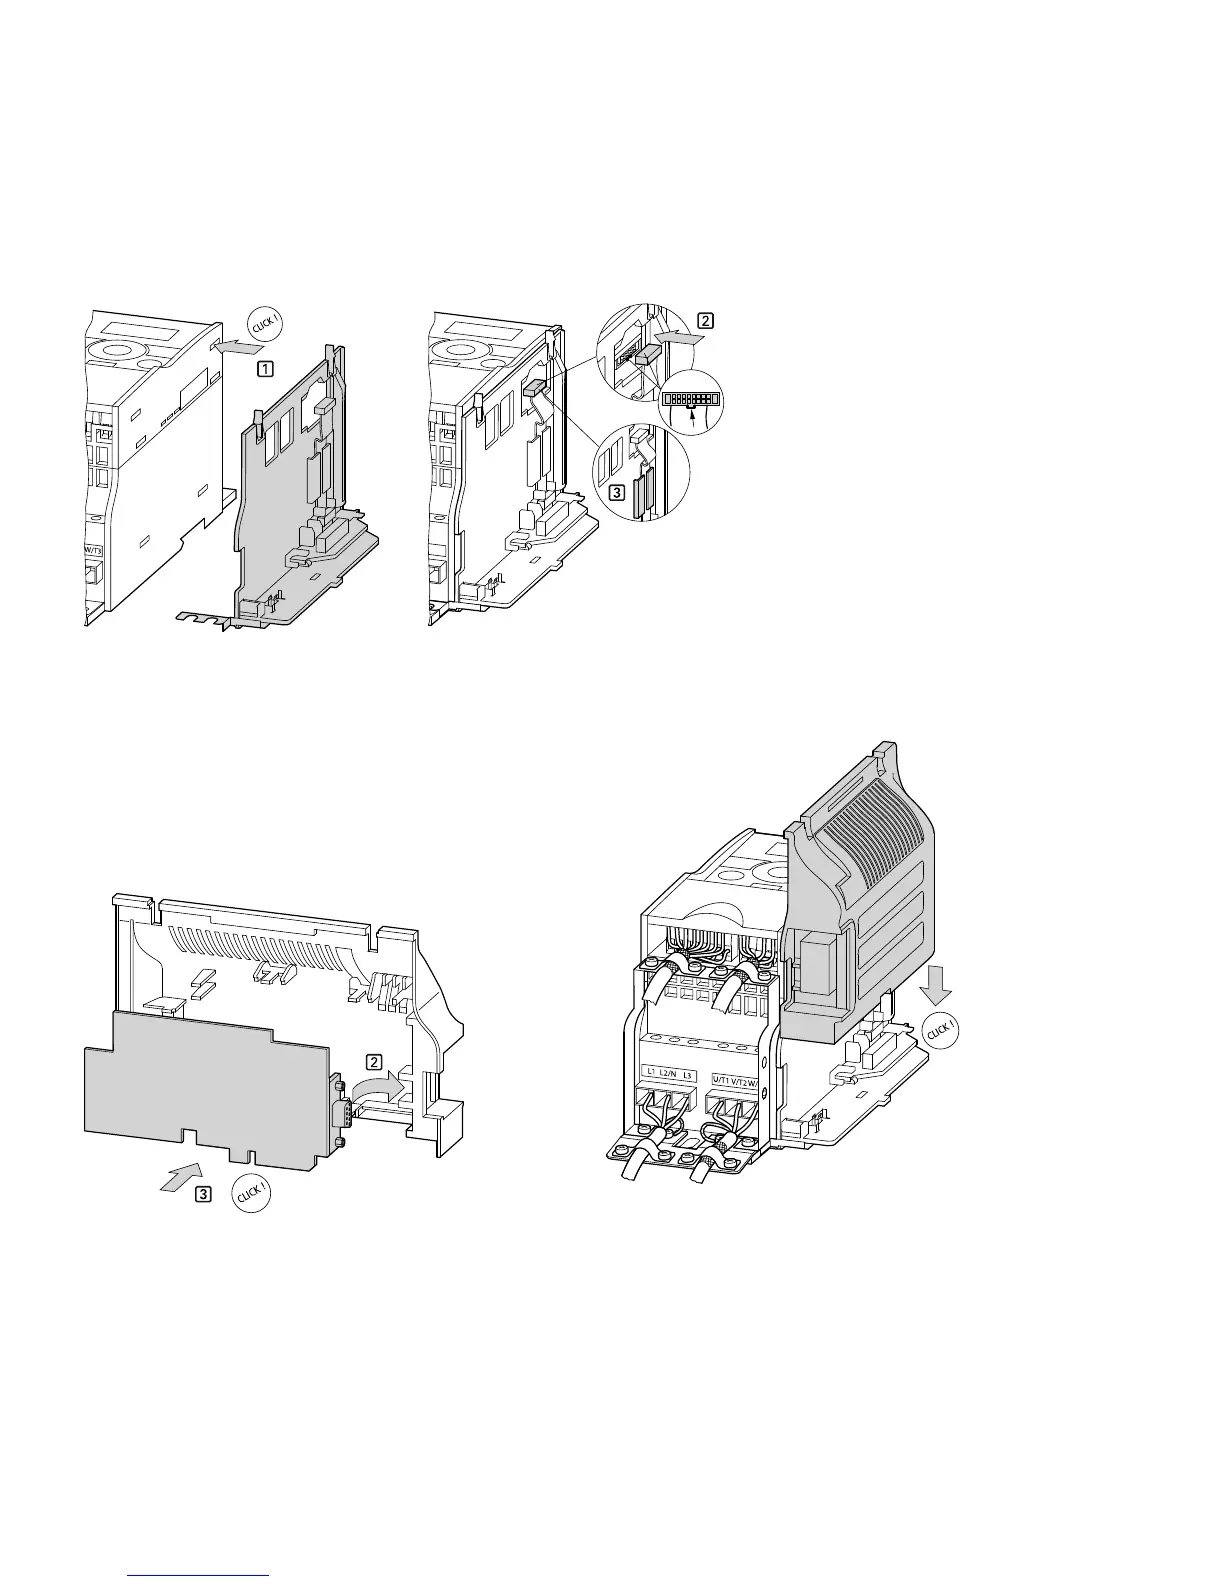
The remaining installation steps are then carried out without any tools
using the cutouts provided in the housing of the MMX (snap fixing).
●
Fit the plug and connection cable onto the interface of the MMX
Fitting and Connecting the Mounting Plate of the MMX-NET-XA
You can then fit a fieldbus interface card (for example,
PROFIBUS DP, and so on) in the cover of the mounting
frame.
Note: Before installing the fieldbus interface card check
whether the plug connection provided, such as GND
or bus terminal resistor have to be changed.
Cover of the MMX-NET-XA for Holding the Fieldbus
Interface Card
●
Then fit the cover with the inserted fieldbus interface card
onto the already fitted and installed mounting plate of the
MMX-NET-XA
Connecting the Interface Card with the Frequency
Inverter
●
Make the connections to the selected fieldbus system
through the opening in the mounting frame directly on the
card
W/T3
 Loading...