Chapter 7: Repair Procedures
Canopy Removal for Service
7-4 Service Manual
d. Support the canopy and hold the threaded inserts inside the canopy while using a 2.5 mm hex key
to remove the three button head screws across the top of the canopy. This step may require the
assistance of another person to support the canopy. Save all hardware from this step for
reassembly (the threaded inserts, three button-head screws, lock washers, and flat washers).
e. Lift the canopy slightly from the south to pivot the north end of the canopy away from the heater
door bracket.
f. Turn the canopy upside down on the clean and soft work surface to avoid scratching the canopy.
Save the canopy for later reassembly.
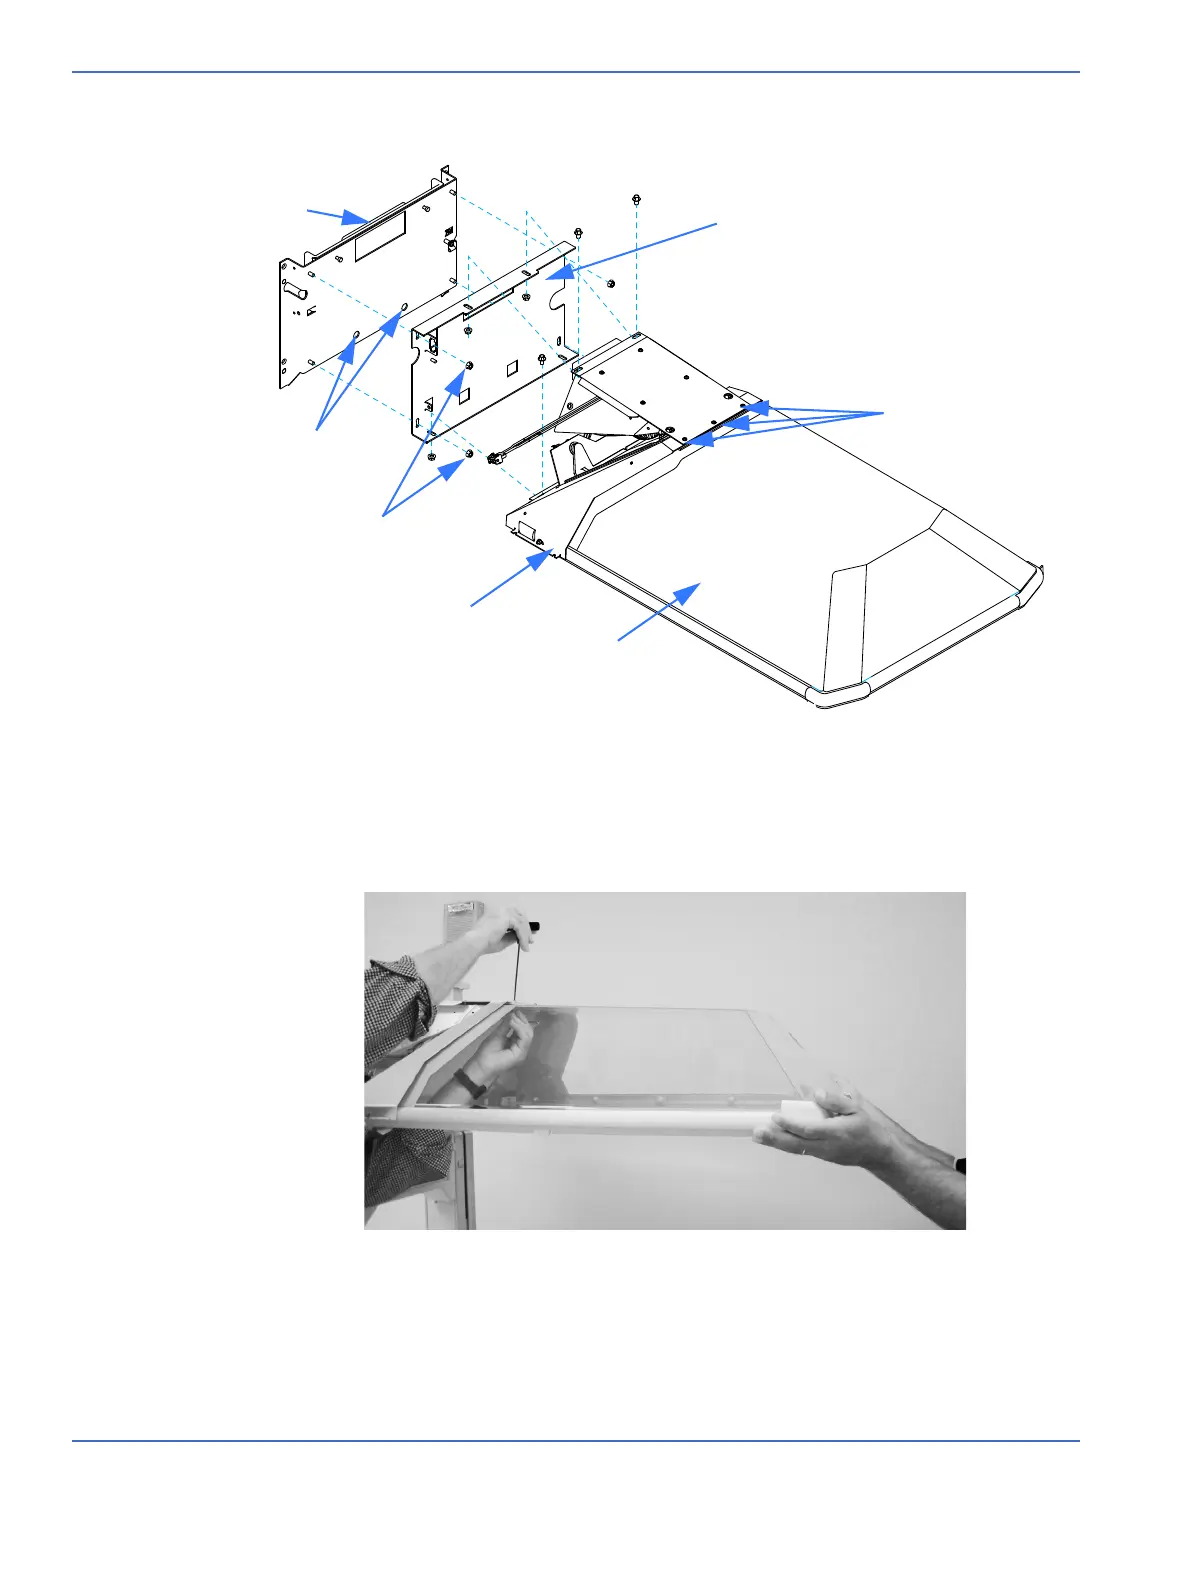
Housing bracket
FIGURE 7-4. Canopy, Bracket, and Heater Housing
Canopy
Button head screws
and threaded inserts
Heater Door Bracket
Canopy mounting nuts
Access holes
Canopy Bracket
FIGURE 7-5. Two People Needed for this Step

 Loading...


