Chapter 7: Repair Procedures
Canopy Removal for Service
Service Manual 7-11
12. Install corner parts:
a. Using a Phillips screwdriver, install the corner pin, gasket, and corner receiver on the upside-down
canopy at each south corner (the corners opposite the heater door cutout). The corner receiver rib
should be closest to the canopy edge.
b. Using a Phillips screwdriver, install the corner pin, gasket, and corner flange on the upside-down
canopy at each north corner (the corners nearest the heater door cutout):
c. Make sure that all pins point up. (The pins should point up when the canopy is upside-down, down
when the canopy is right-side up). Make sure all gaskets are on the inside.
13. Reinstall the canopy. This step may require the assistance of another person, as in Figure 7-5:
a. Using a 2 mm hex key, screw the set screws in the east and west rails at the E and W marks until
they are flush with the rails.
b. Turn the canopy right side up.
c. Insert the canopy north end, with the four set screws protruding, into the heater door bracket on
the device.
d. Hold the canopy in place and hold the threaded inserts inside the canopy while using a 2 mm hex
key to install the three button head screws across the top of the canopy.
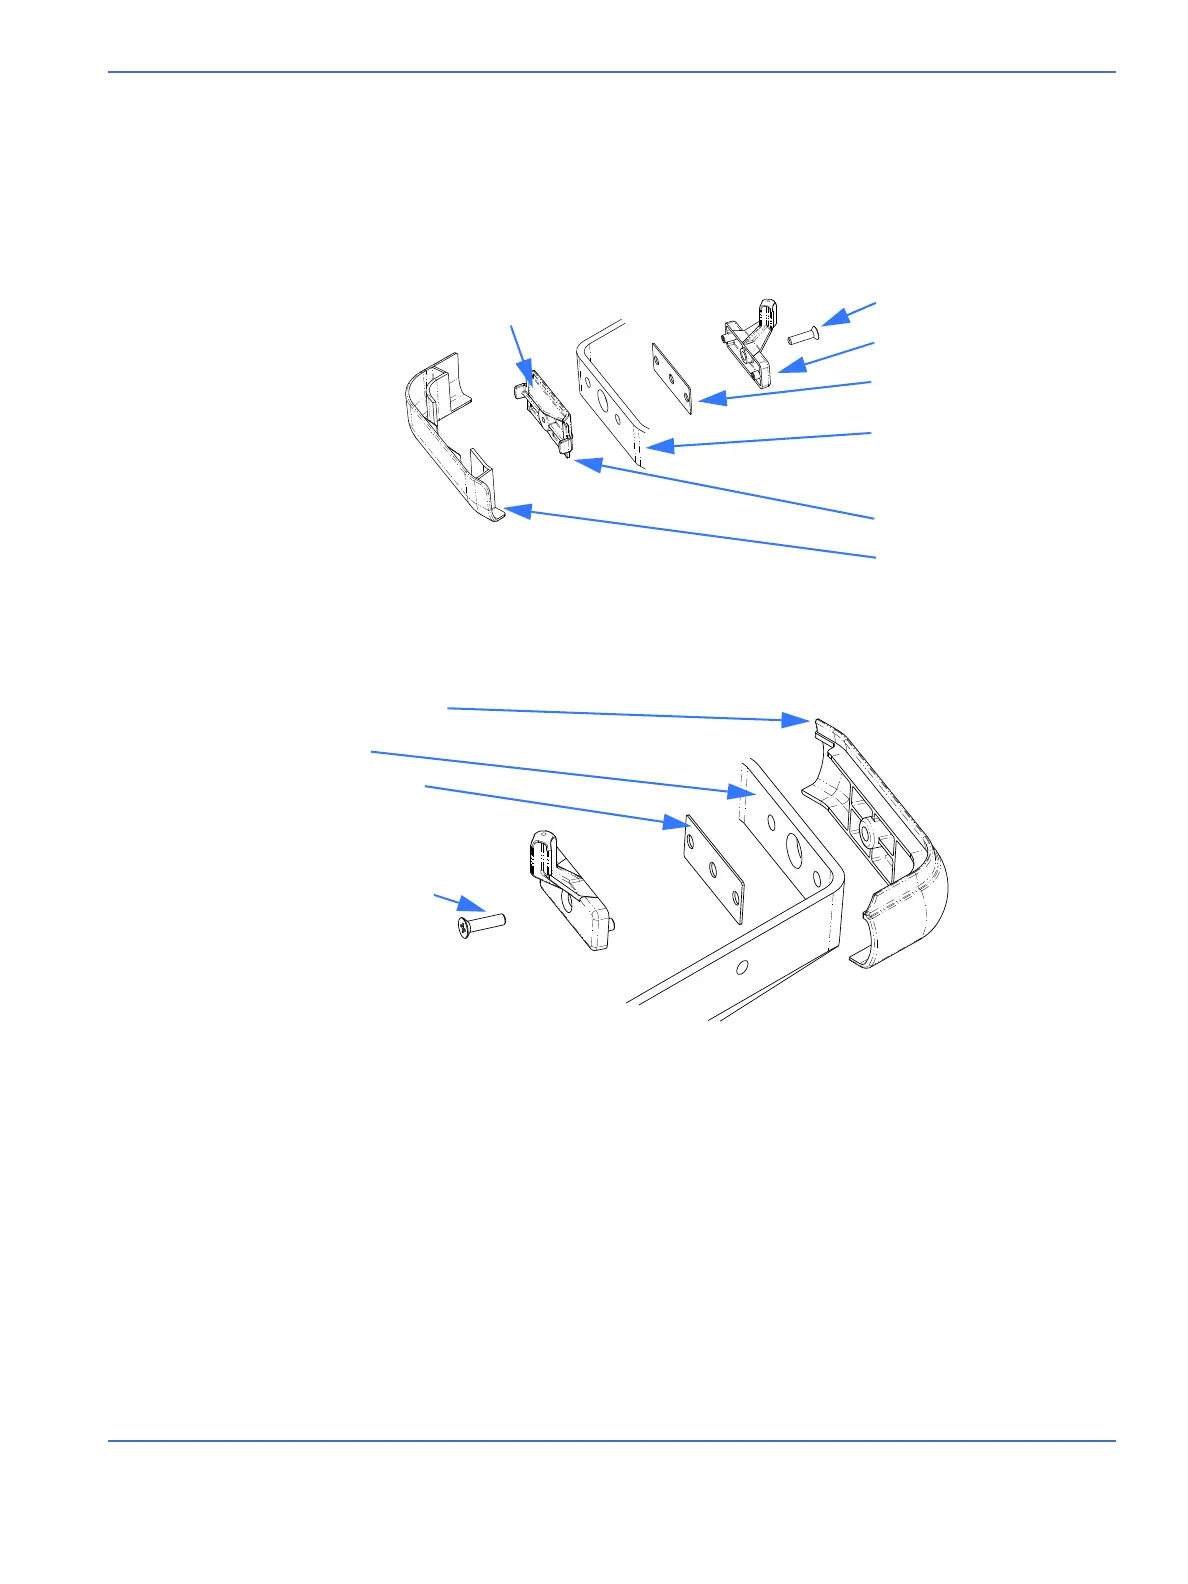
FIGURE 7-14. South Corner Parts
INSIDE OF
CANOPY
M4x16 flathead Phillips screw
with pre-applied nylon patch
OUTSIDE OF
CANOPY
Corner pin
Corner pin gasket
Canopy
Corner cover receiver
South corner cover
Rib
FIGURE 7-15. North Corner Parts
INSIDE OF
CANOPY
North flange corner
OUTSIDE OF
CANOPY
Canopy
Corner pin gasket
Corner pin
M4x16 flathead Phillips
screw with pre-applied
nylon patch

 Loading...


