Chapter 7: Repair Procedures
Clock Battery Replacement
Service Manual 7-73
7.19.5.2 SBC Assembly
1. Reassemble the SBC PCA following “SBC Disassembly” on page 7-71 steps 1 through 6 in reverse order.
7.20 Clock Battery Replacement
1. Follow the instructions in “Rear Cover” on page 7-65.
2. Follow steps 2 through 4 of “SBC (Single Board Computer) PCA” on page 7-71 to access the back of the
SBC board.
Important: Do not perform steps 1, 5, or 6. It is not necessary to remove the display assembly or the
SBC board.
Note the polarity (+ & -) and be sure to install the new lithium ion battery with the same polarity.
3. Use a small screwdriver to slide the old lithium ion battery out of its holder and slide the new battery in
it's place in the same orientation.
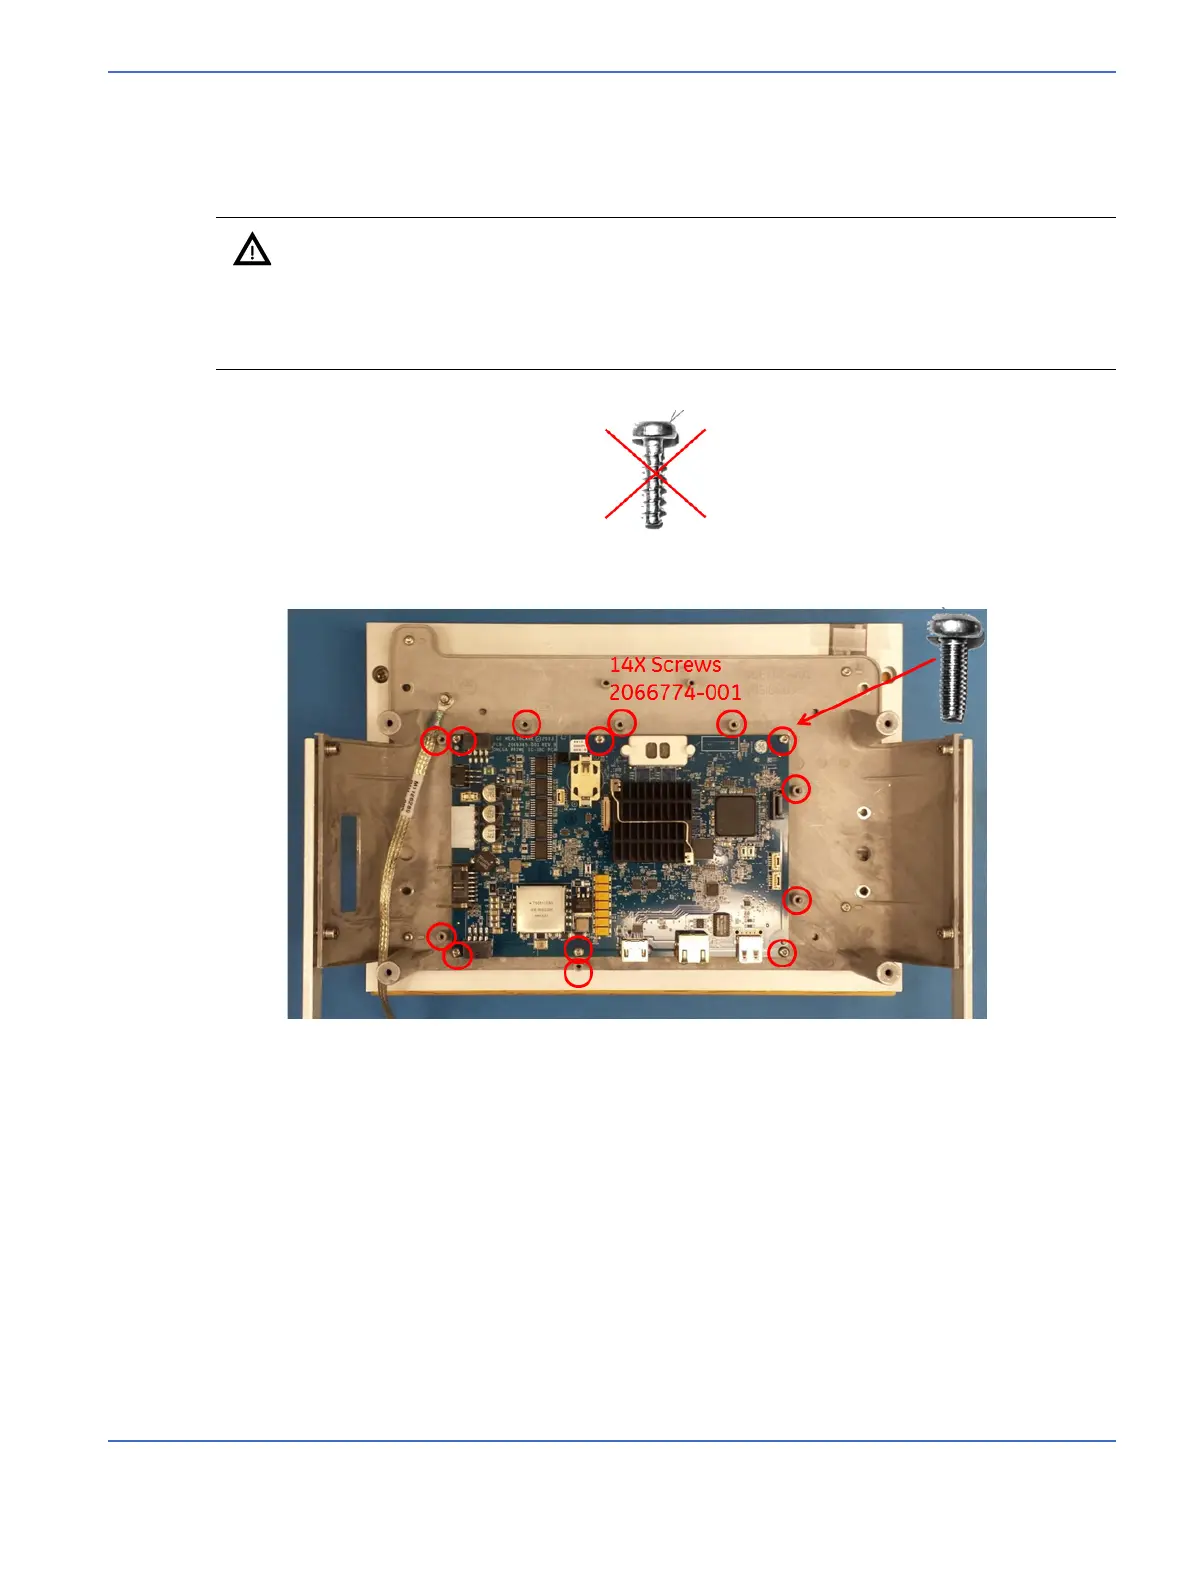
Caution: The Display Assembly requires two types of Torx-drive thread forming screws.
When installing the SBC PCA and EMI Shield it is critical that only the THREAD FORMING,
M3X8 screw (2066774-001) as shown in Figure 7-75 is used. Please note the difference in the
thread of the THREAD FORMING, 30X10 2066775-001 in Figure 7-74. Failure to install the
correct screws will cause breakage and result in permanent damage to the metal carrier
(mounting) plate.
FIGURE 7-74. Do Not Use Screw
FIGURE 7-75. Screw Location

 Loading...


