Chapter 7: Repair Procedures
Canopy Removal for Service
Service Manual 7-9
b. Start all set screws in the spacer, with the hex socket end of the screw pointing to the outside of
the canopy.
c. Add plastic spacer washers to the set screws.
d. Install the north spacer and washers to the canopy with smooth nuts.
e. If your canopy has six holes across the north end, install parts for the middle four holes as shown
in Figure 7-10 and install parts for the remaining two holes as shown in Figure 7-12. The parts for
these two holes serve to fill these two holes.
f. Snap the north seal vertically between the north spacer and canopy for a fit-check. Make sure that
the red/orange indicator is not visible from inside the canopy.
g. Using a 10 mm open-end wrench, tighten all smooth nuts.
Caution: Do not over-tighten the hardware.
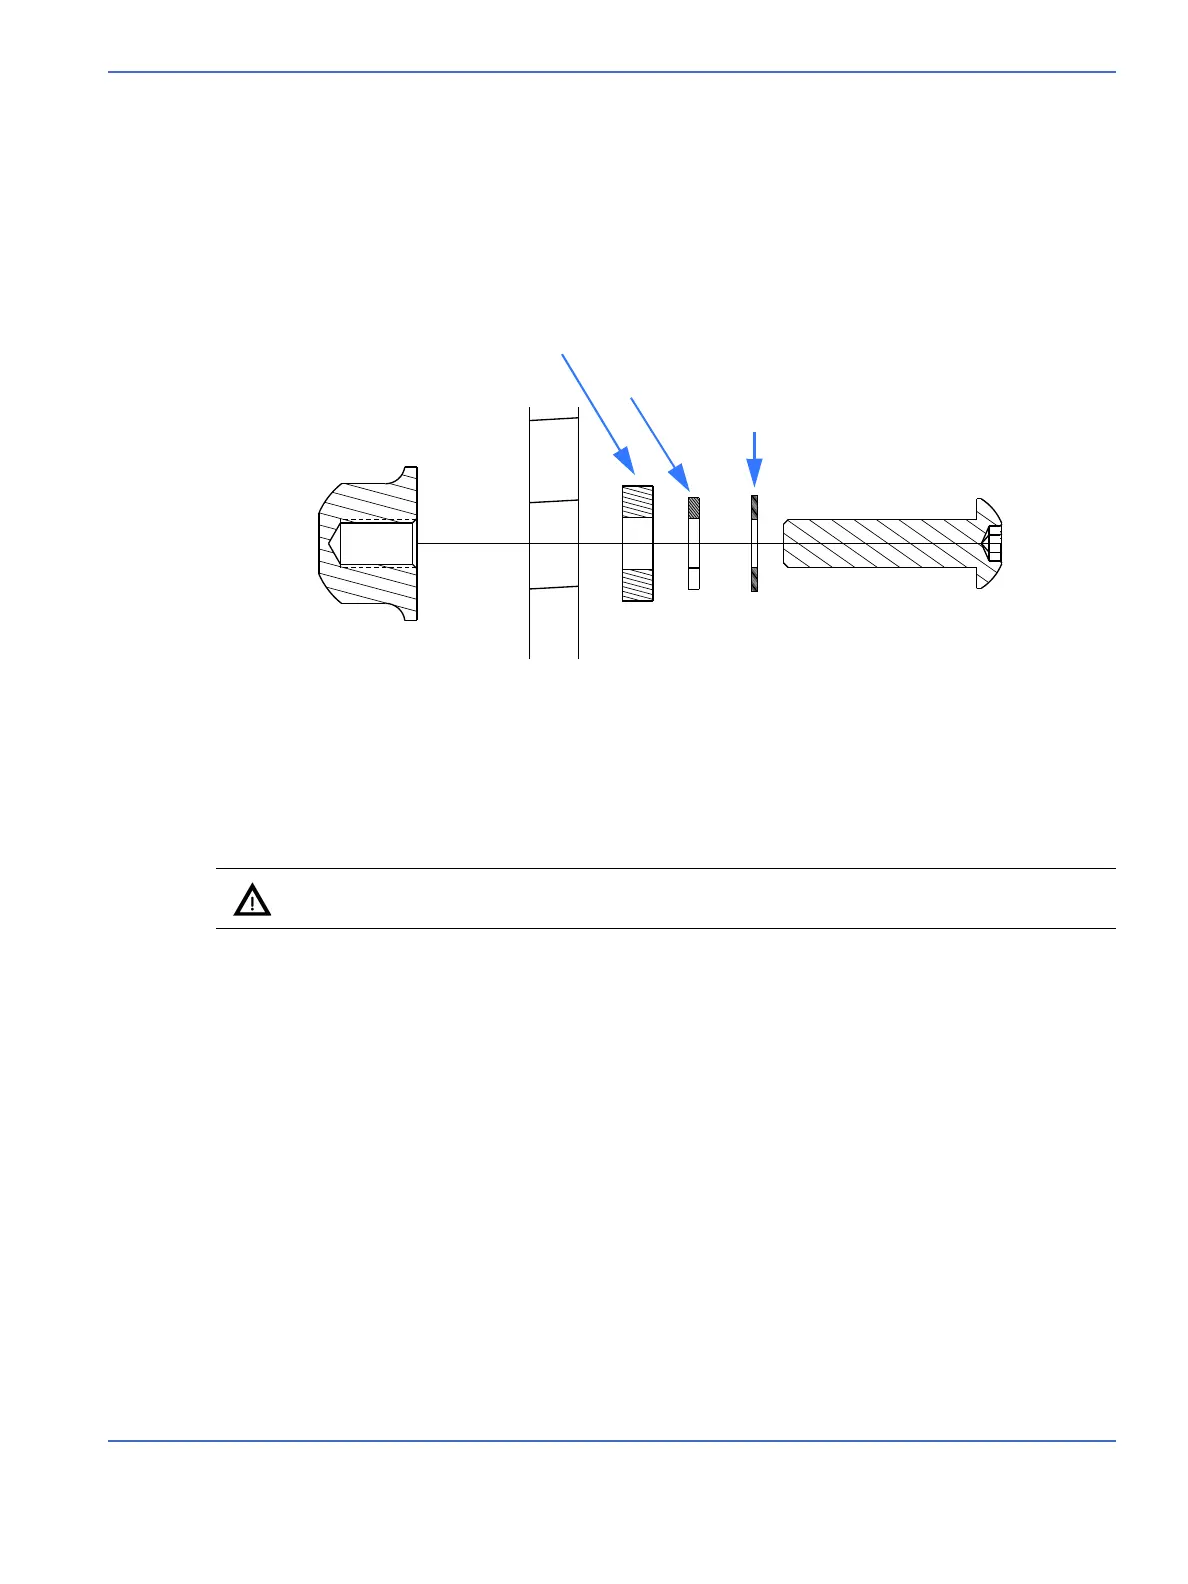
FIGURE 7-12. Hole Fill Assembly (2x) for Canopies with Six Holes across North End
INSIDE OF
CANOPY
Spacer washer
OUTSIDE OF
CANOPY
Smooth nut
Canopy
Flat washer
Splitlock washer
M4x12 buttonhead
stainless steel screw

 Loading...


