Shape Manager 82
Cut Direction
Cut Direction allows to user to select the direction the parts will be placed in during the Automatic
Nesting process. Options are: Left or Right, Right to Left, Top to Bottom and Bottom to Top.
Return to Nest Start
When enabled, the Return to Nest Start feature will insert a traverse segment back to the start point
at the end of the nest.
Using HyperNest – CNC
To begin, first select the plate size requirements for the nest at the Main Setup screen. Press the
Nester™ soft key from the Shape Manager Screen then enter the Setup Screen to enable the
Automatic Nesting software feature and configure the setup parameters for use. Press OK to return
to the Main Screen and begin placing parts in the nest.
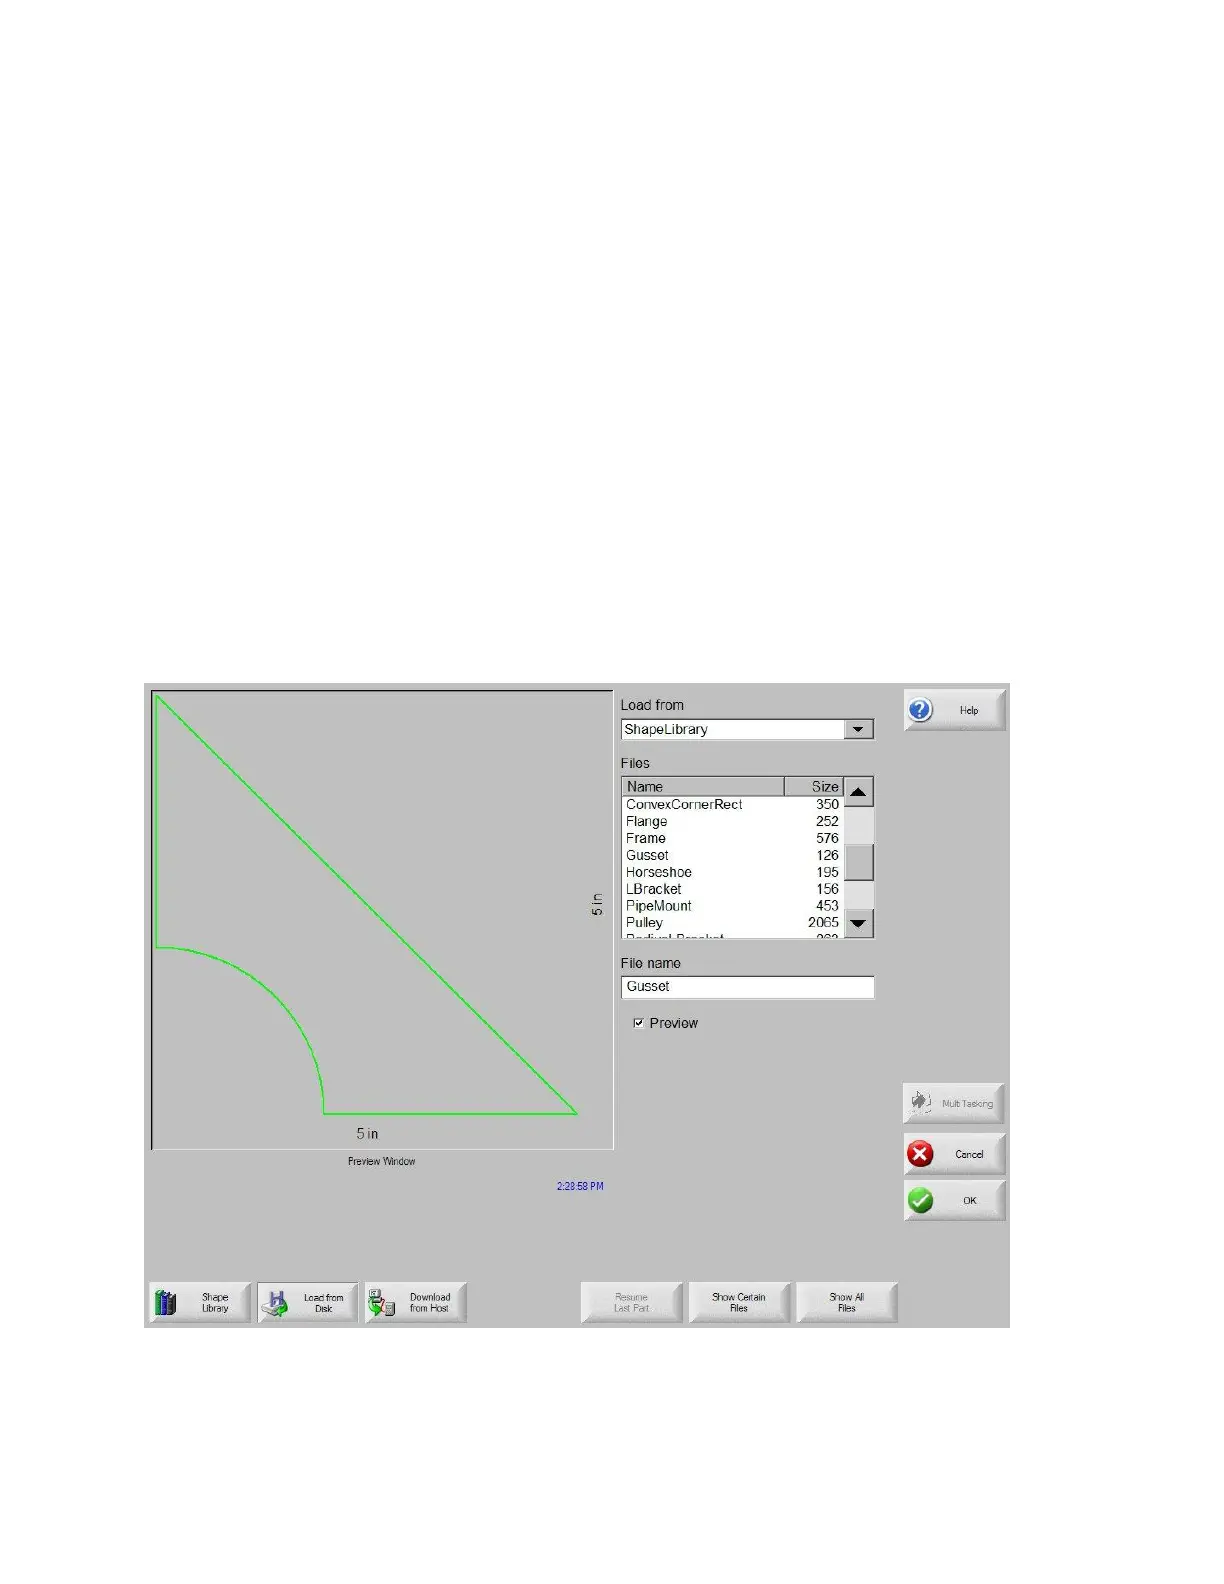
Adding Parts
At the Main Screen, press the Add Part soft key to add a new part to the nesting part list. The Add
Part screen will allow the user to select a part from the Simple Shape Library, from a disk or from the
host computer via link communications.
Once a part has been selected from the desired location, the user will be prompted to select the
number of pieces desired.
 Loading...