Tools required
•
Press tool
•
Valve guide replacing tool
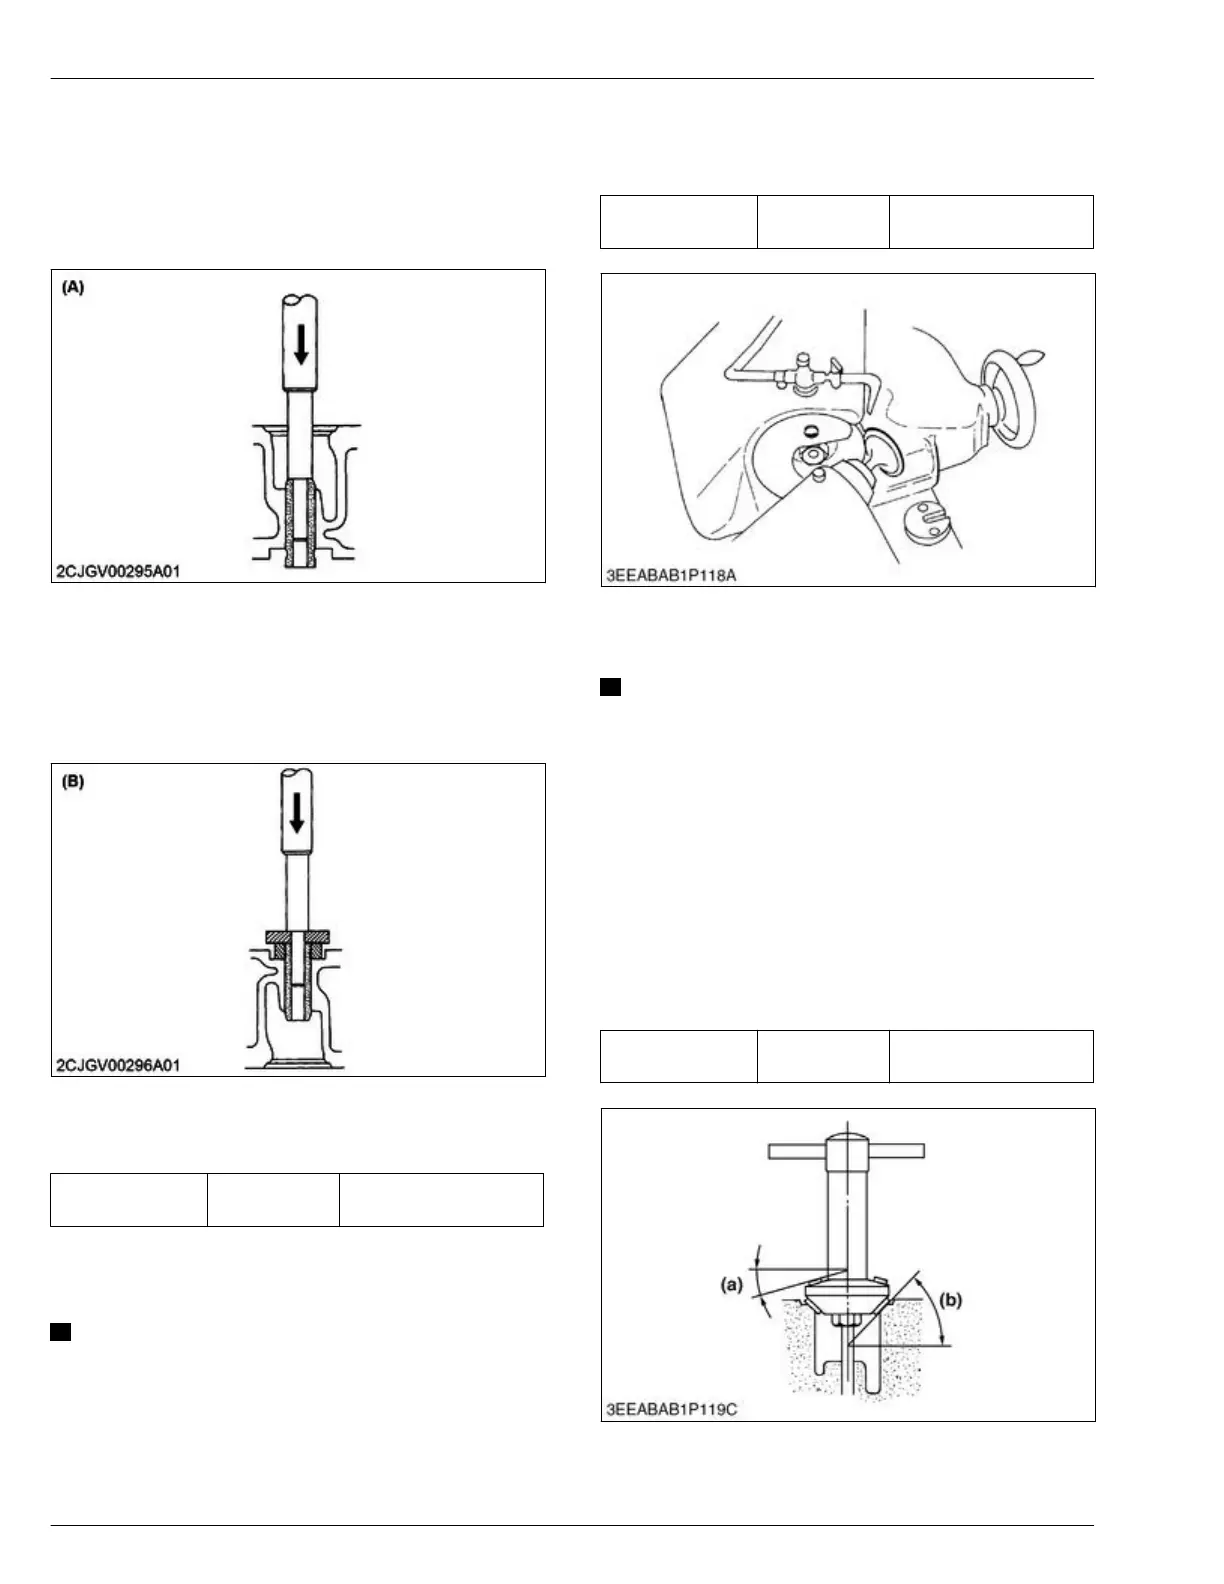
Removing valve guide
1. Press out the used valve guide with the valve guide
replacing tool.
(A) Removing direction
Installing valve guide
1. Clean the
new valve guide and valve guide bore,
and apply engine oil to them.
2. Press fit the new valve guide with the valve guide
replacing tool.
(B) Installing direction
3. Ream accurately the I.D. of the valve guide to the
specified dimension.
V
alve guide I.D.
Service specifi-
cation
8.015 to 8.030 mm
0.3156 to 0.3161 in.
7.8 Adjusting valve angle
NOTE
• Before you
adjust the valve, check the valve
stem and measure the I.D. of the valve guide
section.
Repair them if necessary.
Tools required
• V
alve refacer
1. Adjust the valve with a valve refacer.
Valve face angle
Service specifi-
cation
0.79 rad
45°
7.9 Adjusting valve seat
NOTE
• Before you
adjust the valve seat, check the
valve stem and measure the I.D. of the valve
guide section.
Repair them if necessary.
• After you adjust the valve seat, be sure to check
the valve recessing.
Tools required
• Valve seat cutter
• Valve lapping tool.
• Prussian Blue
1. Slightly adjust the seat surface with a 1.0 rad (60°)
or 0.79 rad (45°) valve seat cutter.
Valve seat angle
Service specifi-
cation
0.79 rad
45°
(a) 0.26 rad (15°) or 0.52 rad
(30°)
(b) 0.79 rad (45°) or 1.0 rad
(60°)
4. ENGINE
SERVICING
7. Servicing
D1803-CR-E4,D1803-CR-TE4,D1803-CR-TIE4,V2403-CR-E4,V2403-CR-TE4,V2403-CR-TE4BG,V2403-CR-TIE4
 Loading...