2FB/2FC-4
1-6-42
(3) Detaching the laser scanner unit
Follow the procedure below to replace the laser scanner unit.
Procedure
1. Remove the hinge retainer and open DP
until it becomes perpendicular (see page 1-
6-34).
2. Remove the left upper cover, right upper
cover and contact glass (see page 1-6-34).
3. Remove the screw and then remove the left
cover.
4. Remove the middle right cover (see page 1-
6-17).
Remove the staple tray, operation unit right
cover, operation unit left cover and operation
unit upper cover (see page 1-6-37).
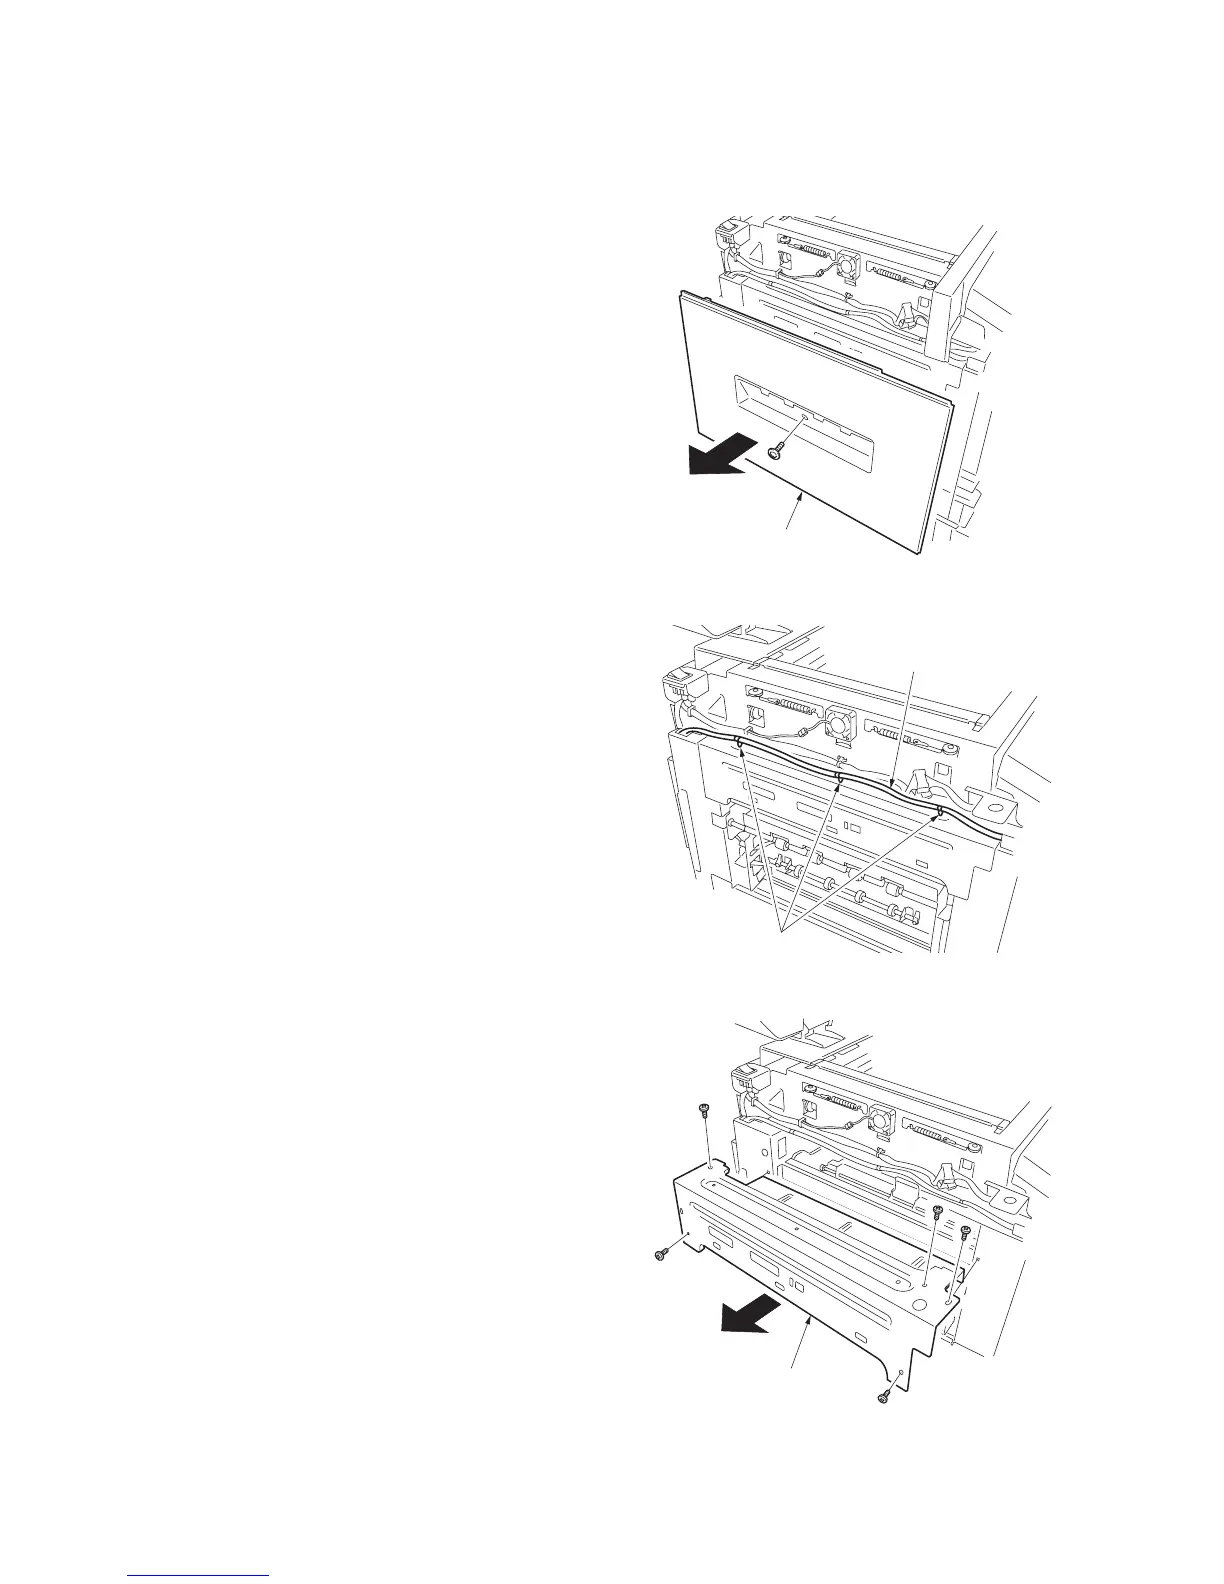
5. Move the mirror 1 frame to the machine left.
* When moving the mirror 1 frame, do not
touch the exposure lamp.
Figure 1-6-82
6. Remove three bands of the machine left to
release the black wire.
Figure 1-6-83
7. Remove five screws and then remove the
upper left frame.
Figure 1-6-84
Left cover
Bands
Black wire
Upper left frame
 Loading...