EasyManuals Logo

Kyocera KM-8030 Service Manual

Kyocera KM-8030
463 pages
To Next Page IconTo Next Page
To Previous Page IconTo Previous Page
Page #341 background imageLoading...
Page #341 background image
2FB/2FC-4
1-6-100
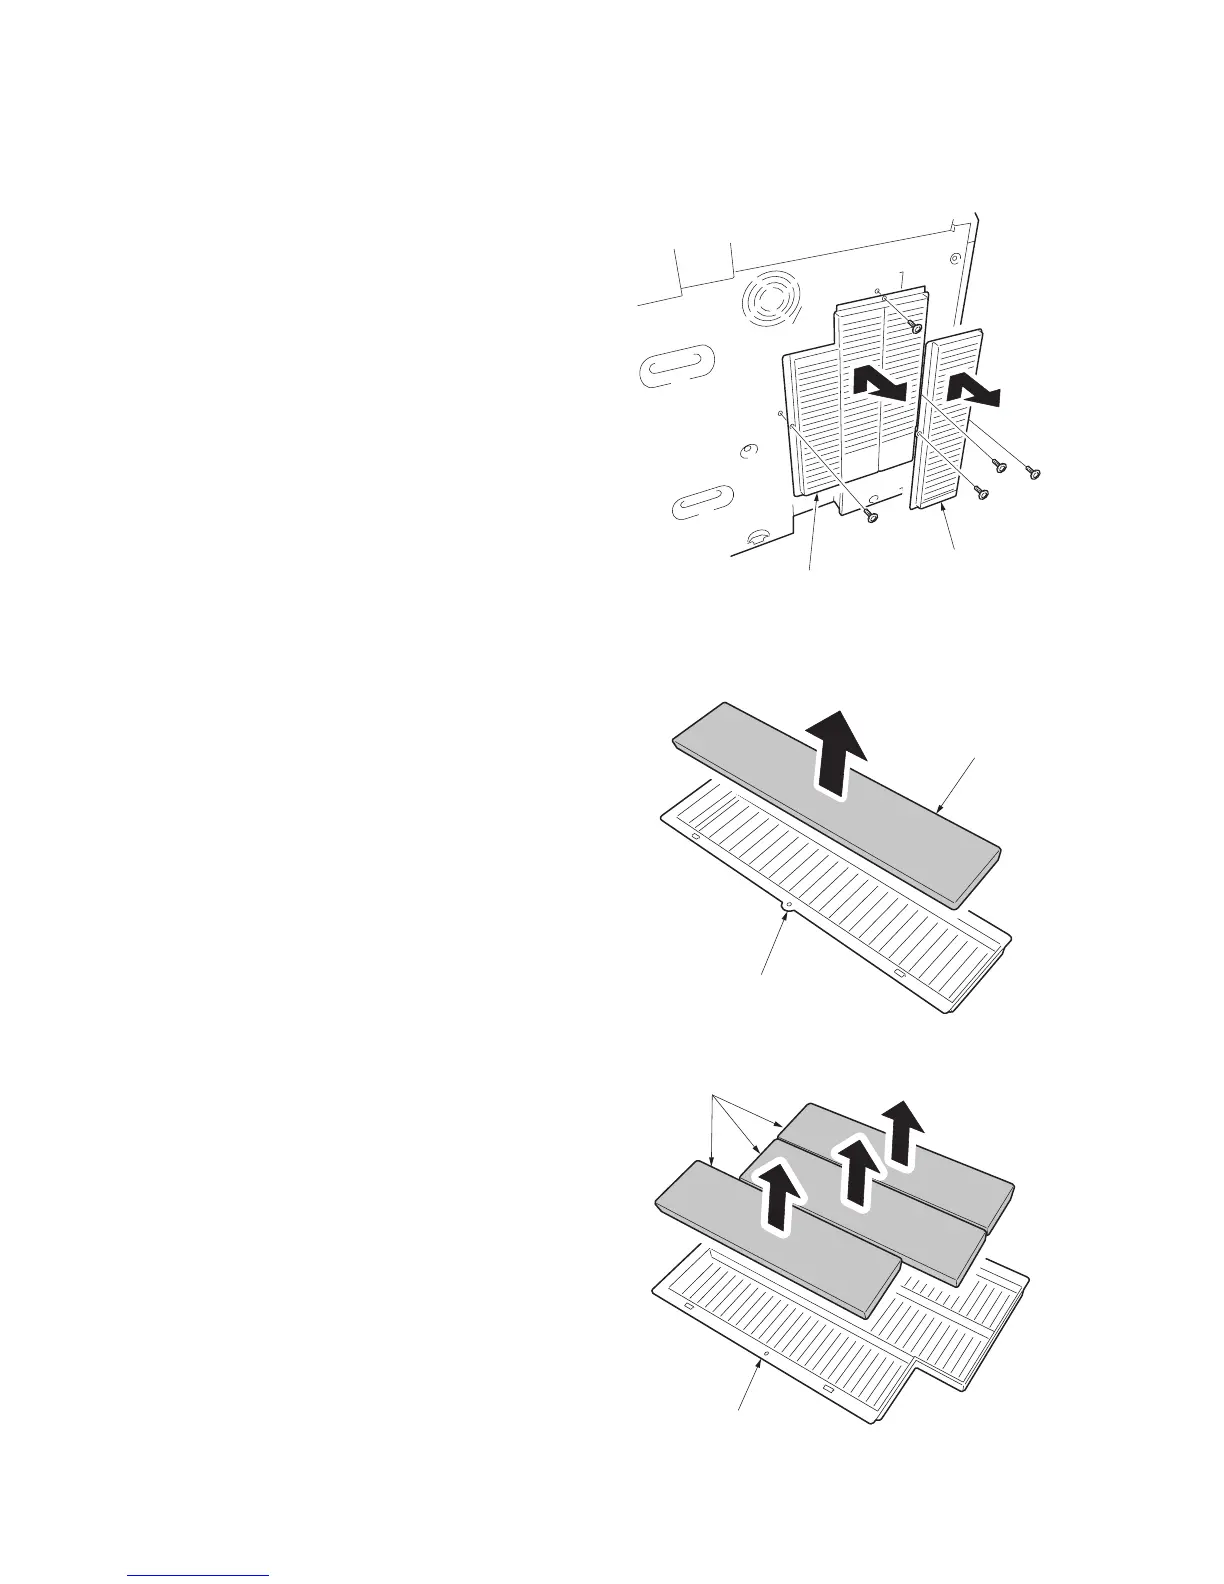
(6) Detaching and refitting the ozone filters
Follow the procedure below to replace the ozone filters.
Procedure
1. Remove two screws and then remove the
rear duct A.
Remove three screws and then remove the
rear duct B.
Figure 1-6-194
2. Remove ozone filter 1 from the rear duct A.
Figure 1-6-195
3. Remove three ozone filter 2 from the rear
duct B.
Rear duct B
Rear duct A
Rear duct A
Ozone filter 1
Rear duct B
Ozone filter 2

Table of Contents

Other manuals for Kyocera KM-8030

Questions and Answers:

Question and Answer IconNeed help?

Do you have a question about the Kyocera KM-8030 and is the answer not in the manual?

Kyocera KM-8030 Specifications

General IconGeneral
BrandKyocera
ModelKM-8030
CategoryAll in One Printer
LanguageEnglish

Related product manuals