POWER TRIM
90-828631R3 MARCH 1999 Page 5B-51
Bleeding Power Trim Unit
1. Secure power trim unit in soft jawed vise.
2. Remove reservoir plug. Add power trim fluid until it is even with the bottom of the fill hole.
Reinstall plug.
3. Close the manual release valve. (Turn full clockwise.)
a
a
a-Reservoir Plug
4. Cycle system full up and down 3 times or until fluid level remains at proper level.
Connect power trim wire to 12 volt source.
Direction
⇑ Up ⇓ Down
Blue + Positive Blue – Negative
Green – Negative Green + Positive
5. Recheck fluid level with rod fully extended, add fluid if required and repeat cycle until
fluid level stays even with the bottom of the fill hole.
Power Trim System Installation
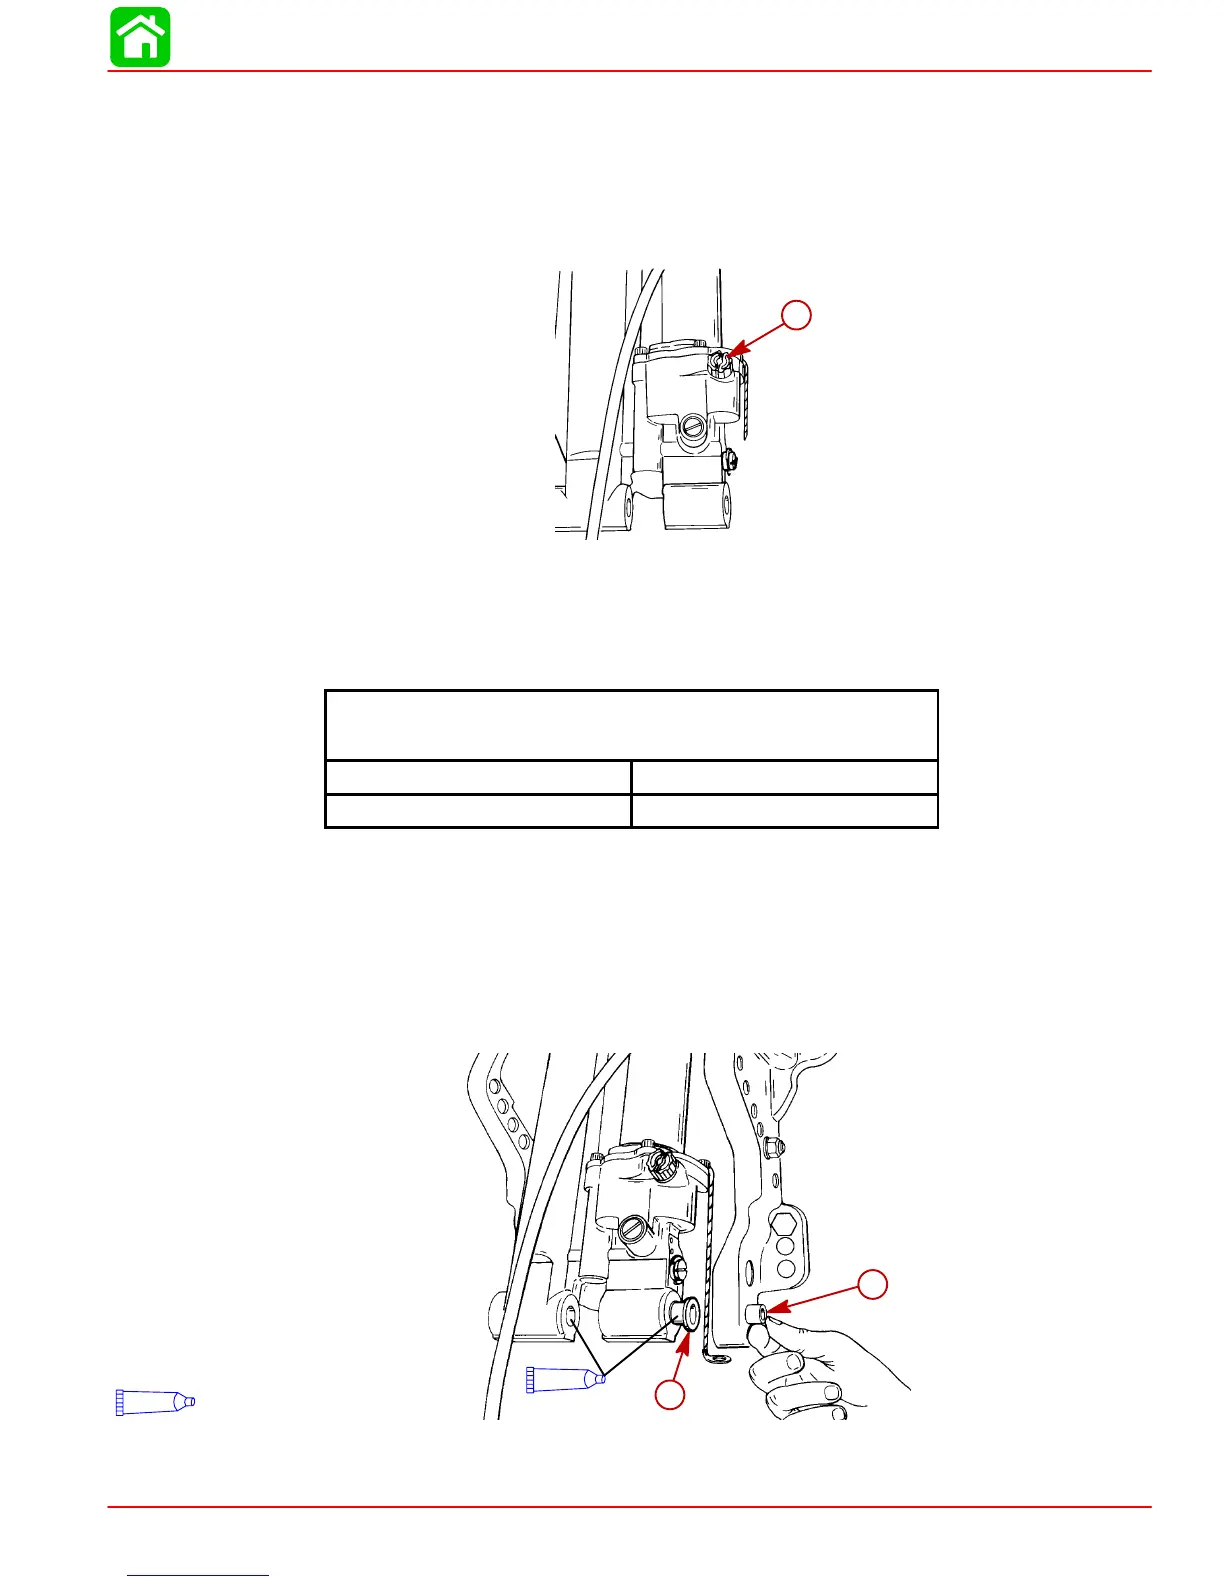
1. Lubricate lower pivot pin, mounting holes and bushings with 2-4-C Marine Lubricant.
2. Install lower pivot pin bushings into the clamp brackets and trim unit.
a
a
b
95
2-4-C w/Teflon (92-850736A1)
95
a-Bushing (2) Install into each Clamp Bracket
b-Bushing (2) Install into each side of Trim Unit
 Loading...
