4-42 - POWERHEAD 90-830234R3 DECEMBER 1997
Check Valves
REMOVAL
• Remove carburetors and intake manifold/reed
block assemblies.
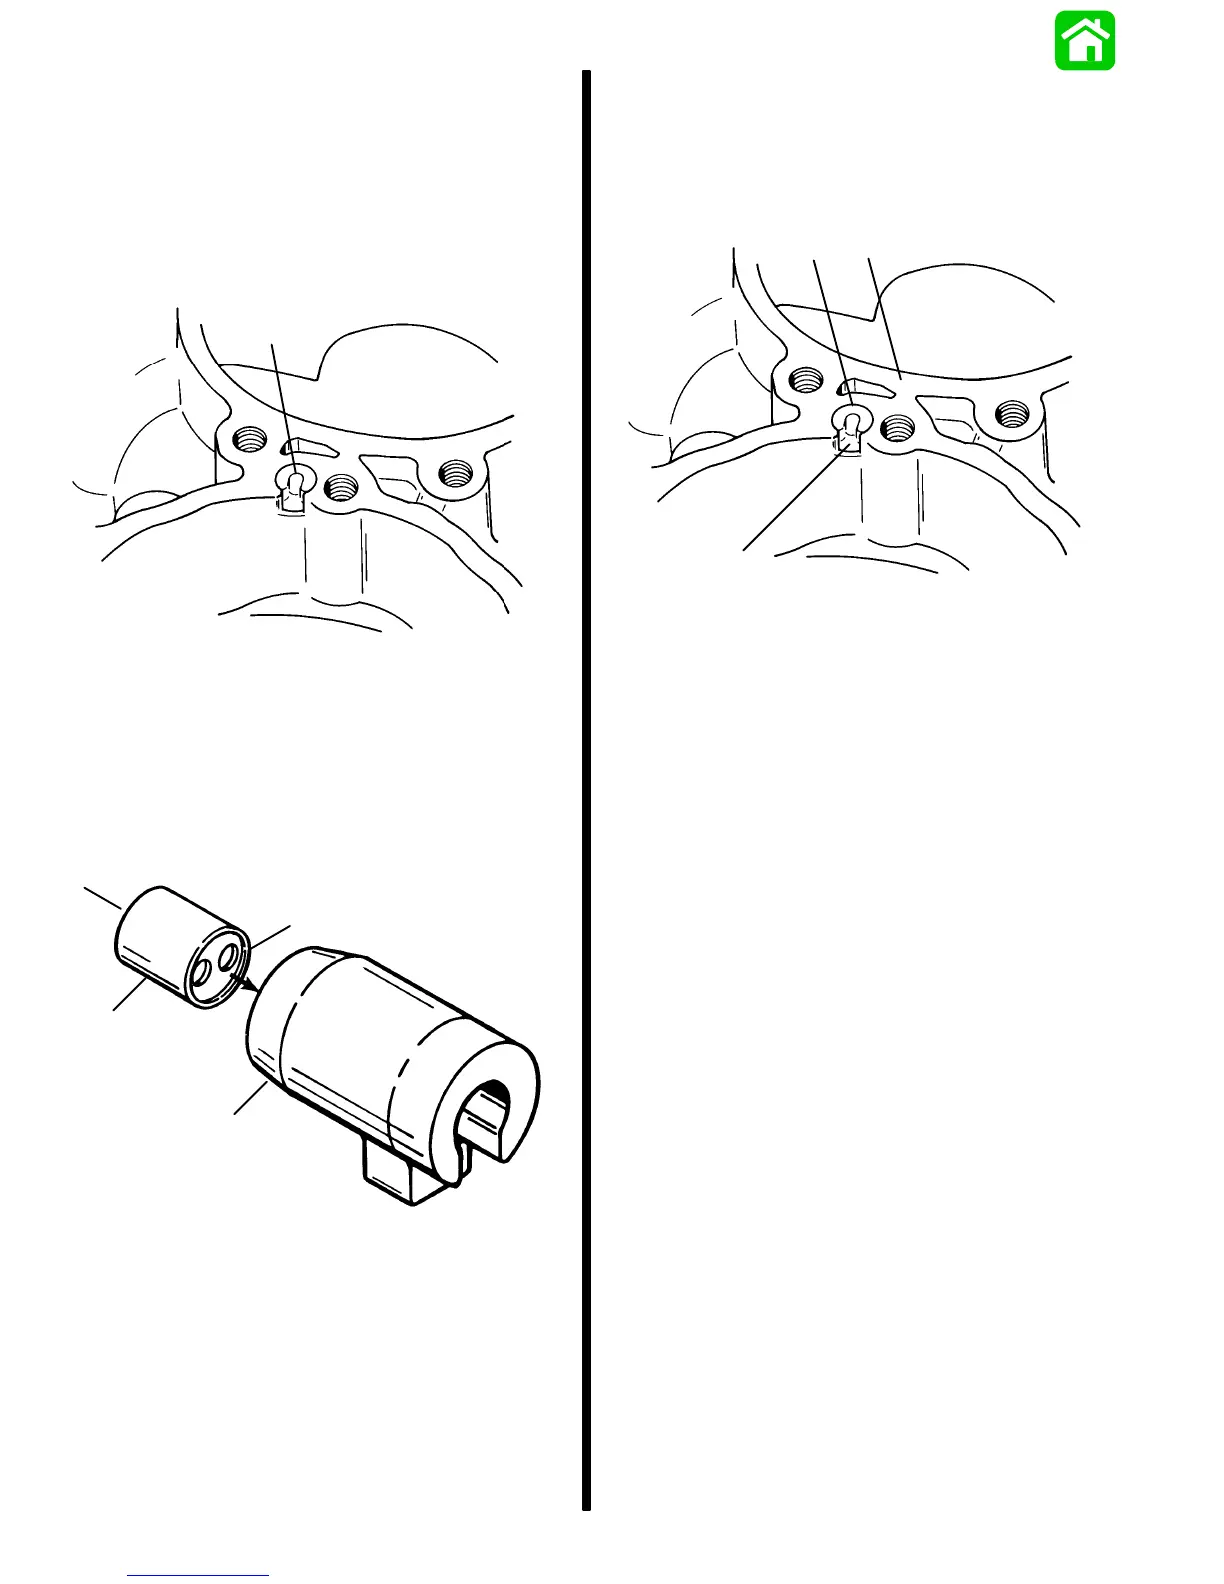
• Grasp carrier and remove carrier/check valve as-
sembly from crankcase cover.
a
51621
a - Carrier/Check Valve Assembly
• Push check valve out of carrier. If nylon ball within
check valve is stuck or carrier is charred, replace
check valve and/or carrier as required.
IMPORTANT: SINGLE HOLE side of check valve
MUST FACE CRANKCASE.
b
a
d
c
51131
a - Check Valve
b - Carrier
c - Single Hole
d - Double Hole
INSTALLATION
• Install check valve (if removed) inside of carrier
(single hole of valve faces tapered end of carrier).
• Align carrier tab with slot in crankcase cover and
insert check valve/carrier assembly into cover.
a
b
c
51621
a - Check Valve/Carrier Assembly
b - Slot
c - Crankcase Cover
• Clean mating surfaces of crankcase cover and
intake manifold. Install new gaskets.
• Install intake manifold/reed block assemblies to
crankcase cover. Refer to PAGE 4-58 for torque
specification and tightening sequence.
• Install carburetors. Torque carburetor (AIR BOX)
stud nuts to 100 lb. in. (11.3 Nm).
• Carburetors MUST BE SYNCHRONIZED. Refer
to SECTION 2C for proper procedures.
• Reinstall air box cover.
• Reinstall top cowling.
Piston and Piston Rings
IMPORTANT: If engine was submerged while en-
gine was running, piston pin and connecting rod
may be bent. If piston pin is bent, piston must be
replaced. Piston pins are not sold separately be-
cause of matched fit into piston. If piston pin is
bent, connecting rod must be checked for
straightness (refer to “Connecting Rods” for
checking straightness).
• Inspect piston for scoring and excessive piston
skirt wear.
 Loading...