90-830234R3 DECEMBER 1997 MID-SECTION - 5B-31
FIELD TESTS
IMPORTANT: Commutator end of armature must
be installed in brushes when performing the fol-
lowing tests.
Ohmmeter
Leads Between
Resistance
(Ohms)
Scale Reading*
(x___________)
Green and Blue
Motors Wires
0 (Rx1)
Green and Black
Motor Wires
0 (Rx1)
Blue and Black
Motor Wires
0 (Rx1)
Black Motor Wire,
and Frame (Motor
Housing)
No Continuity (Rx1)
Green Motor Wire
and Frame
No Continuity (Rx1)
Blue Motor Wire
and Frame
No Continuity (Rx1)
*If specific readings are not obtained, check for:
– Defective Armature
– Dirty or Worn Brushes
– Dirty or Worn Commutator
If defective components are found, repair or replace
component(s) and retest.
Motor Repair
REMOVAL
NOTE: Power trim system does not have to be re-
moved from outboard to repair/replace motor.
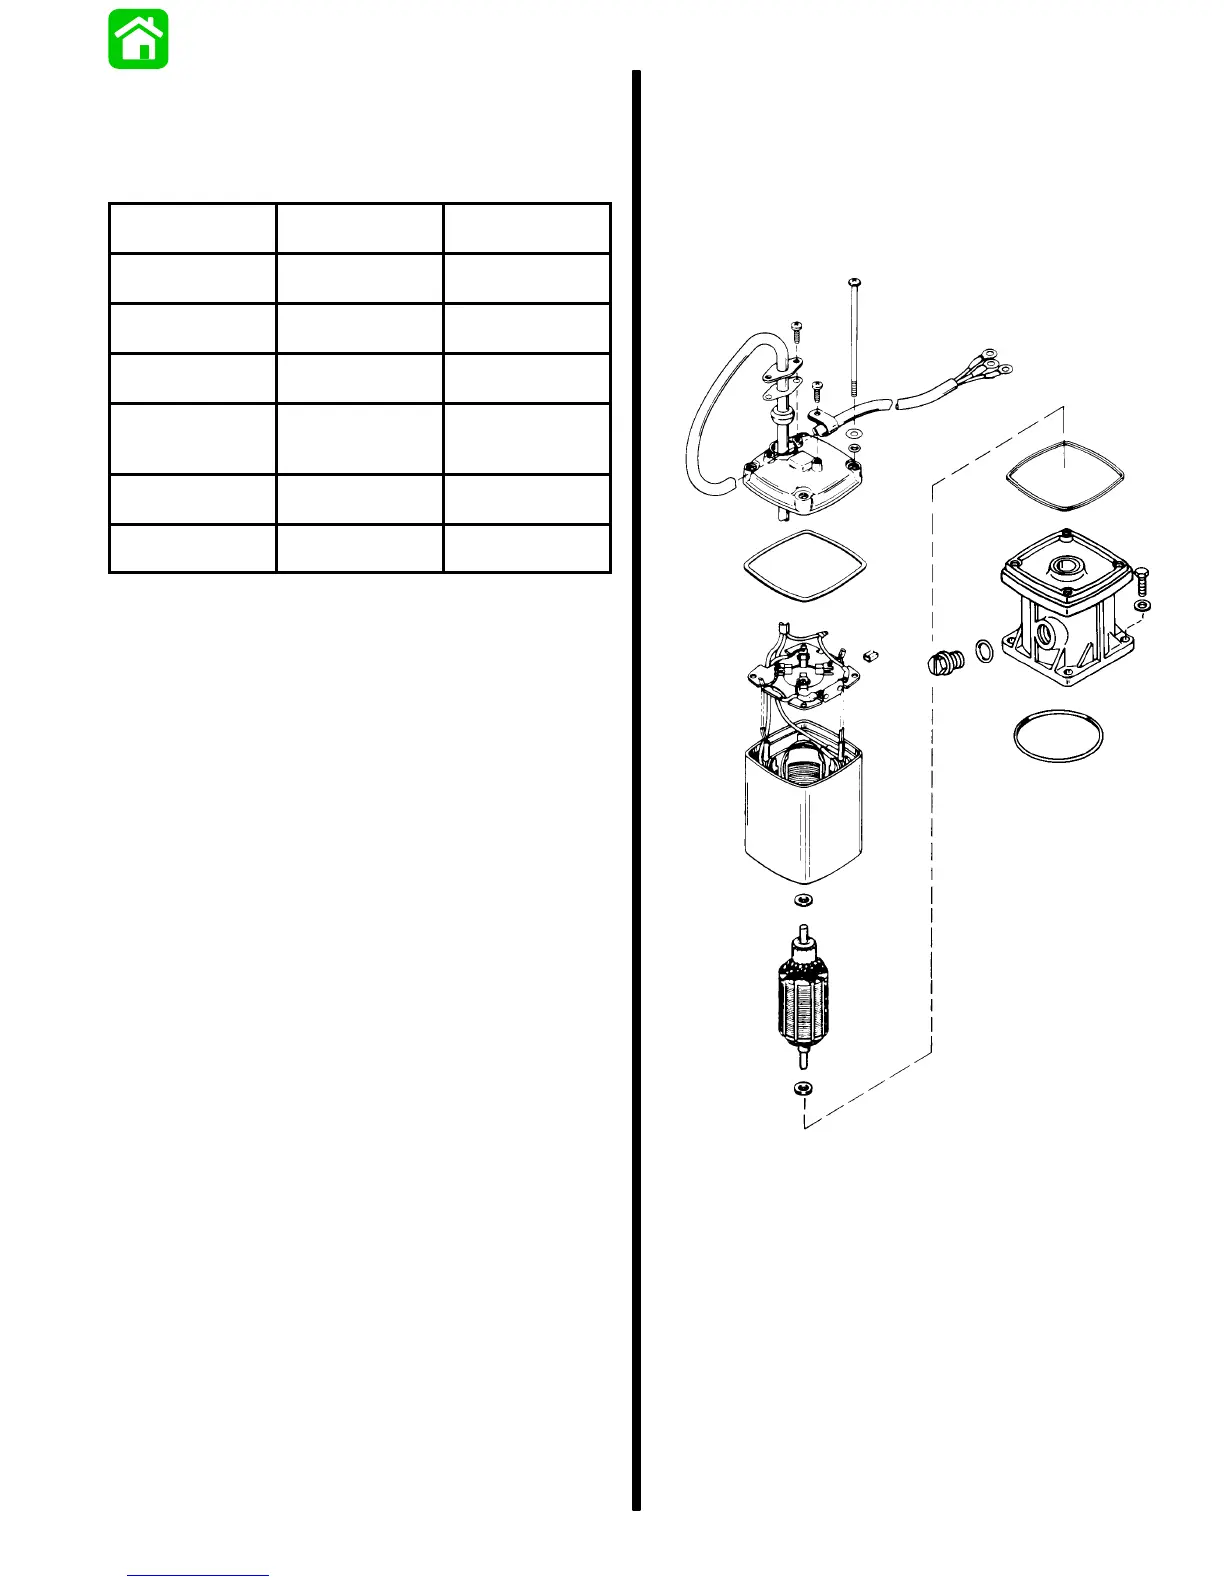
DISASSEMBLY
Refer to “Motor Disassembly” on page 5B-28 to
disassemble motor from pump.
CLEANING AND INSPECTION
Inspect O-rings and replace as necessary. Carefully
inspect harness for cuts or tears which will allow wa-
ter to enter motor. Replace harness if cut or torn.
Clean, inspect and test motor components. Refer to
“Brush Replacement”, “Armature Test” and
“Field Tests” for inspection and test procedures.
51371
 Loading...