90-830234R3 DECEMBER 1997 MID-SECTION - 5B-25
8. Remove trim system from vise and empty fluid
into appropriate container.
Trim Rod Disassembly
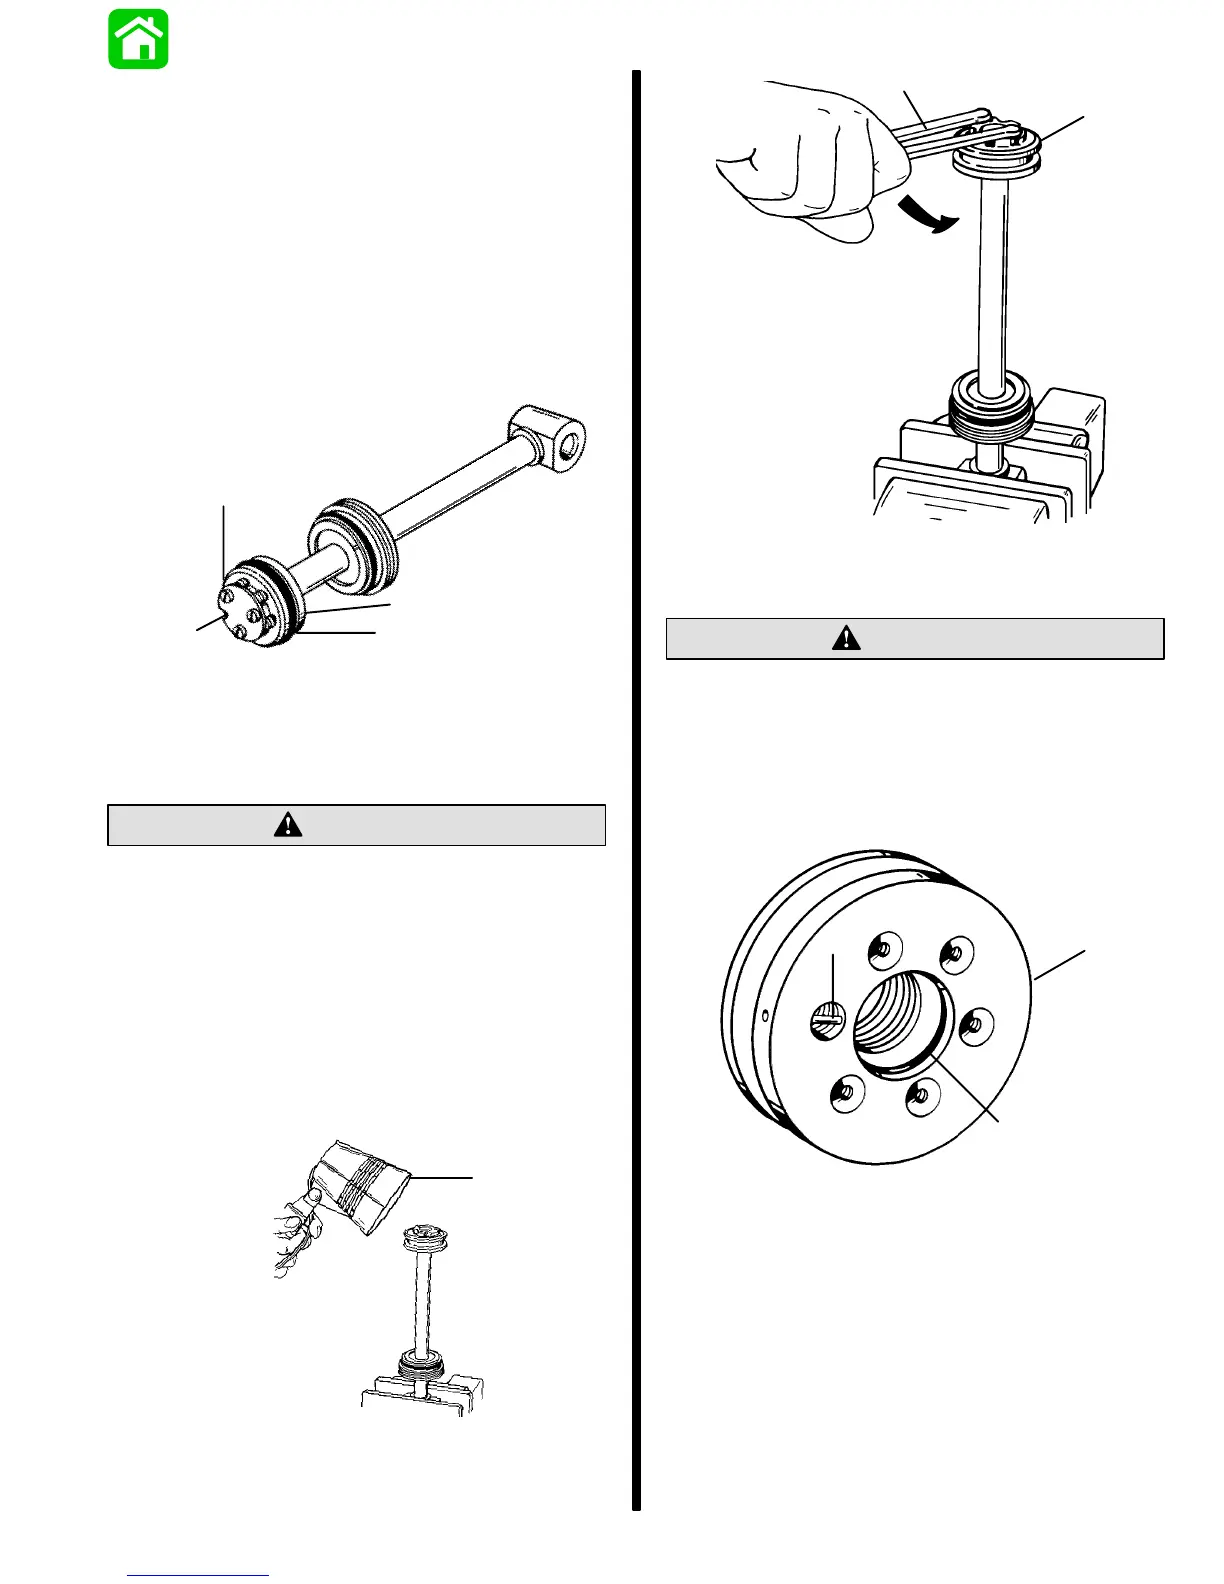
1. Place trim rod assembly on clean work surface.
2. Remove screws securing plate to trim rod piston
and O-ring.
3. Remove check ball components from trim rod
piston.
a
b
c
d
51143
a - Screw (3)
b - Plate
c - O-ring
d - Piston
CAUTION
When removing Trim Rod piston, spanner
wrench must have 1/4 in. x 5/16 in. long pegs to
avoid damage to trim piston.
4. Place trim rod into soft jawed vise and apply heat
to shock piston using torch lamp (91-63209).
5. Loosen trim rod piston using spanner wrench
(1/4 in. x 5/16 in. long pegs).
6. Allow trim rod piston to cool. Remove from trim
rod.
a
51146
a - Torch Lamp
a
b
51146
a - Spanner Wrench
b - Trim Rod Piston
CAUTION
Do not remove check ball components from trim
rod piston. Removal and re-installation of check
valve could result in improper operating pres-
sure and possible power trim system damage. If
check valve is defective, replace trim rod piston.
7. Remove inner O-ring from piston.
a
c
b
51199
a - Check Ball Components
b - O-ring
c - Piston
 Loading...