6A-30 - LOWER UNIT 90-830234R3 DECEMBER 1997
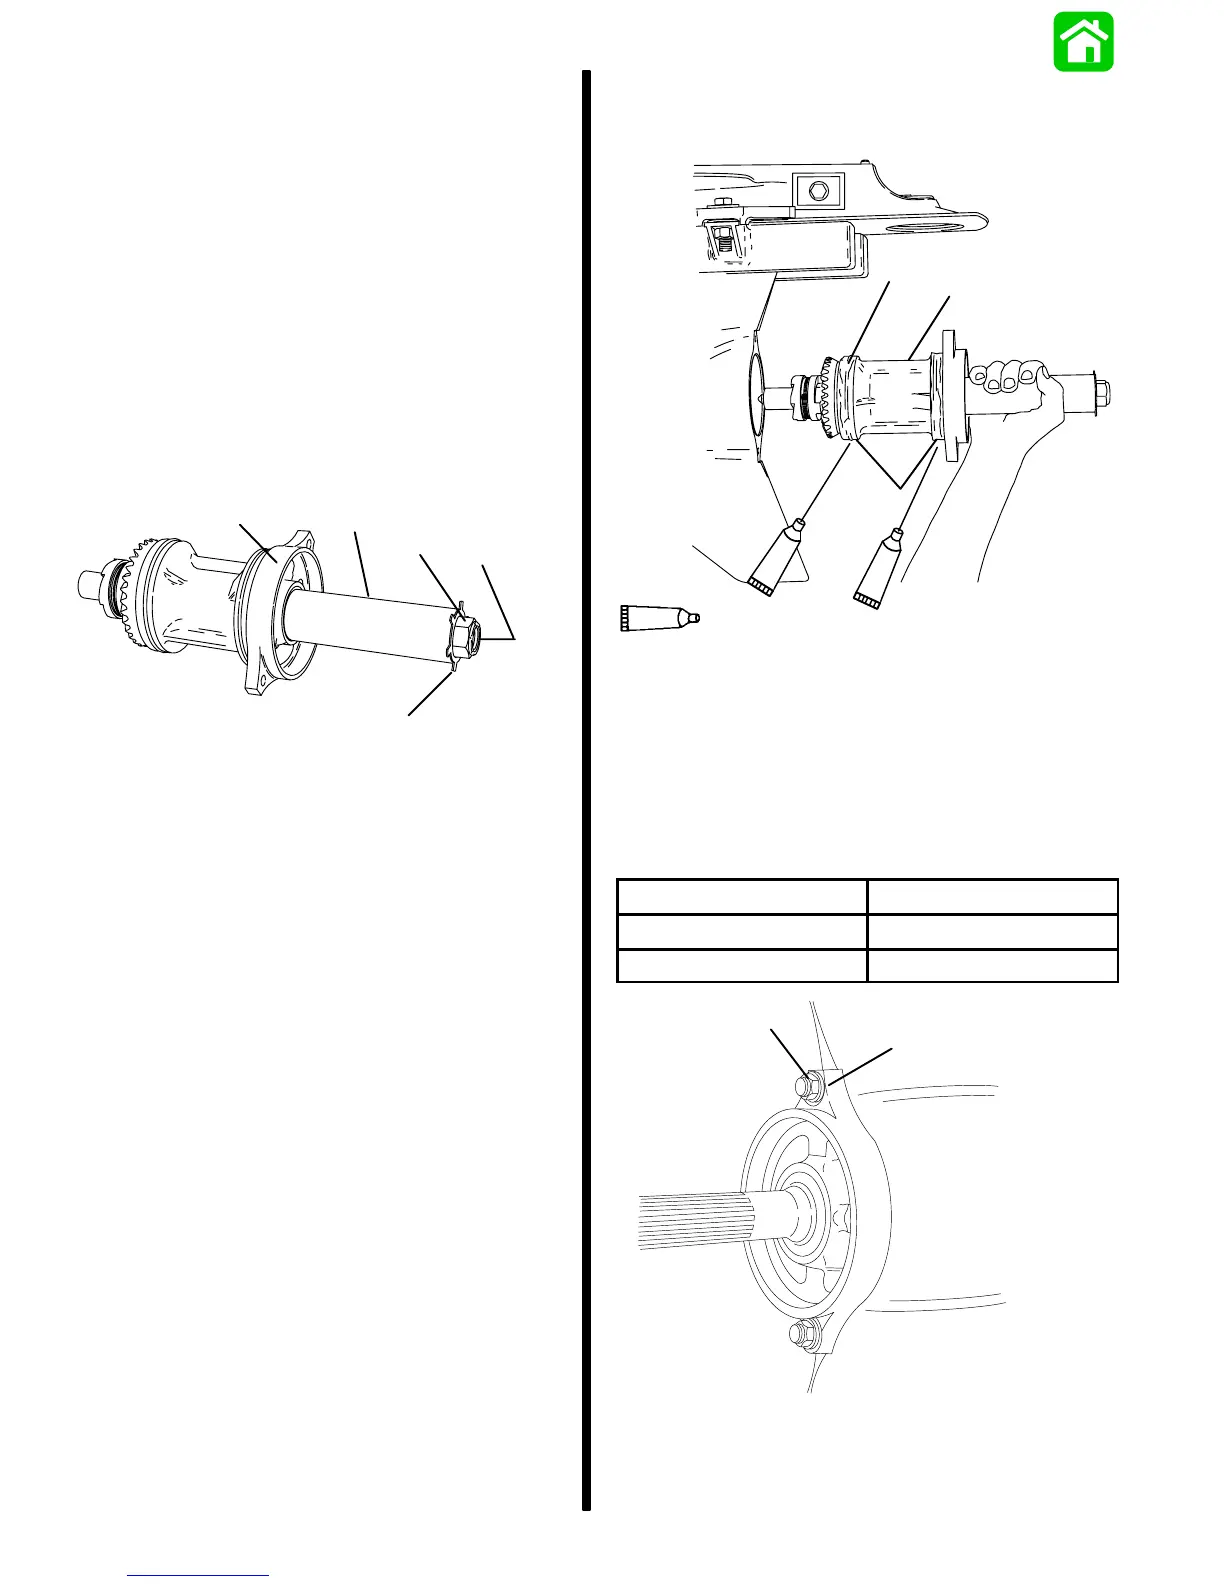
Bearing Carrier and Propeller Shaft
Installation
1. Insert propeller shaft assembly into bearing
carrier.
2. Before installing bearing carrier assembly into
gear housing, obtain locally a 6 in. (152.4mm)
long by 1-1/4 in. – 1-1/2 in. (31.7mm – 38.1mm)
diameter piece of PVC pipe. Install the PVC pipe
over the prop shaft and secure the pipe against
the bearing carrier assembly with the propeller
nut and tab washer. This will allow the reverse
gear to apply pressure to the reverse gear thrust
bearing to prevent the thrust bearing from being
inadvertently dislodged as the bearing carrier as-
sembly is installed in the gear housing.
21043
a
b
c
d
e
a - Bearing Carrier Assembly
b - PVC Pipe
c - Tab Washer
d - Prop Shaft
e - Propeller Nut
3. Lubricate O-ring and mating surfaces with 2-4-C
w/Teflon.
4. Install bearing carrier and propeller shaft into
housing with the word “TOP” located on flange to-
ward top of housing.
a
b
c
95
95
95
2-4-C With Teflon (92-825407A12)
21044
a - Apply 2-4-C w/Teflon
b - O-ring
c-TOP
5. Install components as shown.
NOTE: Use thick 0.090 in. (2.29mm) washers
(12-855941) under fasteners if not previously
installed.
Washer Thickness Fastener Torque
0.090 in. (2.29mm) 22 lb. ft. (29.8 N·m)
0.060 in. (1.53mm) 25 lb. ft. (33.9 N·m)
b
a
a - Washers
b - Fasteners; (If using Bolts – Apply Loctite 271 on Threads)
 Loading...