TIlE
FRONT
SUSPENSION K
...
DIA.
~I
I,
1
102
+
2
..
..
1.161
!'002
PJA..
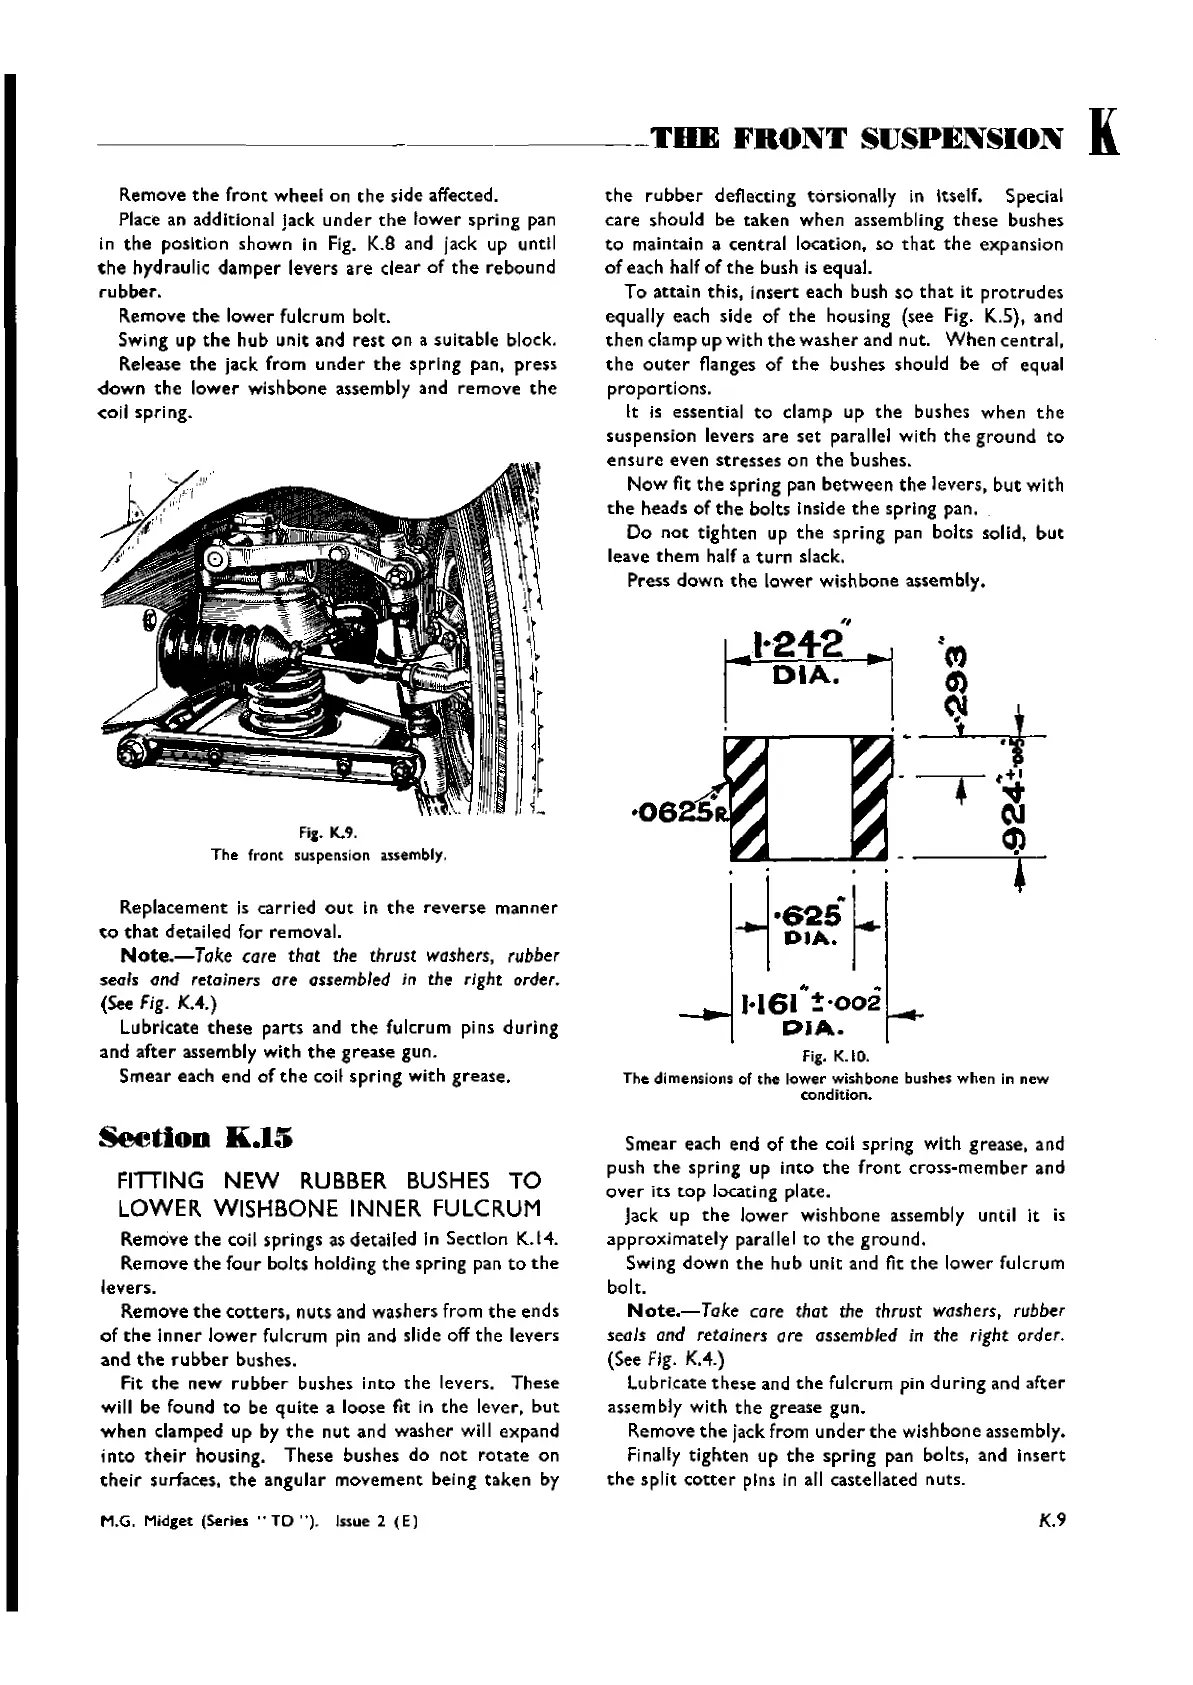
Fig. K.IO.
The dimensions of
the
lower wishbone bushes
when
in new
condition.
.-
i.62sL
lOIA'l
the
rubber
deflecting torsionally in Itself. Special
care should be taken when assembling
these
bushes
to
maintain a central location. so
that
the
expansion
of each half of
the
bush is equal.
To attain
thls,
insert
each bush so
that
it
protrudes
equally each side of
the
housing (see Fig.
K.5).
and
then
damp
up with
the
washer
and nut.
When
central,
the
outer
flanges of
the
bushes should be of equal
pro portions.
It is essential
to
damp
up
the
bushes when
the
suspension levers
are
set
parallel with
the
ground
to
ensure even stresses on
the
bushes.
Now
fit
the
spring pan
between
the
levers,
but
with
the
heads of
the
bolts inside
the
spring pan.
Do
not
tighten up
the
spring pan bolts solid,
but
leave
them
half a
turn
slack.
Press
down
the
lower
wishbone assembly.
Replacement is carried
out
in
the
reverse
manner
to
that
detailed for removal.
Note.-Take
care that the thrust washers,
rubber
seals and
retainers
are assembled in the right
order.
(See
Fig.
KA.)
Lubricate
these
parts and
the
fulcrum pins
during
and
after
assembly with
the
grease gun.
Smear
each end of
the
coil
spring
with grease.
Fit:.
K.9.
The
front
suspension assembly.
Remove
the
front
wheel on
the
side affected.
Place an additional jack
under
the
lower spring pan
in
the
position shown in Fig. K.8 and jack up until
the
hydraulic
damper
levers
are
dear
of
the
rebound
rubber.
Remove
the
lower fulcrum bolt.
Swing up
the
hub unit and
rest
on a suitable block.
Release
the
jack from
under
the
spring pan, press
<lown
the
lower
wishbone assembly and remove
the
cell
spring.
Seetlon
K.lS
FITTING
NEW
RUBBER
BUSHES
TO
LOWER WISHBONE INNER
FULCRUM
Remove
the
coil springs as detailed In Section K.14.
Remove
the
four
bolts holding
the
spring pan
to
the
levers.
Remove
the
cotters,
nuts
and washers from
the
ends
of
the
inner
lower
fulcrum pin and slide off
the
levers
and
the
rubber
bushes.
Fit
the
new
rubber
bushes into
the
levers. These
will be found to be
quite
a loose fit in
the
lever.
but
when
damped
up by
the
nut
and washer will expand
into
their
housing. These bushes do
not
rotate
on
their
surfaces,
the
angular
movement
being
taken
by
Smear each end of
the
coil spring with grease, and
push
the
spring up
into
the
front
cross-member
and
over
its
top
locating plate.
Jack up
the
lower
wishbone assembly until it is
approximately
parallel to
the
ground.
SWing
down
the
hub unit and fit
the
lower
fulcrum
bolt.
Note.-Take
care that the thrust washers,
rubber
seals and retainers are assembled in the right order.
(See
Fig.
K.4.)
Lubricate
these
and
the
fulcrum pin
during
and
after
assembly with
the
grease gun.
Remove
the
jack from
under
the
wishbone assembly.
Finally tighten up
the
spring
pan bolts, and
insert
the
split
cotter
pIns in all castellated nuts.
M.G. Midget (Series .. TO
").
Issue 2
(E)
K.9
Wishvilles Classic
Automobile Library

 Loading...