---
THE
IIYDRAUL'C
DAMPERS
L
While
adding fluid
the
lever
arm
must
be
worked
throughout
Its full
stroke
to
expel
any alr
that
m:l.Y
be
present
in
the
operating
chamber.
If
the
addition of fluid gives no
Improvement
a
replacement
damper
should be
fitted.
Too
much resistance, I.e.
when
it is
not
posslble
to
move
the
lever
arm
by hand, indicates a
broken
internal
part
or
a seized piston.
Seetlon
L.5
REPLACEMENT OF THE
REAR
DAMPER LINK BEARINGS (GIRLlNG)
Special tools, as
shown
in Figs. LA and LS,
are
necessary for fitting
the
bearings, and a hand press
or
equivalent
apparatus
such as a drilling mach ine shouId
be available. -
Tight
rubber
bearings
of
the
flexing
type
are
used
between
the
link and
the
lever
arm,
and
to
connect
the
link
to
the
axle.
GUIDE
FUNNEl.
Fig. L....
Assembling
the
bearing
to
the
lever
arm
end.
Seetion
L6
TO DISMANTLE THE LINKS (GIRLlNG)
Before dismantling
the
link
from
the
lever
arm,
the
position in which it is attached should be
noted.
The
cranked
end
of
the
.. L
"-shaped
link is fitted from
the
outside
of
the
lever
arm,
with
the
assembled pin
at
the
other
end
of
the
link, also facing
outwards
from
the
hydraulic
damper
movement.
r, M.G. Midget. Issue 2 (H
&:
E) 82966-1,154
Care
should be
taken
to
reassemble
the
links
the
correct
way
round
or
it will be impossible
to
connect
them
to
the
axle on refitting
to
the
chassis.
Disconnect
the
link
from
the
lever
arm
by pressing
out
the
end
'of
the
link
from
the
rubber
bearing of
the
lever
arm,
and press
out
the
rubber
bearing from
the
lever
arm.
The
lever
arm
is a
permanent
fixture
and
must
not
be
removed.
Press
out
the
pin and
the
rubber
bearing in
the
end
of
the
link.
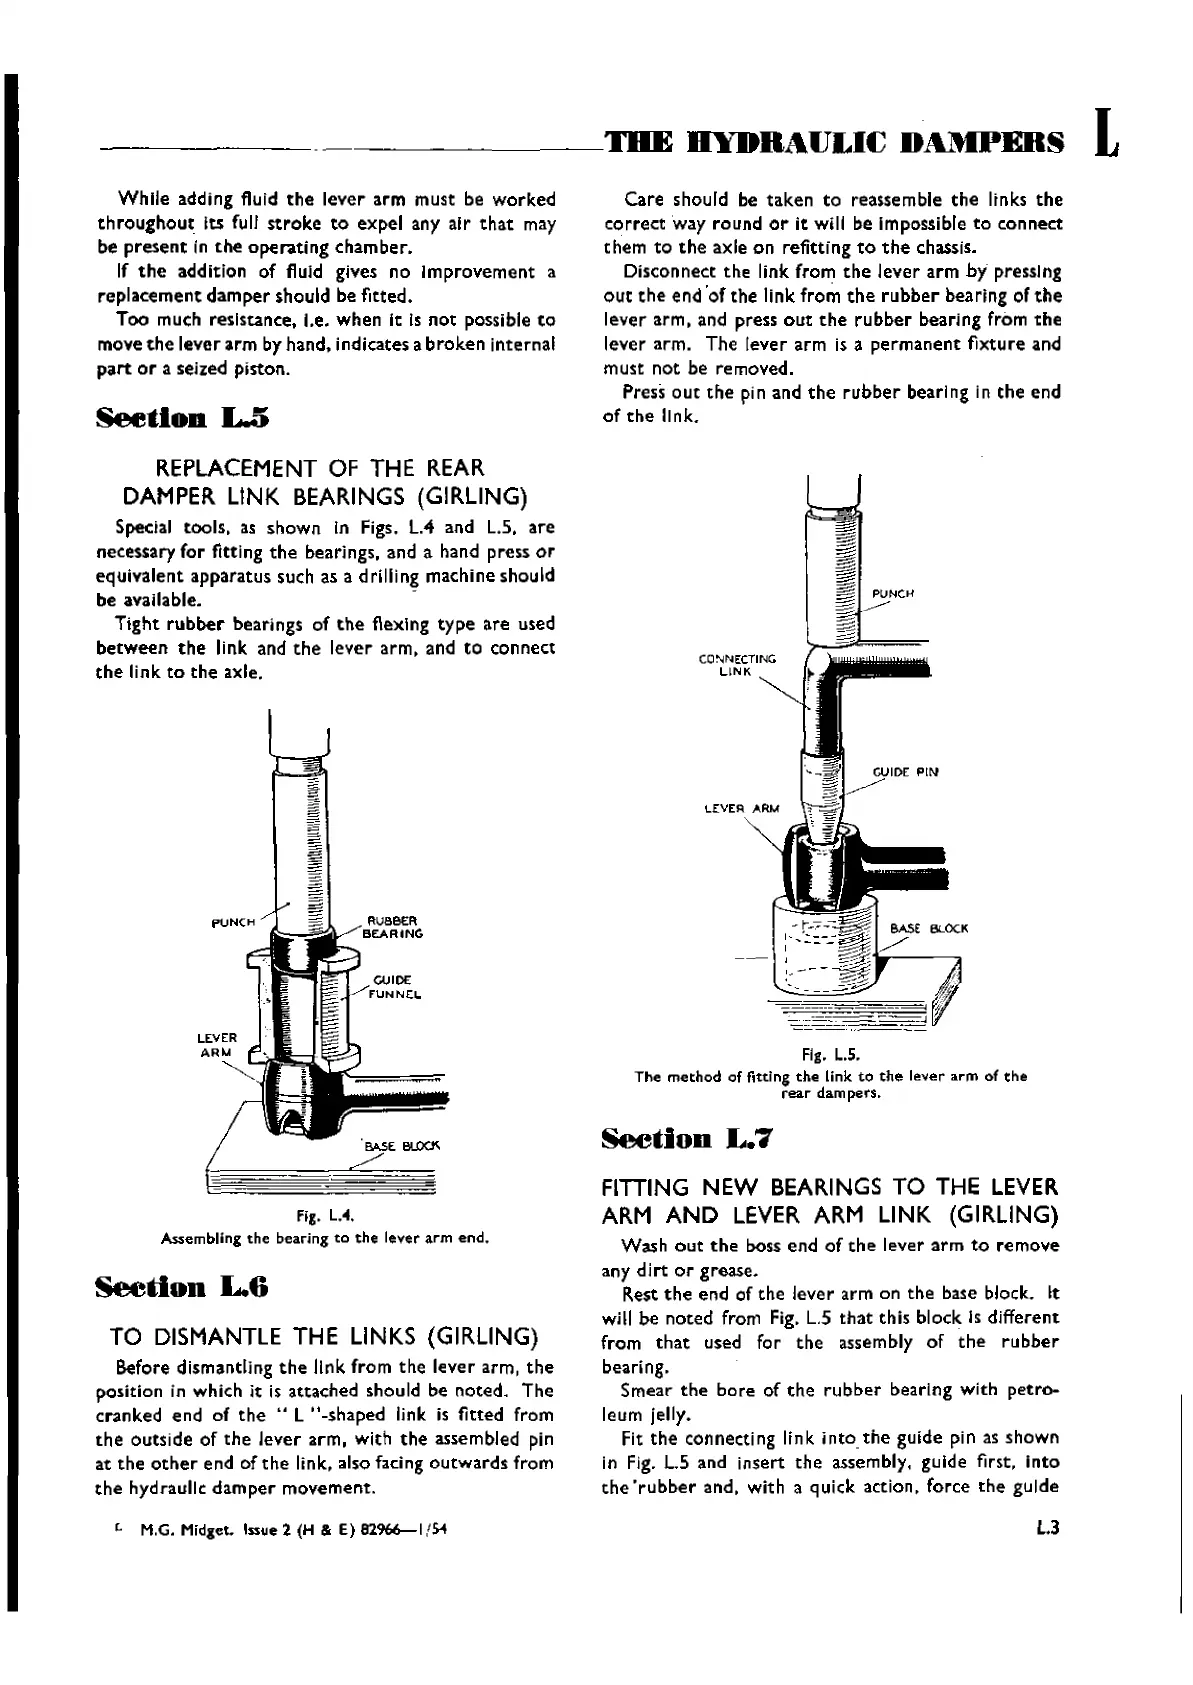
CO""NECTING
LINK
Fig.
L.S.
The
method
of fitting
the
link
to
the
lever
arm
of
the
rear dampers.
Section
L.7
FITTING
NEW
BEARINGS
TO THE
LEVER
ARM
AND
LEVER
ARM LINK (GIRLlNG)
Wash
out
the
boss
end
of
the
lever
arm
to
remove
any
dirt
or
grease.
Rest
the
end
of
the
lever
arm
on
the
base block. It
will be
noted
from Fig. lo5
that
this
block Is different
from
that
used for
the
assembly
of
the
rubber
bearing.
Smear
the
bore
of
the
rubber
bearing
with
petro-
leum jelly.
Fit
the
connecting link
into
the
gulde pin as
shown
in Fig. loS and
insert
the
assembly, gulde first,
into
the'
ru
bber
and,
wit
h a quick action, force
the
guIde
L3
Wishvilles Classic
Automobile Library

 Loading...