-
386
-
1 Put through the wiring from the back side to the hole of the lower case.
2 Fit the lower case into the ceiling opening. Make sure that the clearance between the convex part of the back of the lower
case and the ceiling opening must be as equal as possible on both sides.
3 Using the two installation holes shown above, fix the lower case onto the ceiling with the enclosed wood screws. (The
other four holes are not used.)
4 Connect the wiring with the wiring from the upper case by the connector.
5 Take out the connector to the backside from the hole of the lower case putting through the wiring at 1.
6 Fit the upper case and the lower case, and tighten the screws.
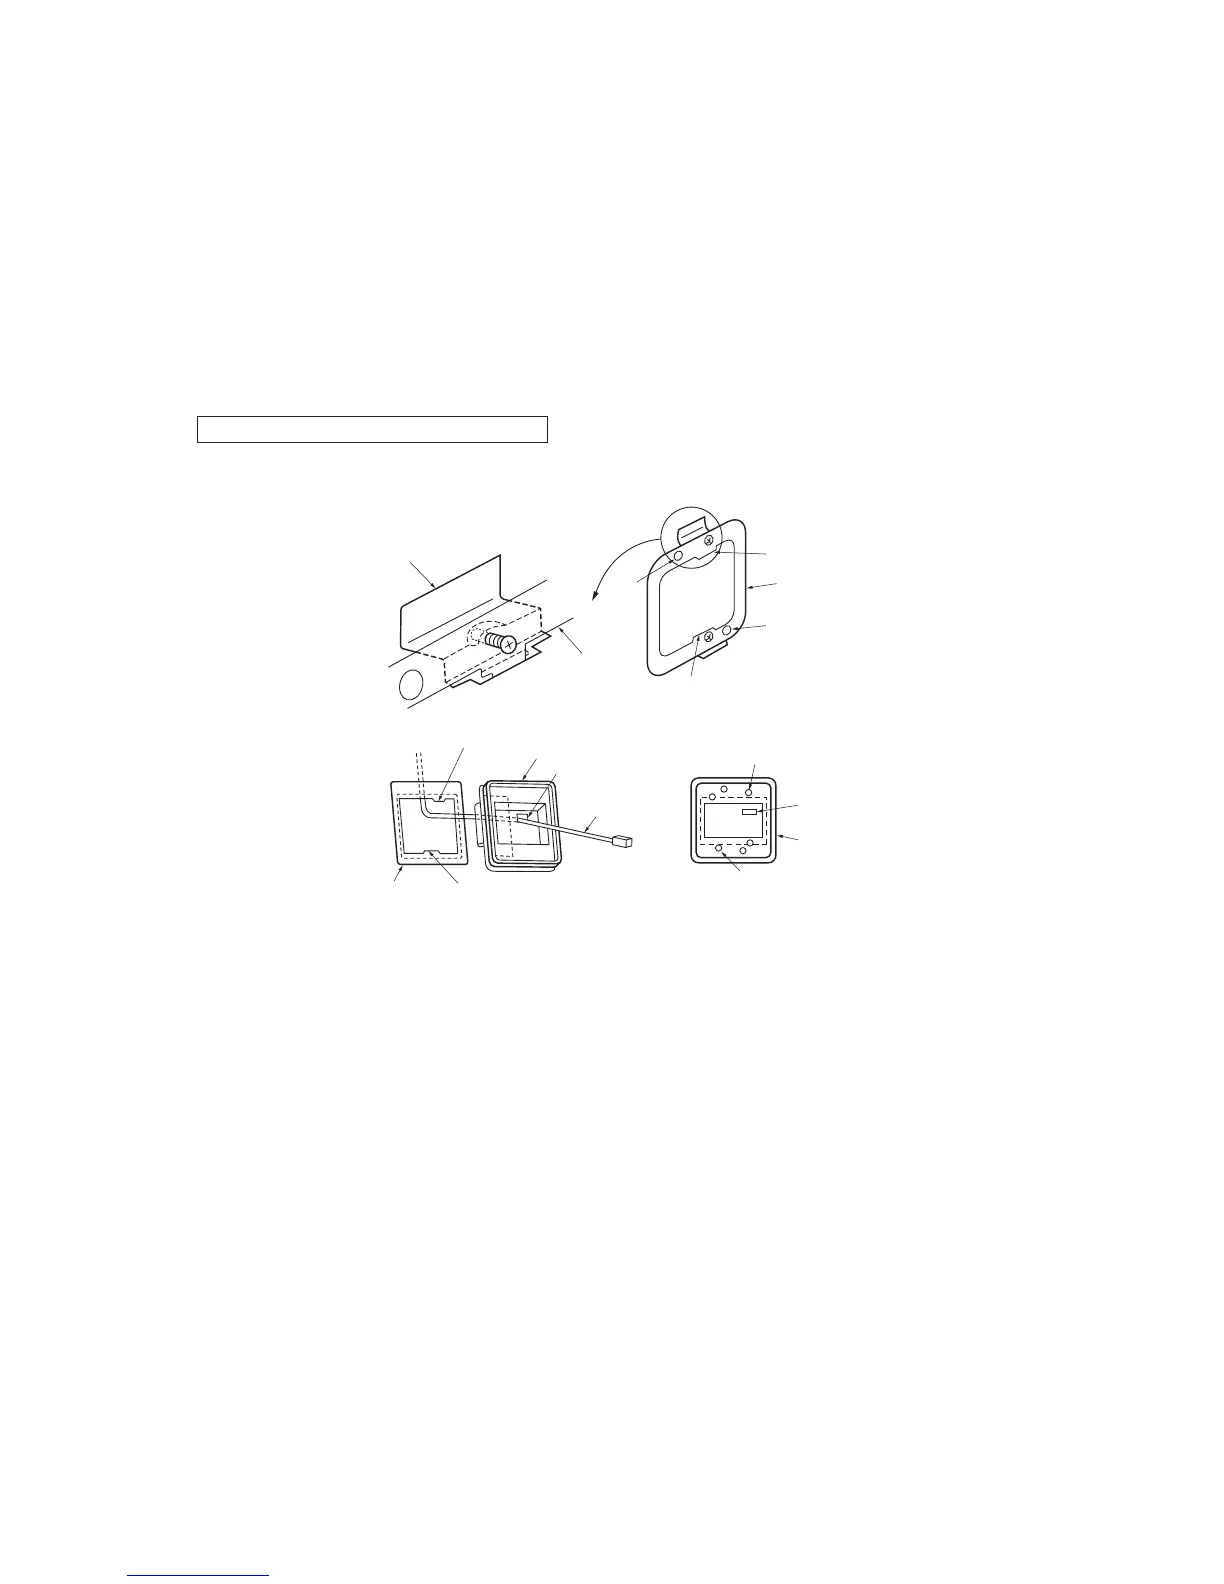
(B) Installation with enclosed bracket
u Use this method when installaing onto a gypsum board (7 to 18mm), etc.
Installation fitting
Bracket
Bracket Protrusion (left side of center)
[Top]
[Top]
Hole
(ø10)
Protrusion
(right side of center)
Lower case
Hole
Wiring
Hole (ø10)
Hole
Lower case
[Bottom]
[Bottom]
Protrusion (left side of center)
Protrusion
(right side of center)
Bracket
Installation hole
Installation hole
1 Catch the two protrusion of the enclosed bracket onto the fitting as shown above, and temporarily fix with the screws.
(The bracket has an up/down and front/back orientation. Confirm the top/bottom protrusion positions and the positional
relation of the ø 10 holes on the bracket and the installation hole on the lower case with the above drawing.)
2 Insert the end of the installation fitting into the back of the ceiling from the opening, and tighten the screws to fix the
bracket onto the ceiling.
3 Pass the wiring from the rear side through the hole on the lower case.
4 Fit the lower case onto the bracket, and fix the lower case to the bracket using the two installation holes shown above.
(The other four holes are not used.)
5 Follow step 1 to 6 for (A) to complete the installation.
 Loading...