Chapter 12 Installing, Removing, and Replacing
Adding, Removing, and Replacing the FC I/O Fan Blade
Scalar i500 User’s Guide 460
6 Remove and discard the necessary number of the black rubber
protective covers from the ports on the FC I/O blades.
7 Reconnect the FC cables to the appropriate FC ports on the FC I/O
blade.
8 Save the library configuration (see Saving the Library Configuration
on page 495).
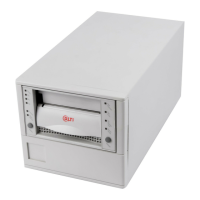
Adding, Removing, and Replacing the FC I/O Fan Blade
Each FC I/O blade is cooled by a fan blade. The fan blade is always
installed in the bay to the right of the FC I/O blade. Each expansion
module has four bays and can accommodate two FC I/O blades and two
fan blades.
The recommended order of installing the FC I/O blade and fan in the
expansion module is starting from the bottom two bays and moving up.
Note: The LEDs for the FC I/O blade are on the bottom of the
blade when the blade is correctly installed in the expansion
module.
Caution: Fibre optical cables will be damaged if they are bent at
more than a four-inch arc.
Note: After you replace the FC I/O blade, the library ensures
that the FC I/O blade is loaded with the proper firmware.
This firmware is based on the currently installed level of
library firmware. If the autoleveling process fails, the FC
I/O blade becomes inoperable and the library creates a
ticket to report the issue. For information about LED
behaviors on blades during autoleveling operations, see
Blade Status LEDs
on page 506.
 Loading...