R5906848 /04 DP2K SLP Series128
How to replace the Notch Filter?
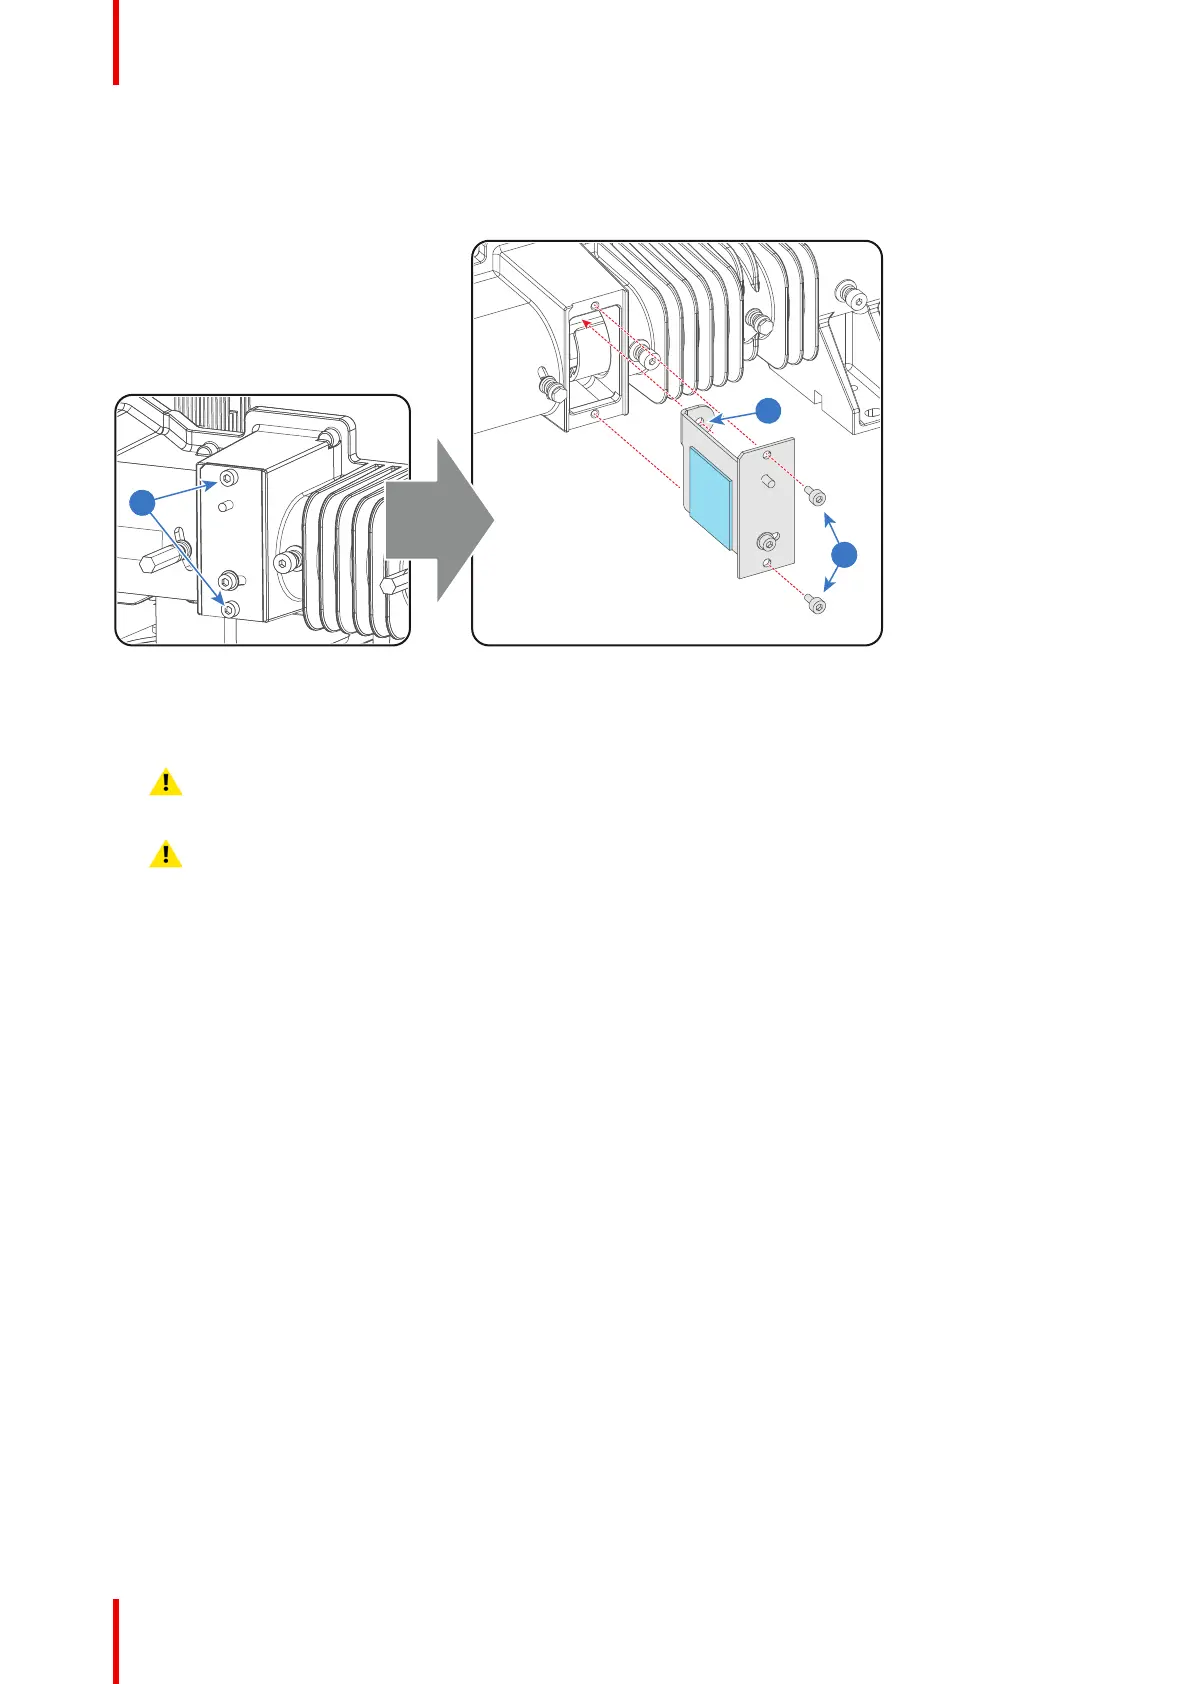
1. Remove the old Notch Filter from the Light Pipe by releasing the two hexagon head cap screws (reference 1
Image 10-20) as illustrated. Use for that a 2.5mm Allen wrench.
Image 10-20
2. Insert a new Notch Filter. Note that the Notch Filter has a mounting hole (reference 2 Image 10-20) which
must match the mounting pin inside the Light Pipe.
Caution: Do not touch the Notch Filter with bare fingers. To clean the Notch Filter see procedure
“Cleaning the Notch Filter”, page 130.
Caution: Ensure that the colored dot on the Notch Filter matches with the colored dot nn the front side
of the Light Processor.
3. Fasten the Notch Filter with two hexagon head cap screws (reference 1 Image 10-20). Use for that a 2.5mm
Allen wrench.
4. Readjust the Notch Filter. See procedure “Adjusting the Notch Filter”, page 128.
10.14 Adjusting the Notch Filter
Purpose of the Notch Filter
The Notch Filter is a coated glass plate located in the middle of the Light Pipe assembly. The Notch Filter
applies some small color corrections of the light coming out of the Light Pipe, which is emitted by the light
source of the projector. This is done to achieve an optimal color calibration of the native colors. The Notch
Filter can slightly turn, with respect to the light path, which allows a small adjustment of the native colors. Note
that, next to the pure optical color calibration by the Notch Filter there is also a software color calibration.
Light Pipe
 Loading...


