R5906848 /04 DP2K SLP Series72
6. Reconnect all wiring to the Interconnection Board.
7. Place the Interconnection Board Cover over the board and tighten it (see Image 7-25). Use a PH1 Phillips
screwdriver.
8. Place new cable binders on the cable trees coming from the light source. Do this as illustrated in Image 7-24.
9. Install the left side cover
7.10 Replacing the Phosphor Wheel Monitoring
Interconnection Board
How to replace the interconnection board?
1. Remove the Light Source from the projector frame. See “Removing the Light Source”, page 61.
2. Remove the wire unit connected to the interconnection board.
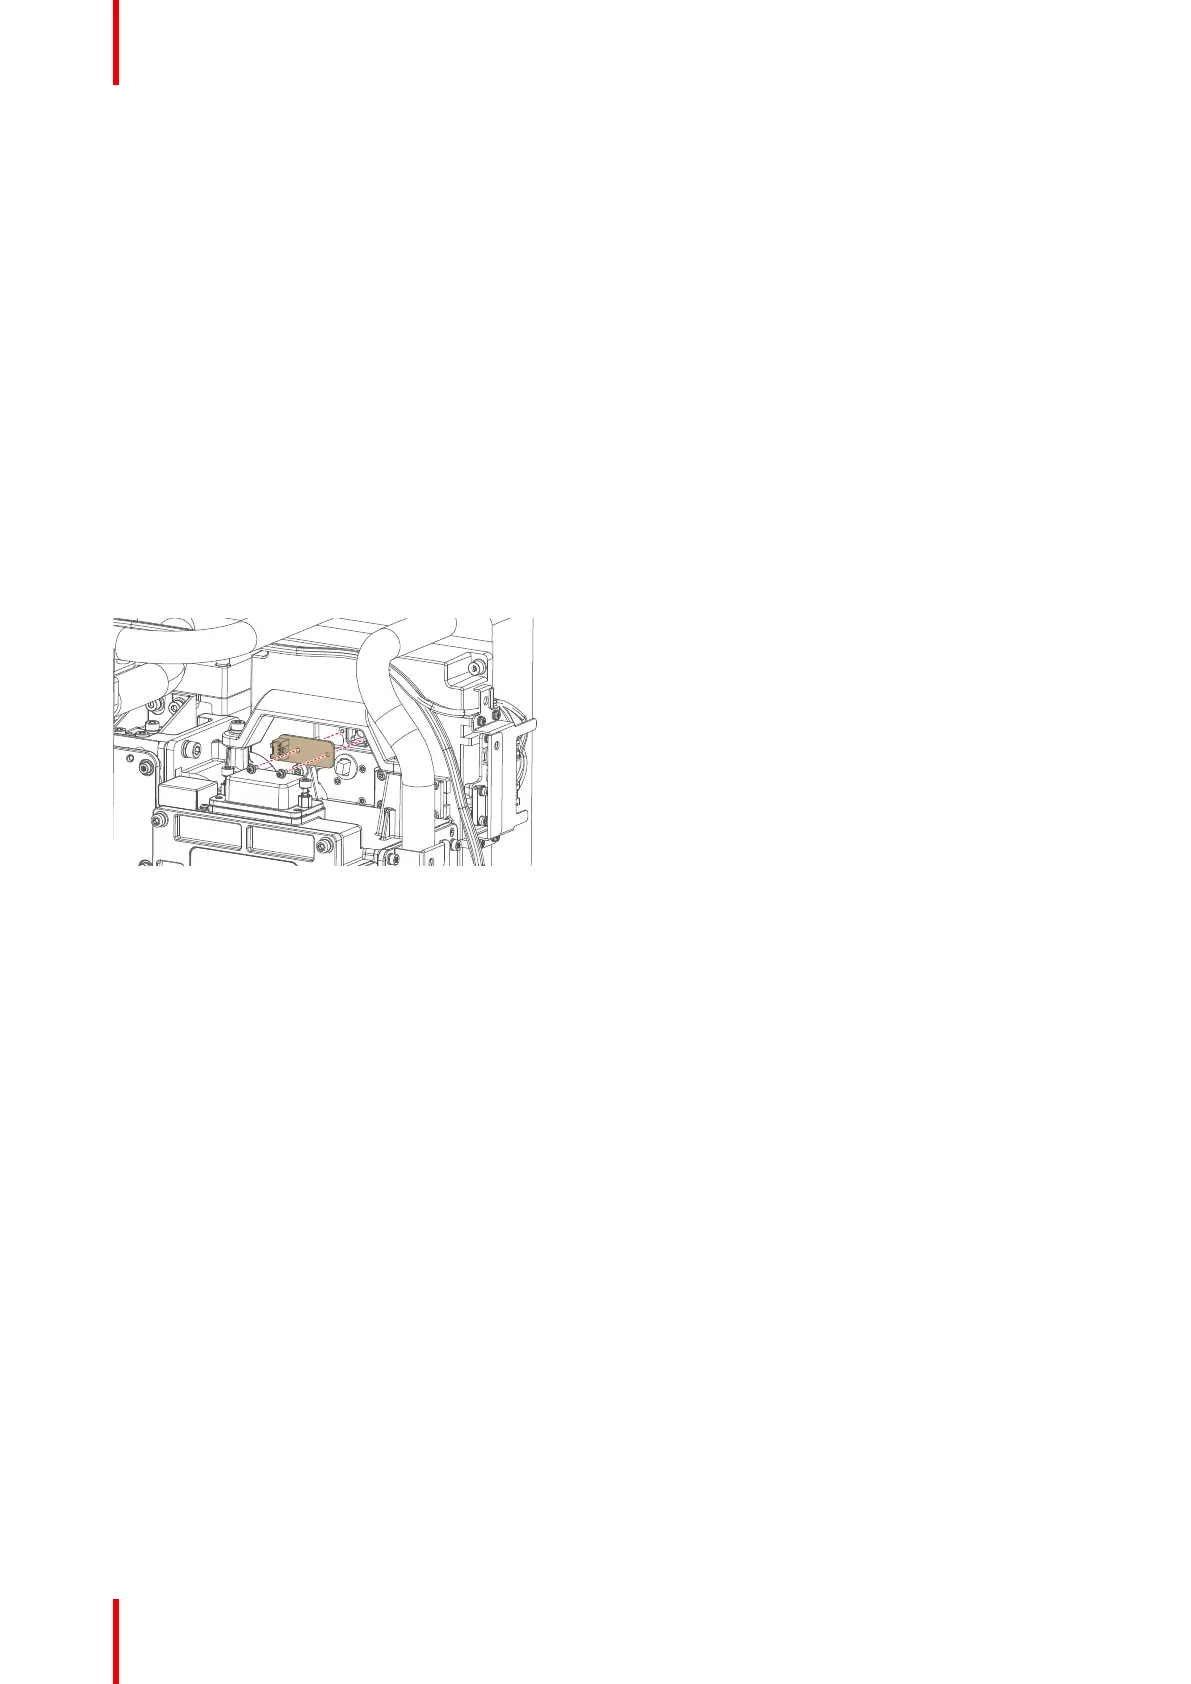
3. Spot and replace the light sensor Board as illustrated. Use a PH1 Phillips screwdriver to loosen and tighten
the 2 screws.
Image 7-27
4. Reconnect the wire unit to the Light Sensor Interconnection board.
5. Install the light source back into the projector. See “Installing the Light Source”, page 67.
7.11 Replacing the Light Source Fan
Interconnection Board
Required tools
Allen wrench 2.5 mm
How to replace the interconnection board?
1. Remove the top cover and the Light Source top cover, so you can access the Fan Interconnection Board.
2. Remove the wire units connected to the interconnection board.
Laser Phosphor Light Source
 Loading...


