R5906848 /04 DP2K SLP Series 77
Image 7-37
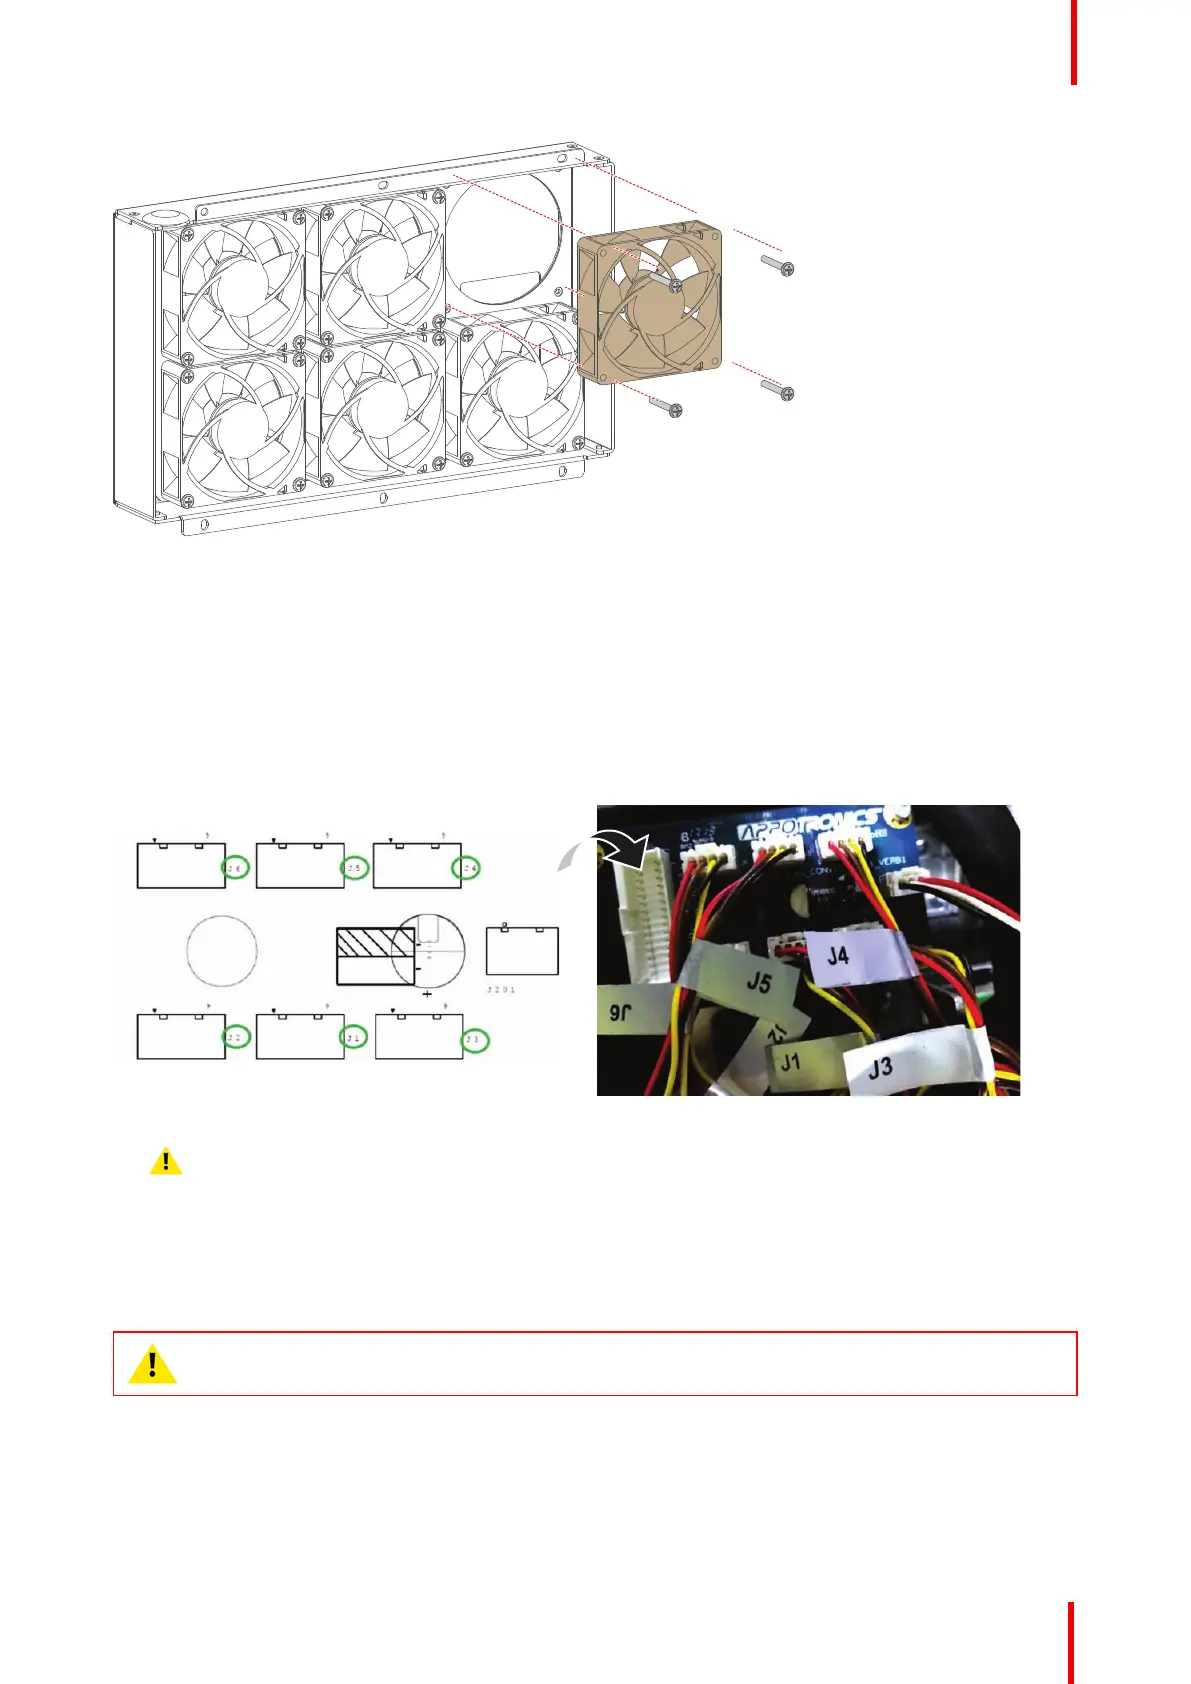
6. Install the new fan into the fan assembly. Take into account the position of the wire unit and the airflow
direction. Use a PH1 Phillips screwdriver to tighten the screws.
7. Place the Fan assembly back onto the Light Source assembly. Use a 3 mm Allen wrench to tighten the six
Allen screws.
8. Use tie binders to properly assembly the fan wire units and properly direct them towards the Fan
Interconnection board.
9. Reconnect all wire units to the Fan Interconnection board as illustrated.
Image 7-38
Caution: Pay attention to the labels on the fan wires and the fan connector numbers.
10. Install the light source back into the projector. See “Installing the Light Source”, page 67.
7.15 Replacing the combiner of the Light Source
CAUTION: This procedure assumes the light source is already removed from the projector. For
more info, see “Removing the Light Source”, page 61.
Required tools
• Allen wrench 1.5 mm
• Allen wrench 4 mm
• Torx screwdriver T20
Laser Phosphor Light Source
 Loading...


