R5906848 /04 DP2K SLP Series42
5.3 Installing the SMPS board
Required tools
3mm Allen wrench.
How to install the SMPS board in its compartment?
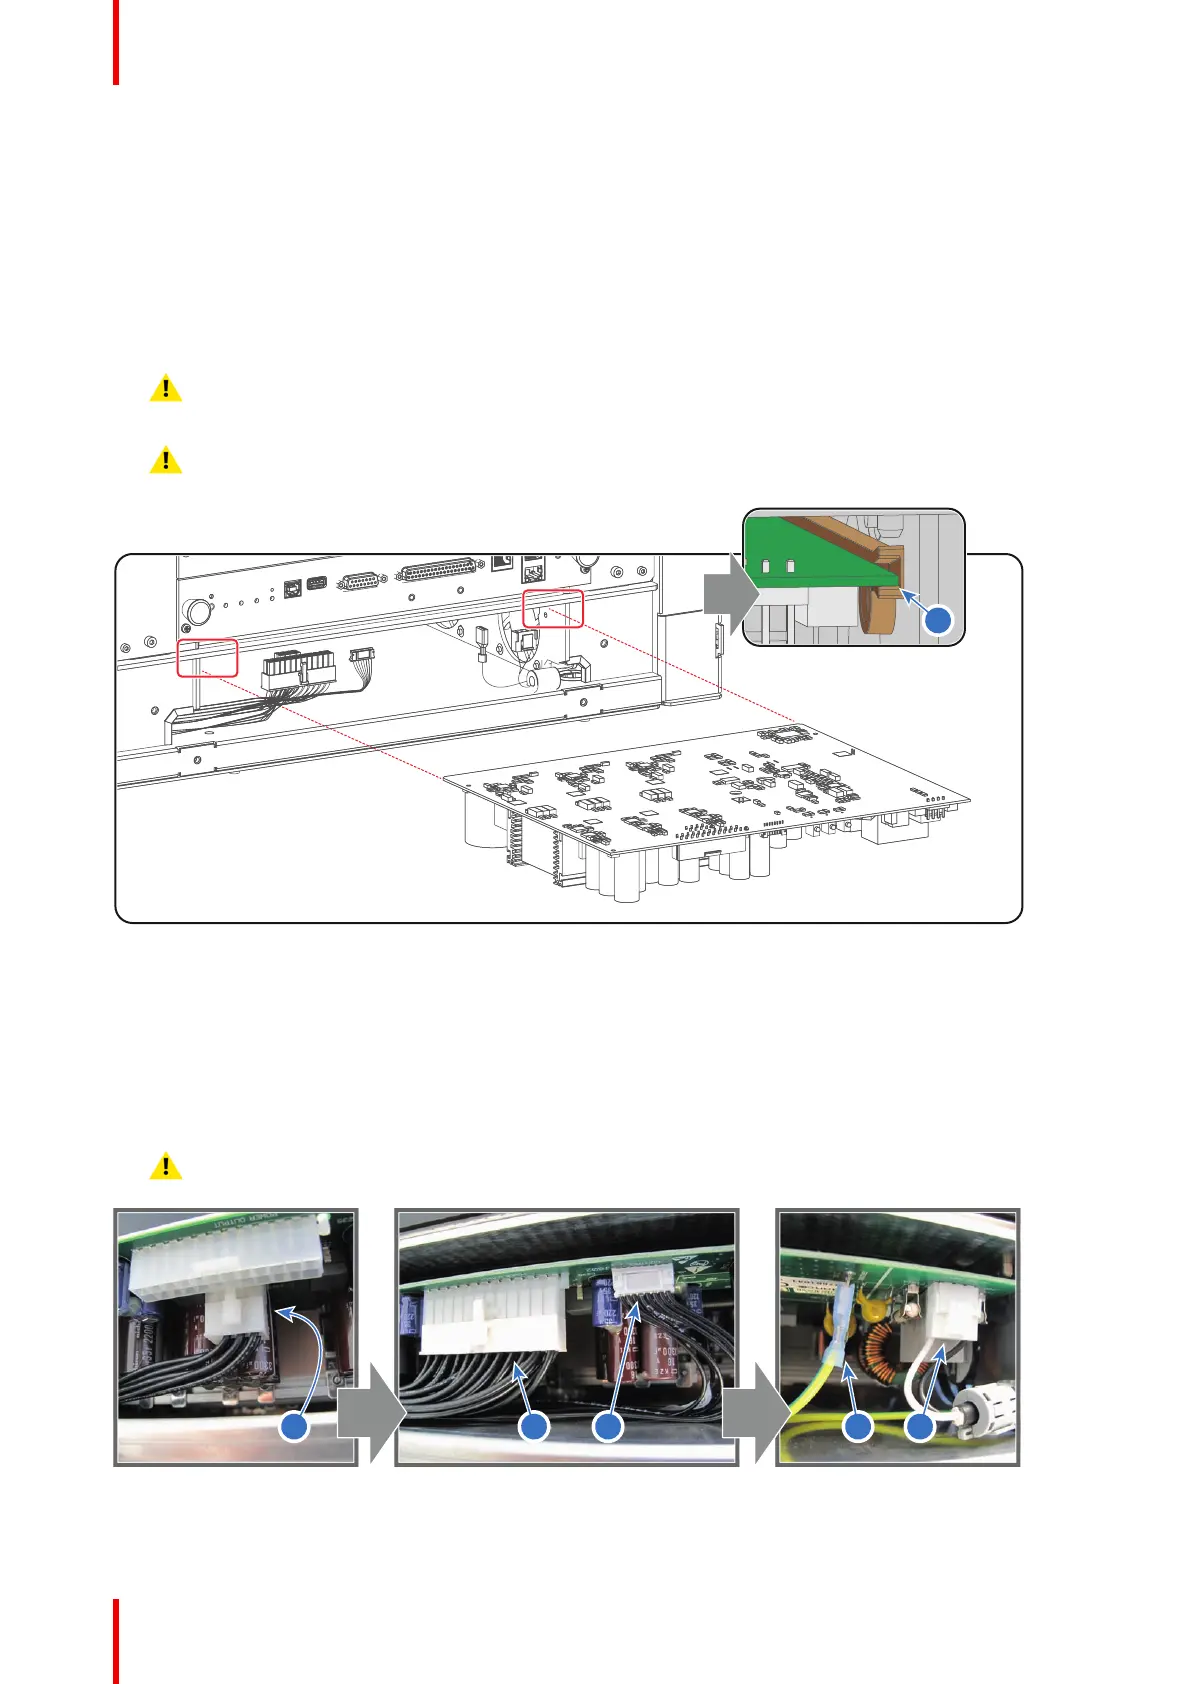
1. Gently insert the SMPS board in the guides of the SMPS compartment as illustrated. Push it completely in.
Caution: Do not damage the wires. Move the wires towards the sides of the opening of the SMPS
compartment.
Caution: Ensure that the both sides of the SMPS board are captured by the guides inside the SMPS
compartment. See reference 1 of Image 5-5.
Image 5-5
2. Make the electrical connections:
• Power out connector 1 (reference 1 Image 5-6)
• Power out connector 2 (reference 2 Image 5-6)
• Control connector (reference 3 Image 5-6)
• Ground wire (reference 4 Image 5-6)
• Mains input (reference 5 Image 5-6)
Caution: Support the SMPS board while plugging in the wires.
Image 5-6
Switch Mode Power Supply (SMPS)
 Loading...


