R5906848 /04 DP2K SLP Series144
Image 11-6
9. Install the Mask plate and Rod heatsink. See procedure “Installing the Mask plate and Rod heatsink”, page
144.
The Integration Rod has to be readjusted after replacement.
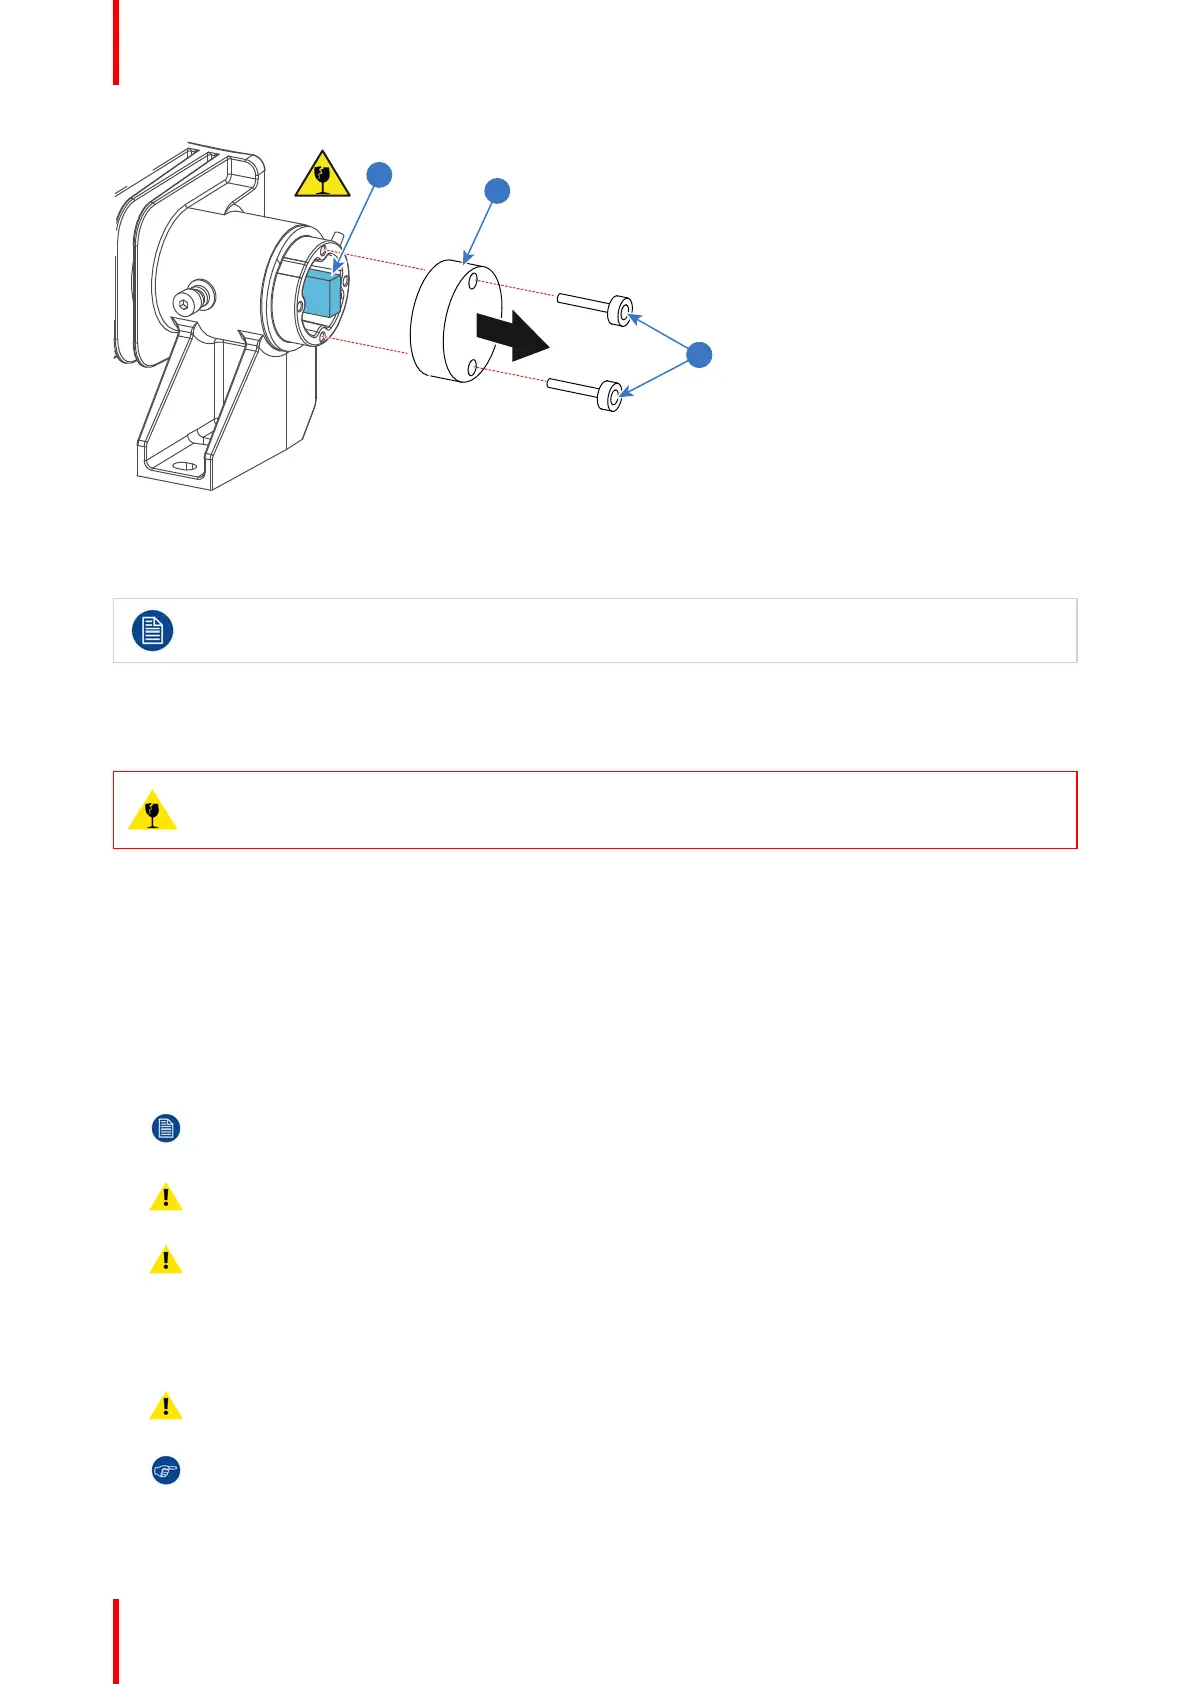
11.5 Installing the Mask plate and Rod heatsink
CAUTION: Take into account that the Mask plate and Rod heatsink are mounted very close to the
Rod entrance. The Rod is extremely fragile! Avoid touching the Rod at all times. An minor collision
is sufficient to cause irreversible damage to the Rod.
Required tools
• TX10 Torx driver.
• Cotton gloves.
• 3mm Allen wrench.
How to install the Mask plate and Rod heatsink onto the Light Pipe entrance?
1. Install the Rod heatsink as illustrated (reference 7 Image 11-7). Fasten the Rod heatsink with two Torx
countersunk head screws (reference 6 Image 11-7). Use a TX10 Torx driver.
Note: The Rod heatsink is provided with a temperature sensor (reference 1). This temperature sensor
must facing the Light Pipe as illustrated in Image 11-8.
Caution: Ensure that the Rod heatsink does NOT touches the Rod!
Caution: Any contact with the integration rod may cause damage.
2. Install the Mask plate (reference 5 Image 11-7) with the shiny side facing outwards as illustrated. Use the
Mask plate with engraved number R8761960.. Fasten with two Torx countersunk head screws (reference 6
Image 11-7). Use a TX10 Torx driver.
Caution: Ensure that the Mask plate does NOT touches the Rod!
Tip: Wear cotton gloves to prevent fingerprints on the Mask plate.
Integration Rod
 Loading...


