R5906848 /04 DP2K SLP Series36
Note: Respect the mounting order on the threaded rod of the connection pin: first a plain washer, then
a nut, then the cable eye of the two wires, then again a plain washer and finally the second nut.
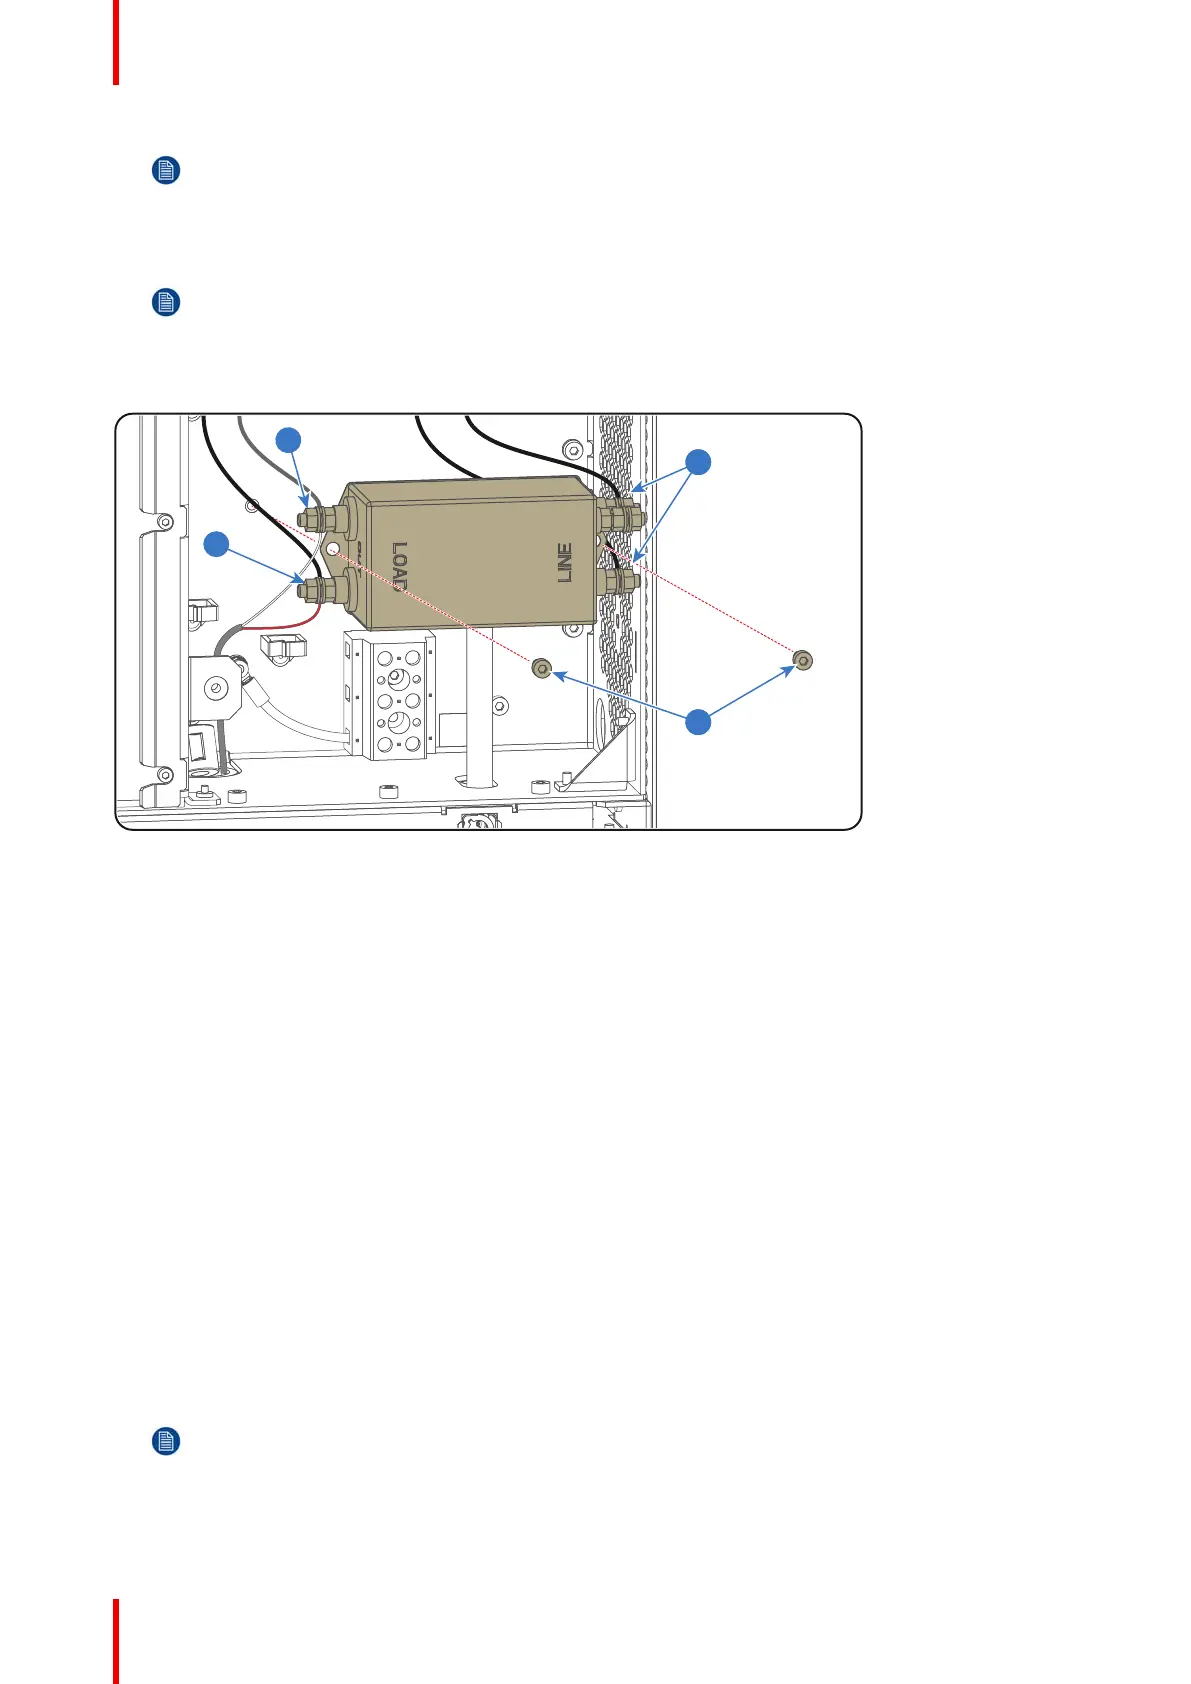
7. Connect the black wire (Solid State relay) and thin red wire (SMPS) with the lower pin of the LOAD side
(reference 4 Image 4-6) of the new Mains Filter. Fasten the nut with a torque of 2.7Nm (2.0 lbf*ft).
Note: Respect the mounting order on the threaded rod of the connection pin: first a plain washer, then
a nut, then the cable eye of the two wires, then again a plain washer and finally the second nut.
8. Install the new Mains Filter into the Mains Input compartment. Use a 3mm Allen wrench to fasten the two
screws (reference 1 Image 4-6) as illustrated.
Image 4-6
9. Guide all wires in the cable clamps, close the Mains Input compartment and install the rear cover of the
projector. See procedure “Accessing the Mains Input compartment”, page 33.
4.5 Replacing the Solid State relay
Required tools
• 3mm Allen wrench.
• Medium size flat screw driver or Phillips PH2 screw driver.
• Torque screw driver with PH2 socket.
How to replace the Solid State relay?
1. Switch off the projector and disconnect the power cord of the projector from the power net.
2. Remove the rear cover of the projector and open the Mains Input compartment. See procedure “Accessing the
Mains Input compartment”, page 33.
3. Disconnect the four electrical wires (reference 1, 2, 3 & 4 Image 4-7) from the Solid State relay. Use a medium
size flat screw driver or Phillips PH2 screw driver.
4. Remove the Solid State relay from the projector chassis by loosening the two screws with reference 5 as
illustrated in Image 4-7. Use a 3mm Allen wrench.
Note: An insulation sheet and heat sink (reference 7 & 8 Image 4-7) fits between the Solid State relay
and the projector chassis. These two parts come loose together with the Solid State relay.
Mains Input
 Loading...


